Finding & exporting data
Search
Finding Imaging Data
The search page helps to find the imaging data. The following are the parts of the search page that can be used to define and refine the search.
Subject
There are various subsections on the search screen, those are self-explanatory. The first section is “Subject” as shown in the following figure. A search in this section can be defined based on:
Subject Ids (UIDs or Alternate UIDs)
Name (First or Last)
Range on date of birth
Range on age
Sex-based
Subject group

Enrollment
The next section is enrollment where a search can be restricted based on projects. One can choose a single project or a list of projects from the drop down menu. Also a sub-group if defined can be specified.

Study
In this part search parameters / variables in a project / study can be defined to refine the search. A search can be restricted based on, study Ids, Alternative study IDs, range of study date, modality (MRI,EEG, etc.), Institution (In case of multiple institutions), equipment, Physician name, Operator name, visit type, and study group

Series
A more specific search based on protocol, MR sequence, image type. MR TR value, series number (if a specific series of images is needed) and series group can be defined.

Output
In this section, the structure of the search output can be defined. The output can be grouped based on study or all the series together. The output can be stored in “.csv” file using the summary tab. The Analysis tab is used to structure the pipeline analysis results.

Other Data Queries
Other than imaging data can also be quried using the similar way as mentioned above for the imaging data above. However the required non-imaging data modality can be selected from the modality dropdown menu in the study section as shown below

ID Mapping
The Ids can be mapped using the "Data" menu from the main menu. One can go to the Id-maper page by clicking on the "ID mapper" link as shown below or by selection the ID mapper sub-menu.

The following page will appear that is used to map various Ids.
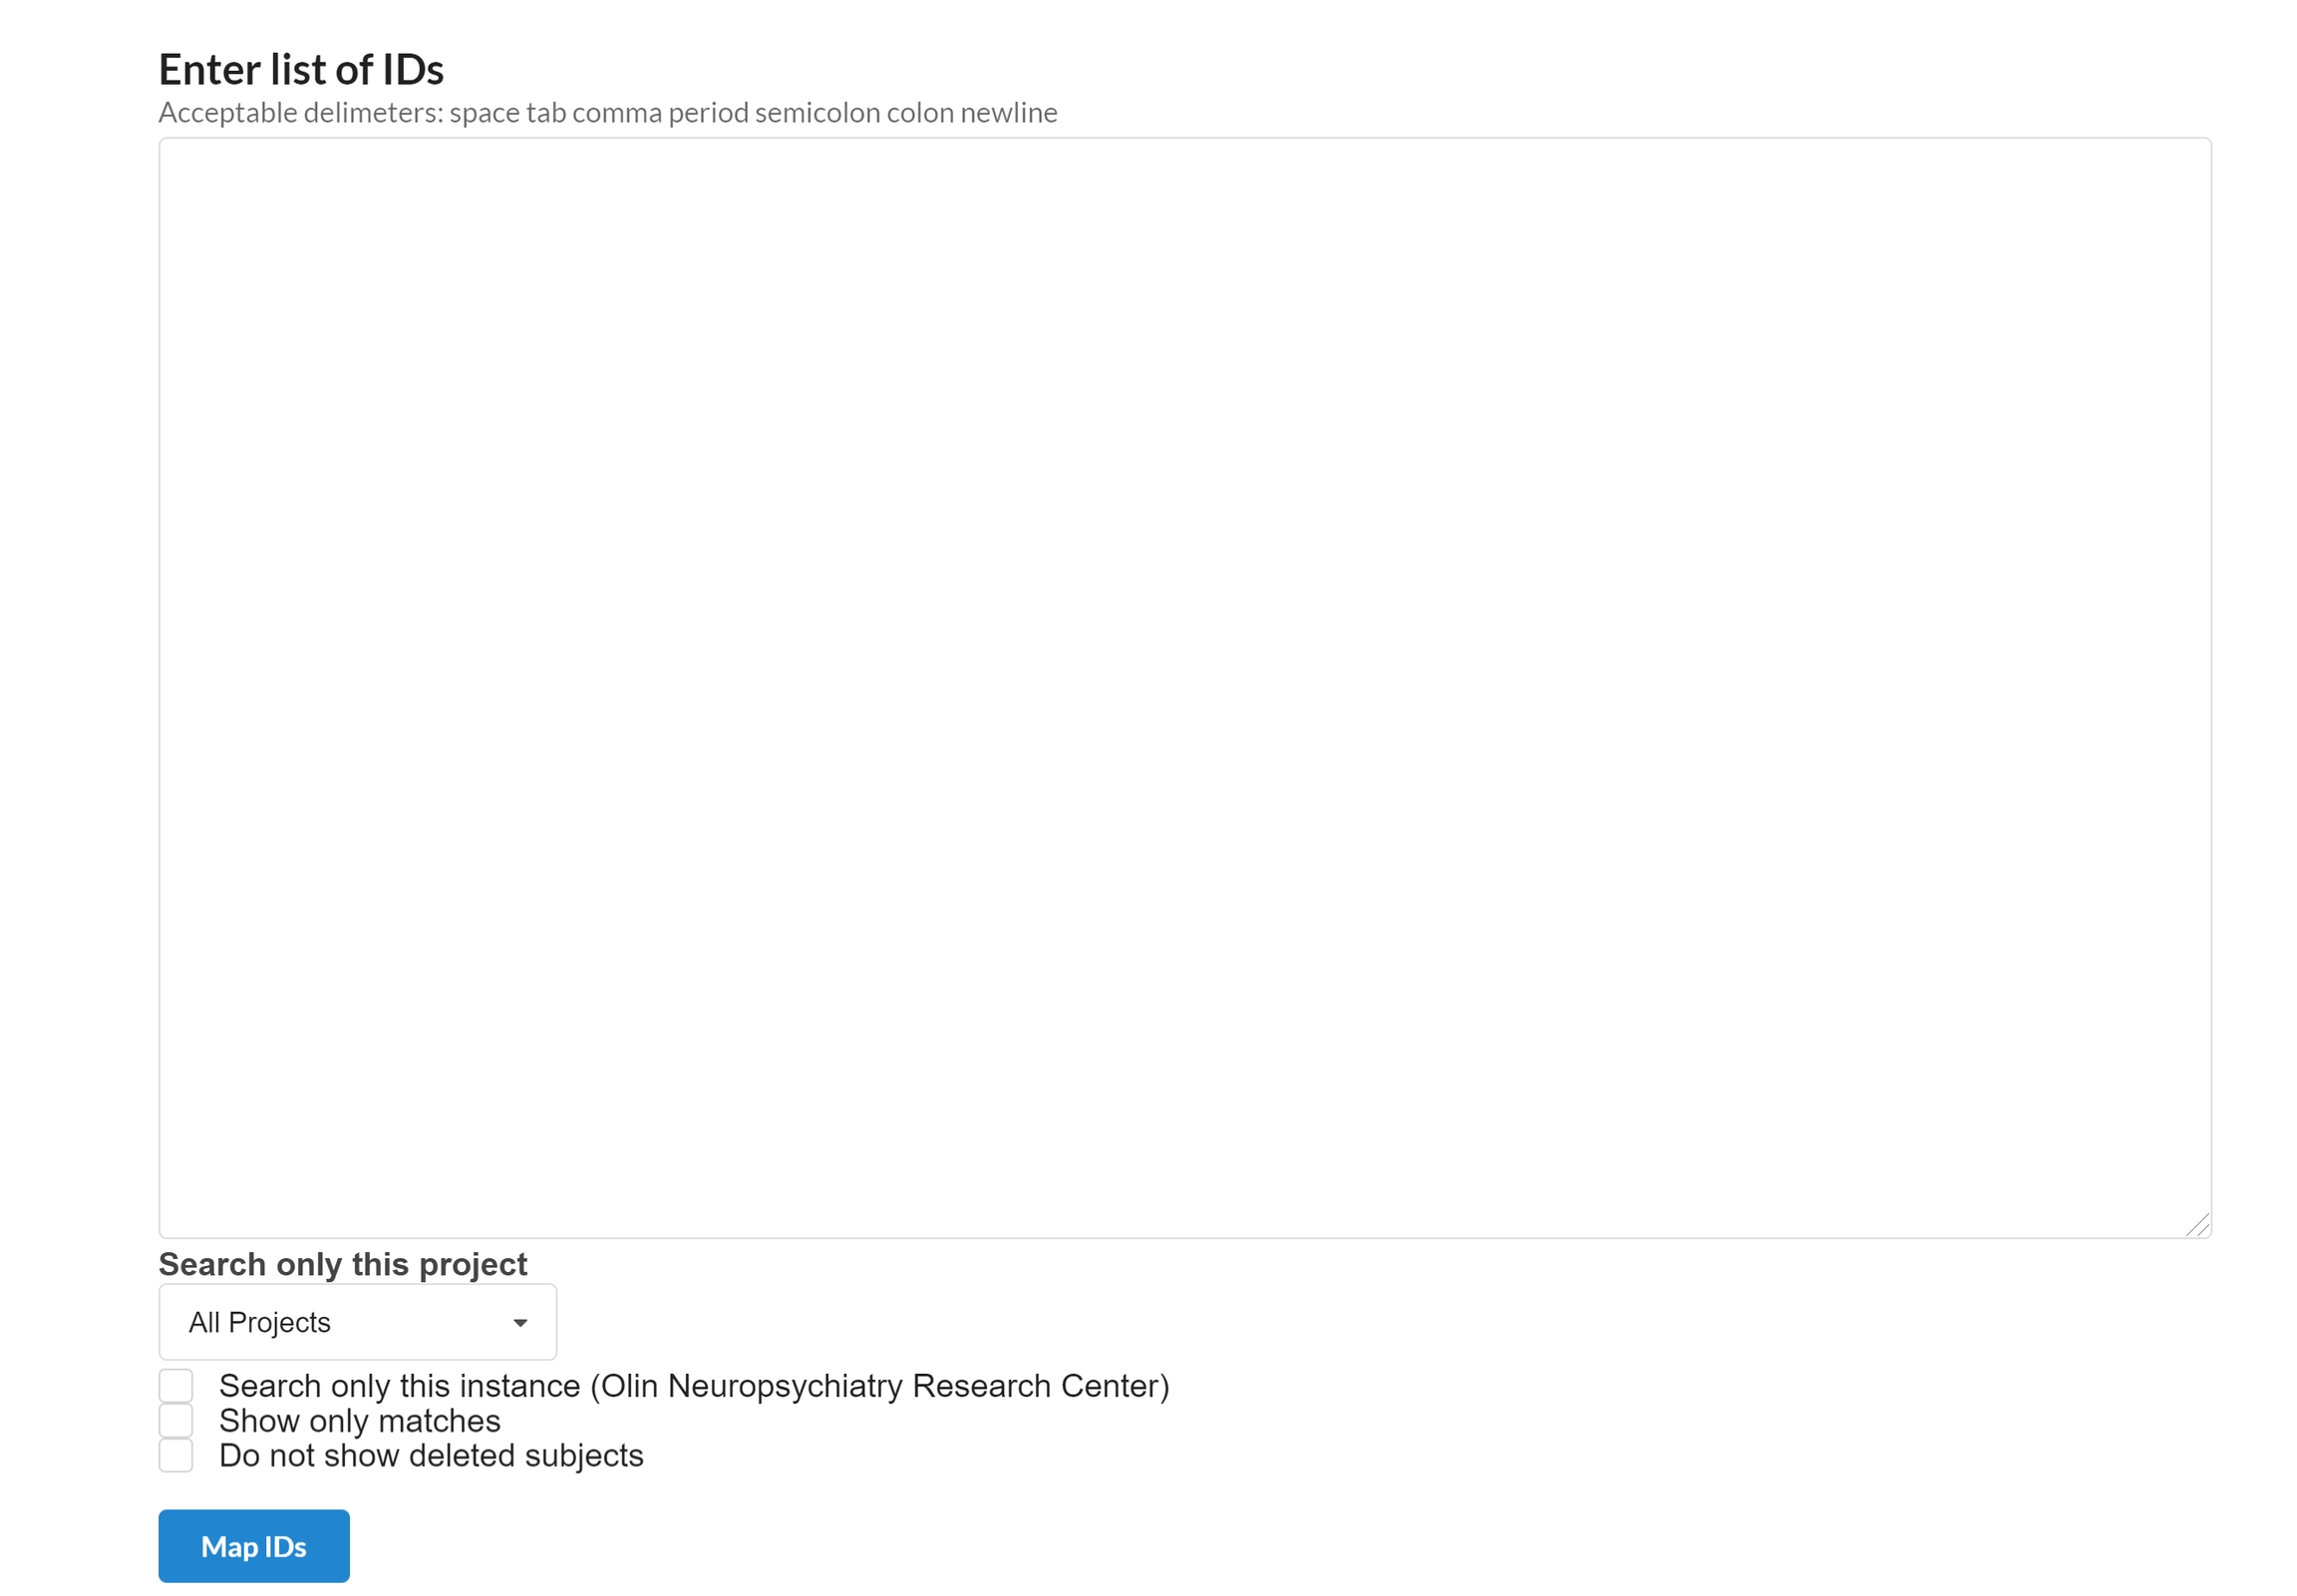
A list of Ids to be mapped separated by space, tab, period, semicolon, colon, comma and newline can be typed in the box above. the mapping can be restricted to a certain project by selecting the project name from the dropdown menu. The search can only be restricted to the current instance, undeleted subjects and exact matches by selecting the approprriate selection box shown above.
Export
After searching the required data, it can be exported to various destinations.
For this purpose a section named "Transfer & Export Data" will appear at the end of a search as shown in a fiigure below.

Following are some destinations where the searched data can be exported:
Export to NFS
To export the data to a NFS location, you can select the "Linux NFS Mount" option and type the NFS path where you want to download the data.

Export to Remote FTP Site
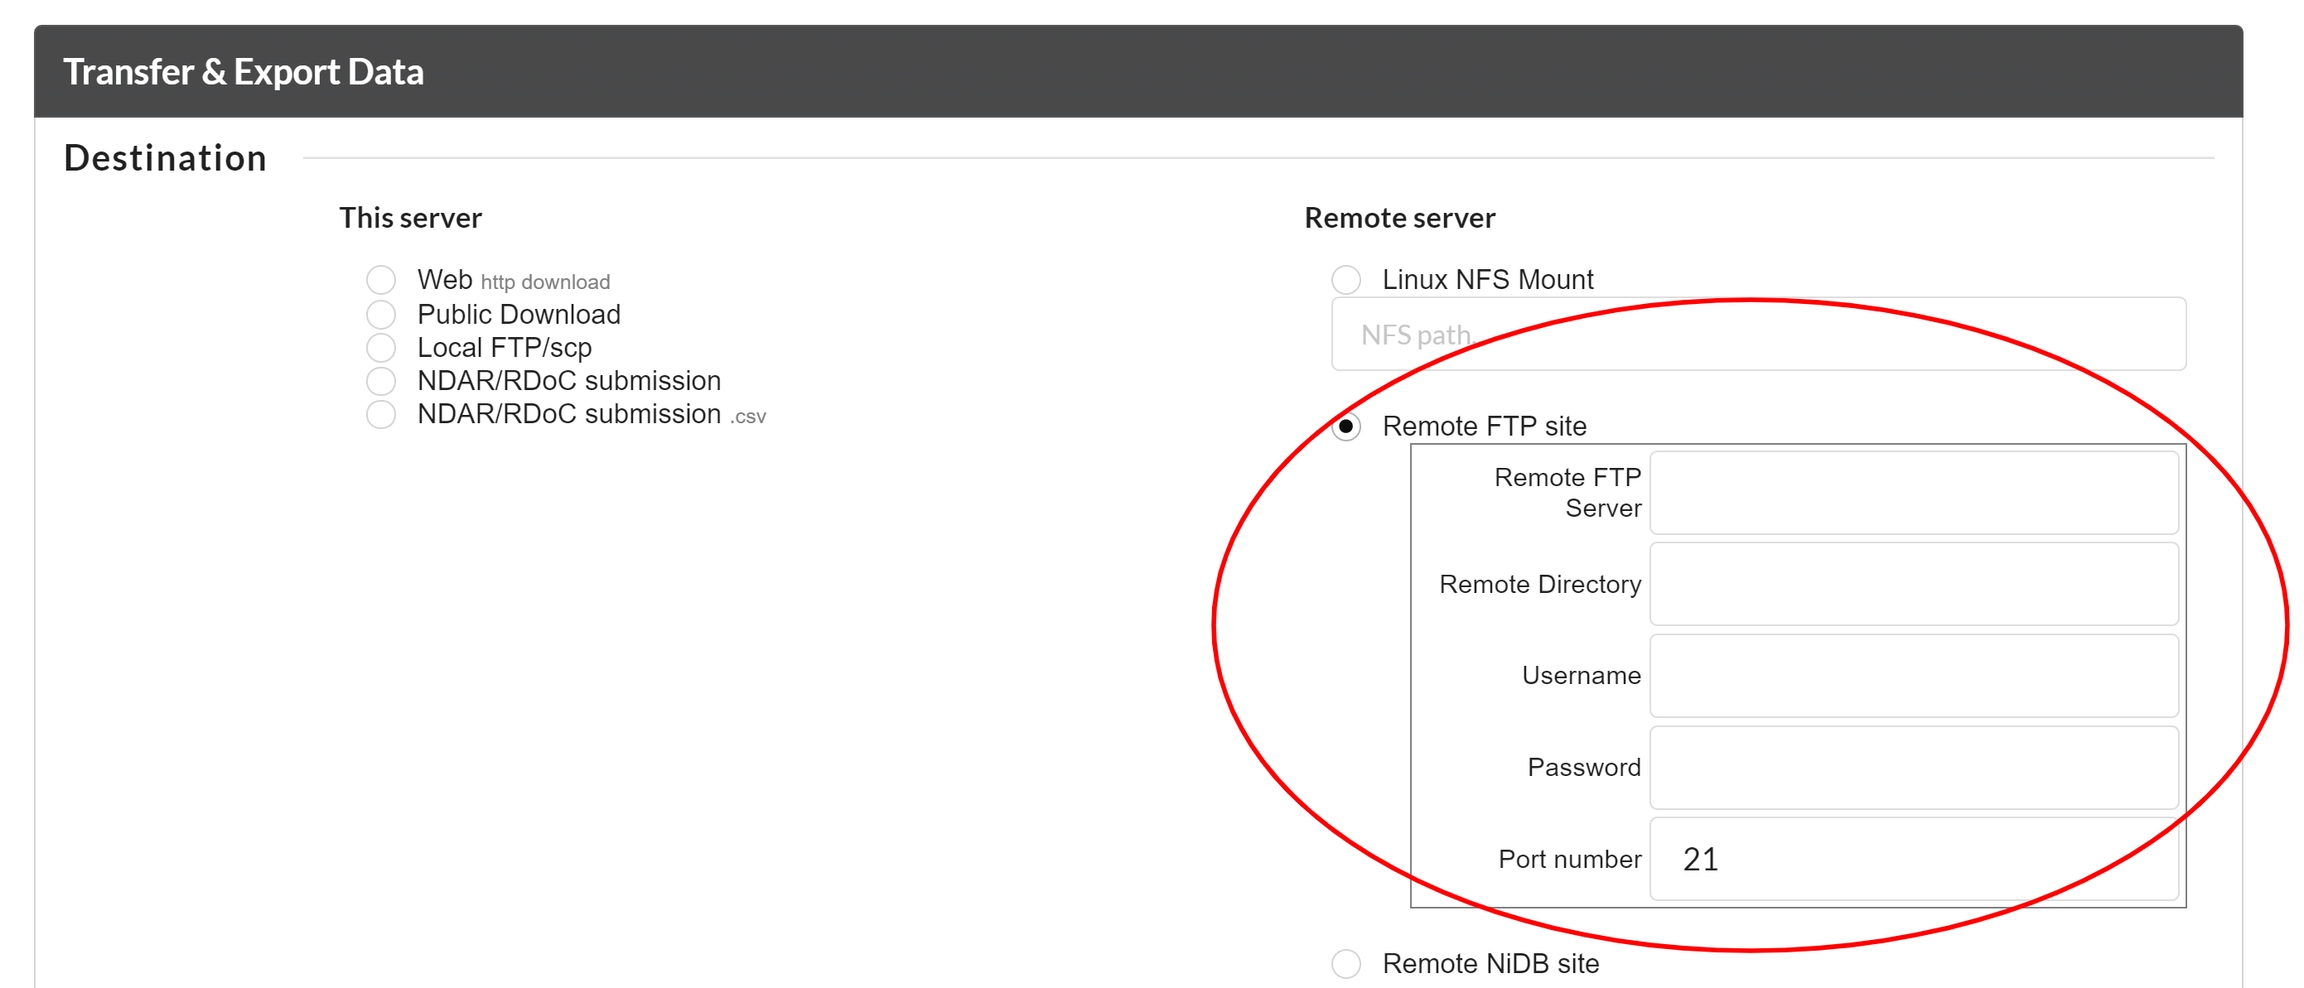
To export the data to a remote FTP location, you can select the "Remote FTP Site" option and type the FTP information where you want to download the data.
Export to Remote NiDB Site
To export the data to a remote NiDB site, you can select the "Remote NiDB Site" option and select the NiDB site from a drop down menue where you want to download the data.

Export via Web Download
You can select the data to be downloased to the local http location. you can select "Web http download" option for this purpose as shown below.

Export to NDAR/ RDoCdb/NDA
NiDB has a unique ability to download the data that is required to submit to NDAR/RDoC/NDA. It automatically prepares the data according to the NDAR submission requirnments. Also one can download the data inforamation in terms of .csv that is required to submit NDAR data. The following the the two options to download the data accordigly.

Export status
After starting the transfer by clicking the transfer button at the end of the search, a transfer request will be send to NiDB. The status of a request can be seen via Search-->Export Status page as shown below. The status of 30 most recent serches will be shown by default. All the previoius searches can be seen by clicking on the "Show all" button on the left corner of the screen as shown below.

Public Downloads
This is another option in the "Transfer and Export" section to transfer "searched data" and to make it as public downloadable. There are options to describe briefly about the dataset, setting up a passowrd for secure tranmitability and making the public download updateable to the users having rights on the data. One can select "Required Registration" option to restrict the dowload to NiDB users only. An expiration date for the download can be set to 7, 30 and 90 days. One should select "No Expiration" if the public data should be available for longer than 90 days or for indefinite period.
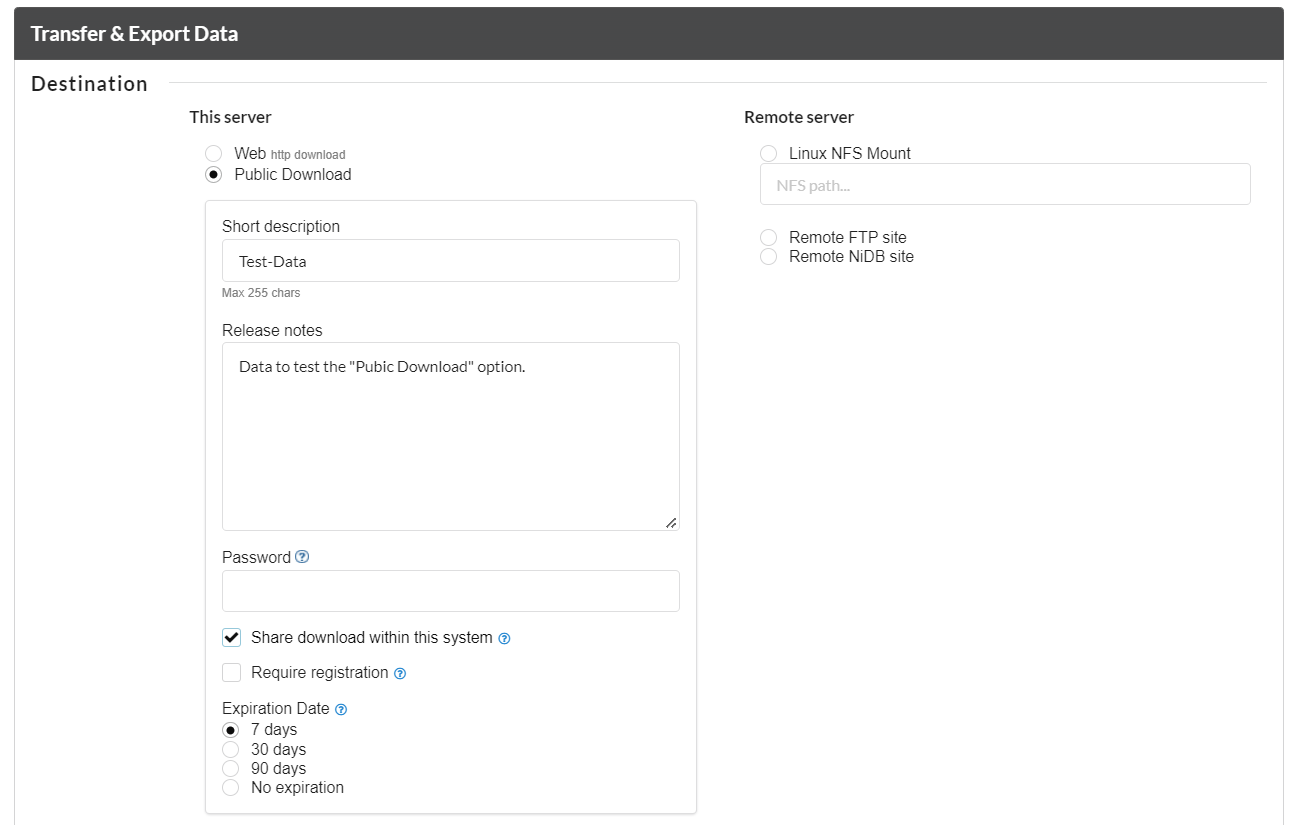
The "public Download" will be created after pressing the "Transfer" button at the end of search page. The public downloads can be accessed via Data --> Public Download menue. The following is a a page with Public download information:

Request a Dataset
Sometimes you as a user have no idea how the data is stored for a particular project, or you don't have permissions to the project. If you are lucky enough to have a data manager, you can send a request for data to a data manager who can then follow your instructions to find the data and send it to them.
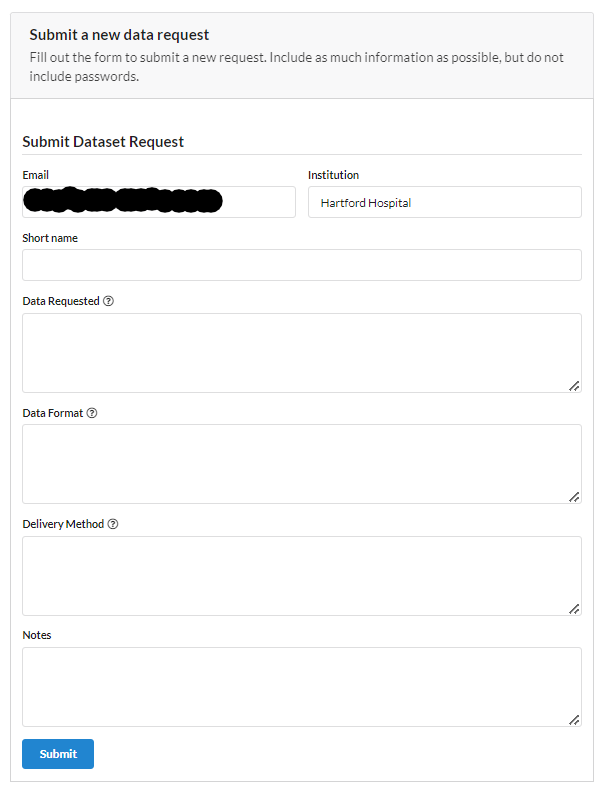
To request a dataset from NiDB-based database, select Data --> Request a Dataset. The following page will appear.
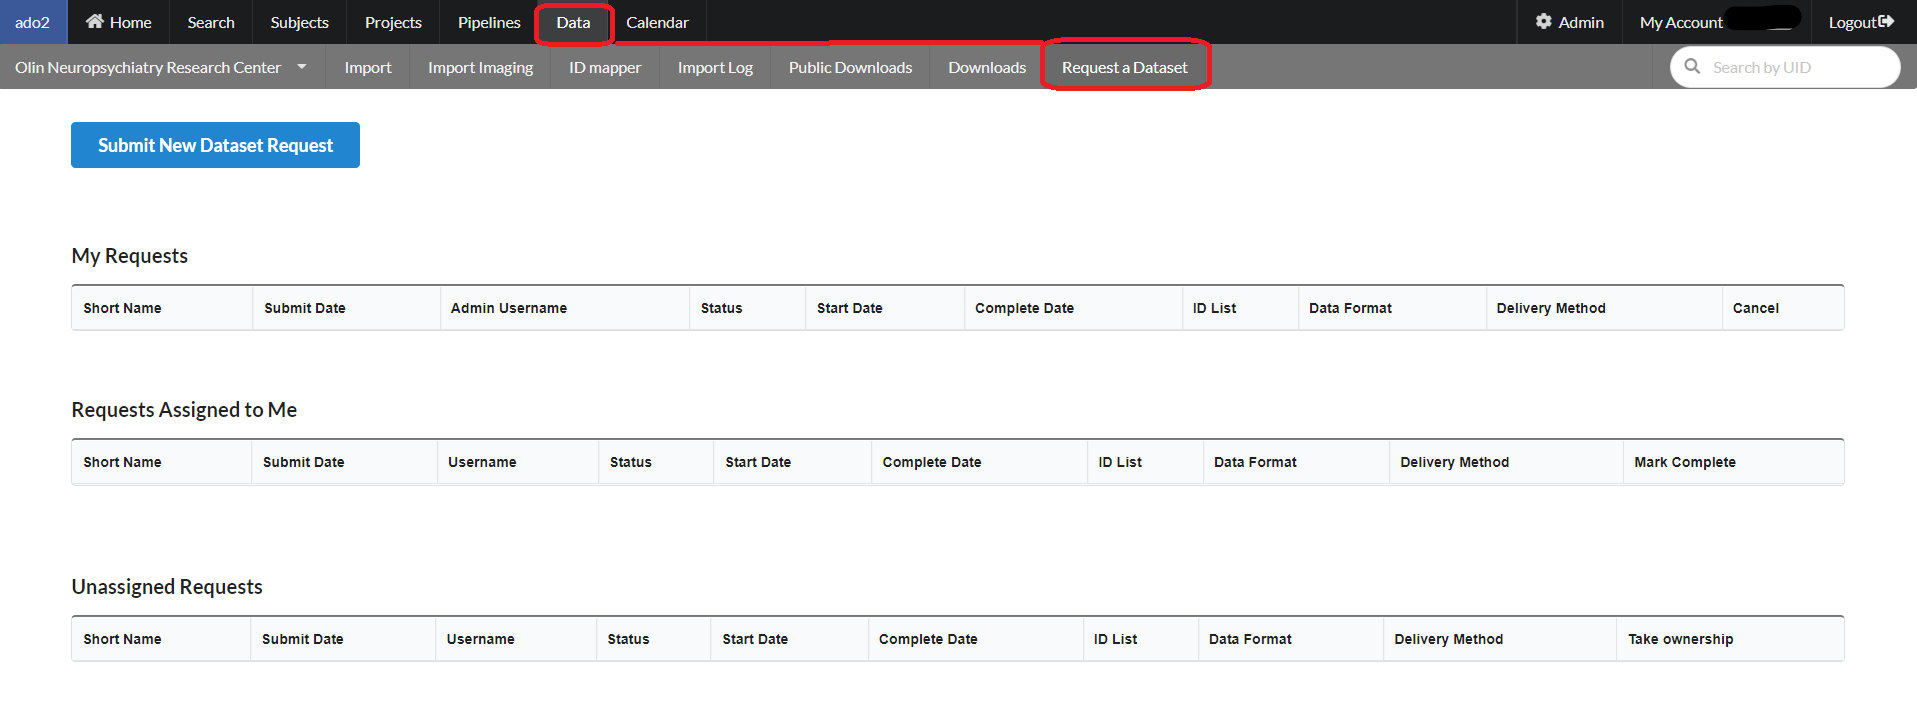
Click Submit New Dataset Request button, and fill the following form to request a dataset from the NiDB-databse.
Analysis Builder
Analysis builder is a report generating tool that can be used to generate various types of reports using the stored data in NiDB. This report generating tool builds on the base of various types of data variables that is being stored in the NiDB. This is different than the search tool where you can search different types of data and download it. In this tool you can search the variables those are generated and stored / imported in the NiDB (Example: You can query the variables generated from a task using MRI / EEG data, but not the actual EEG and MRI data). Analysis builder can be reached via Search --> Analysis Builder or you can go to a specific project front page and select the option (Analysis Builder) on the right from "Project tool and settings" and you will land on the following screen.

Usage
Analysis builder is designed to create reports based on various types of parameters from different types of measures. It has been categorized in the various types of measures like MR, EEG, ET, etc. as shown below.

After selecting the project from the drop down menu "Select Project", click "Use Project" button. Now the project just selected will be the current project for data retrieval.

Last updated
Was this helpful?
