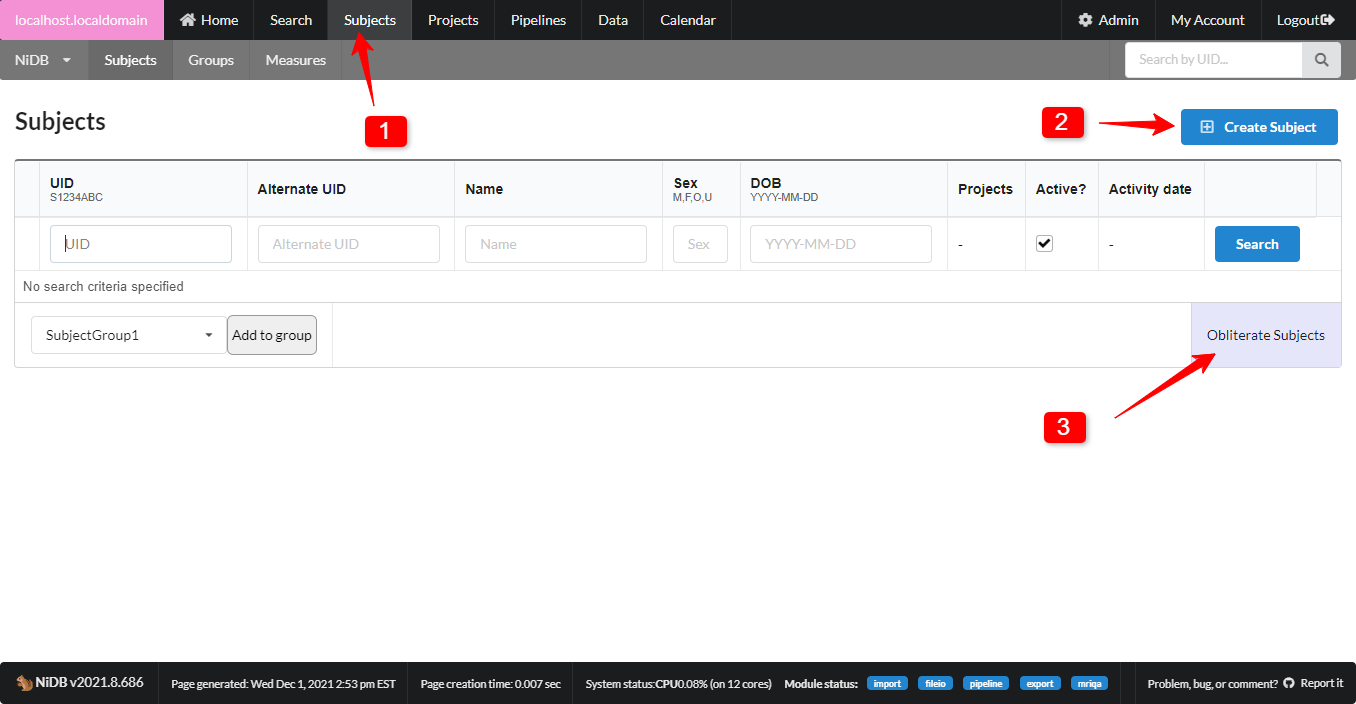
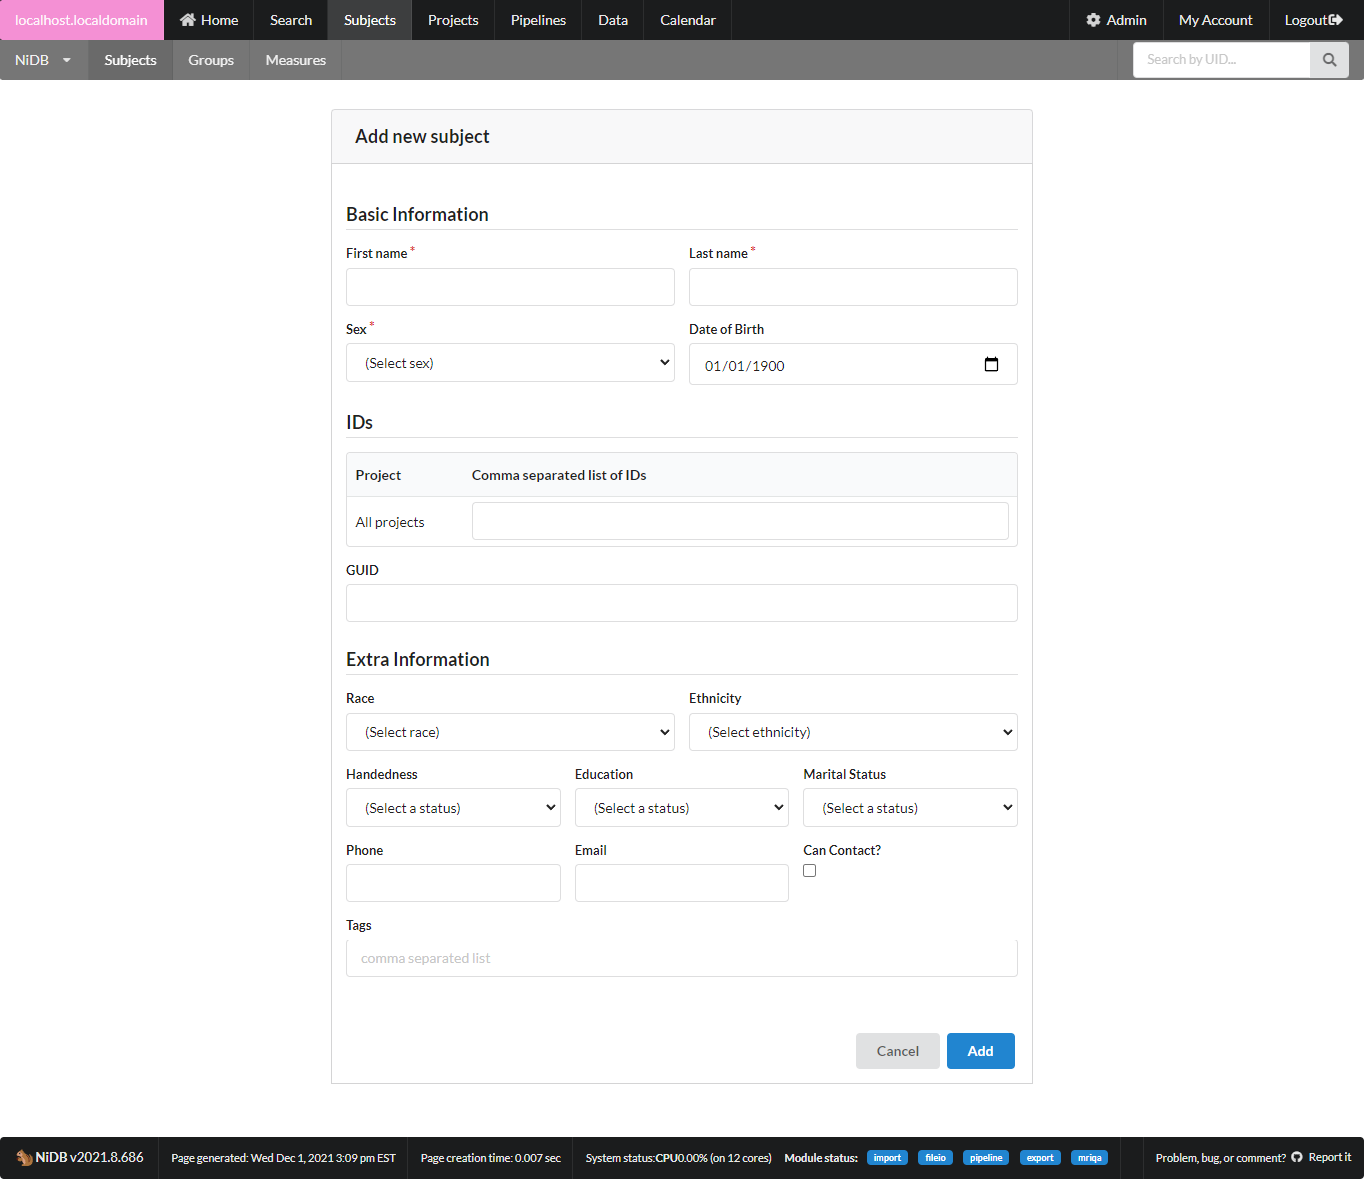
 Fill out as much information as you need. Name, Sex, DOB are required to ensure a unique subject. Most other information is optional. While fields for contact information are available, be mindful and consider whether you really need to fill those out. Chances are that contact information for research participants is already stored in a more temporary location and does not need to exist for as long as the imaging data does.
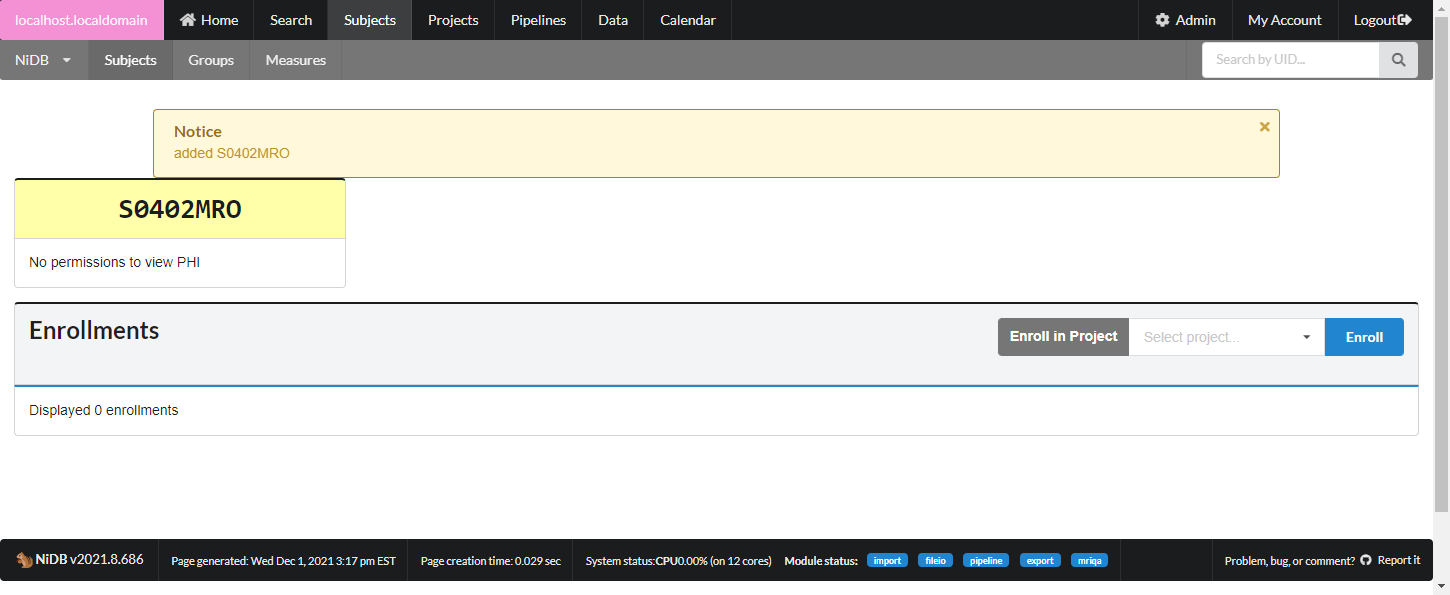
 The subject will now be assigned a UID, but will not be enrolled in any projects. Enroll the subject in the next section.
 ### Importing Subjects from Recap
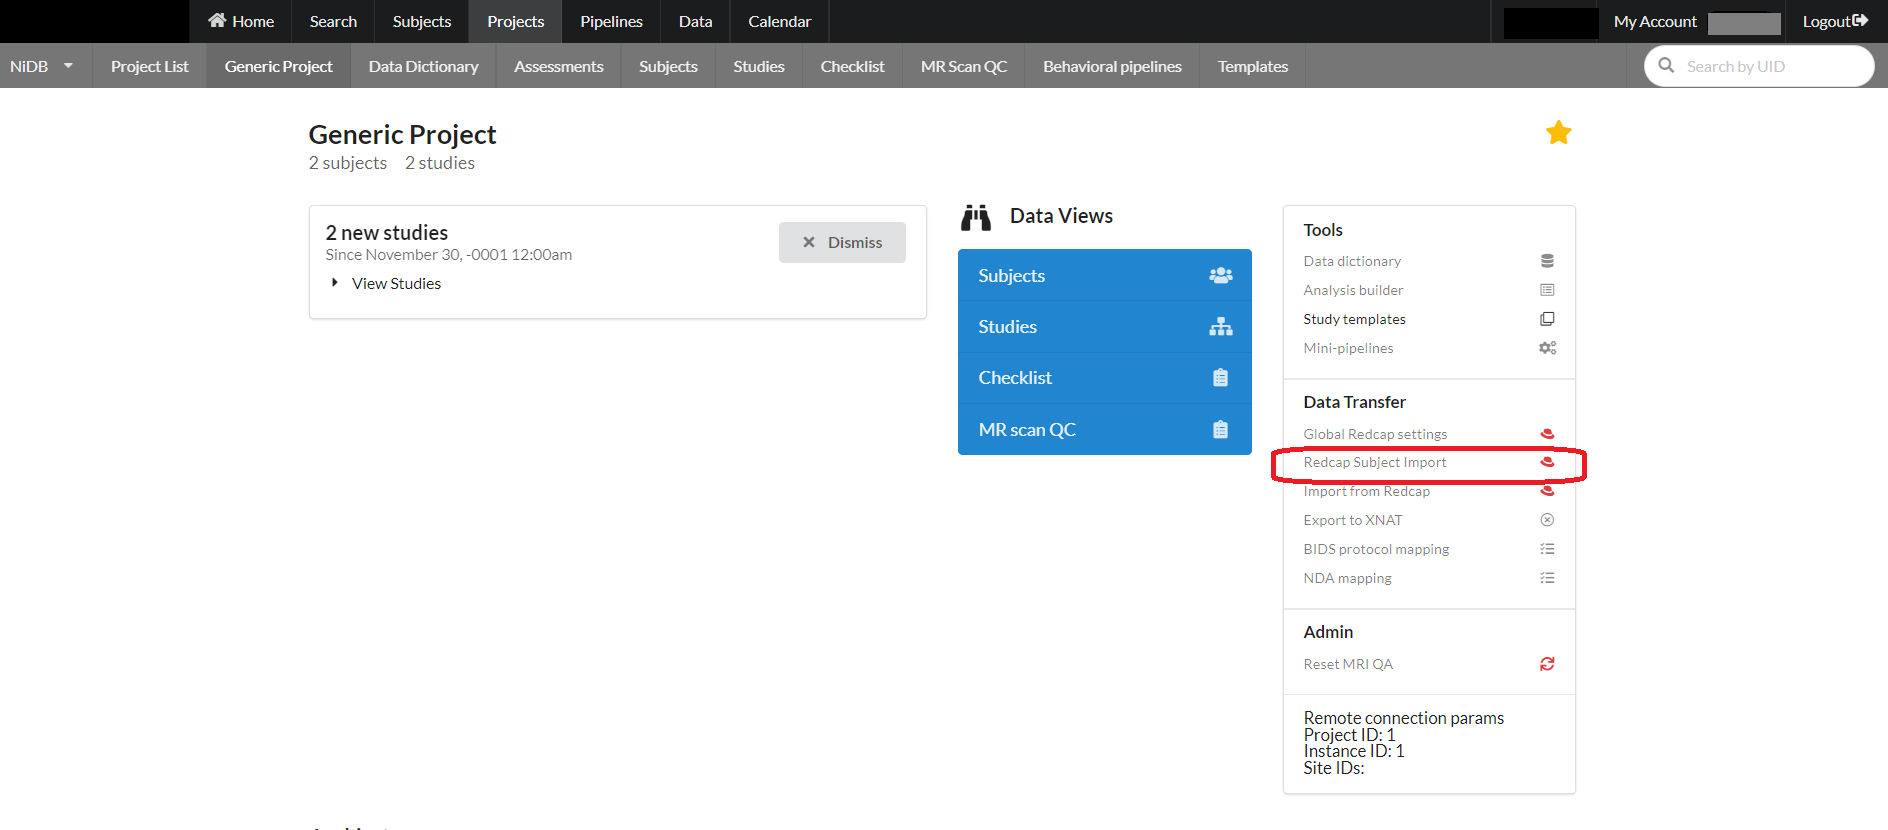
For a project, subjects can be imported from redcap using an option on the project page as shown below:
### Importing Subjects from Recap
For a project, subjects can be imported from redcap using an option on the project page as shown below:
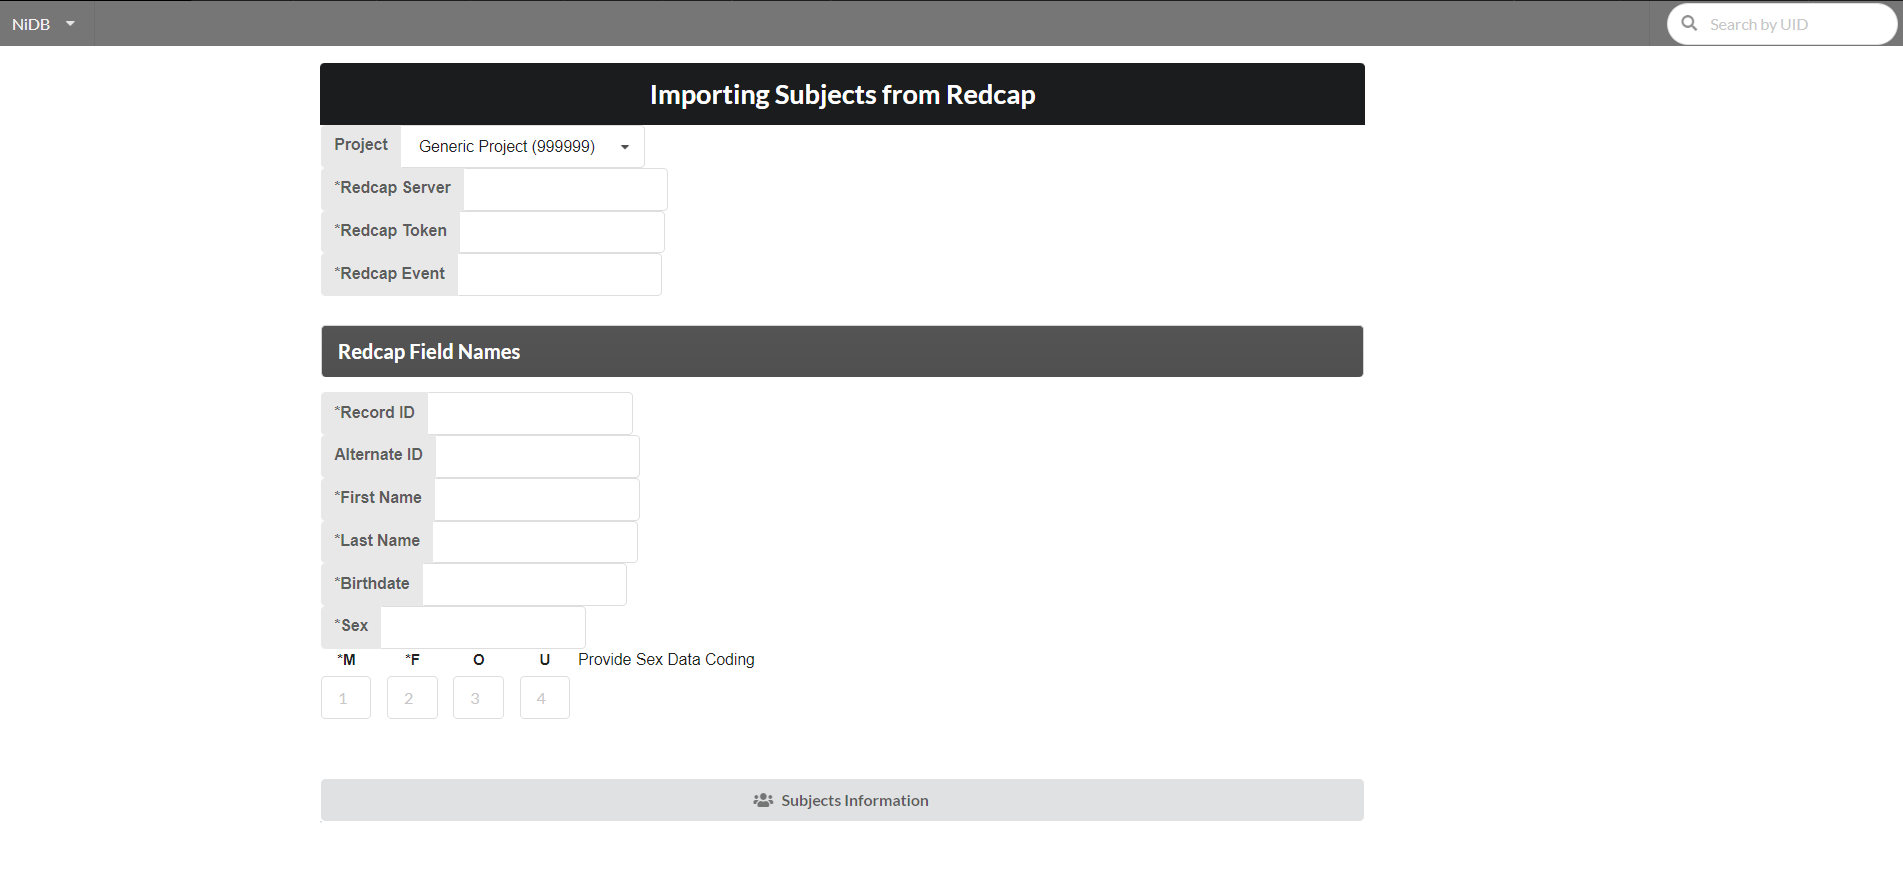
 Fill the following form requiring information for API connection to redcap and required redcap field names. After providing the required fields click "Subjects Information" button.
 If all the above information is correct, then the list of the subjects from redcap will be shown as follows:
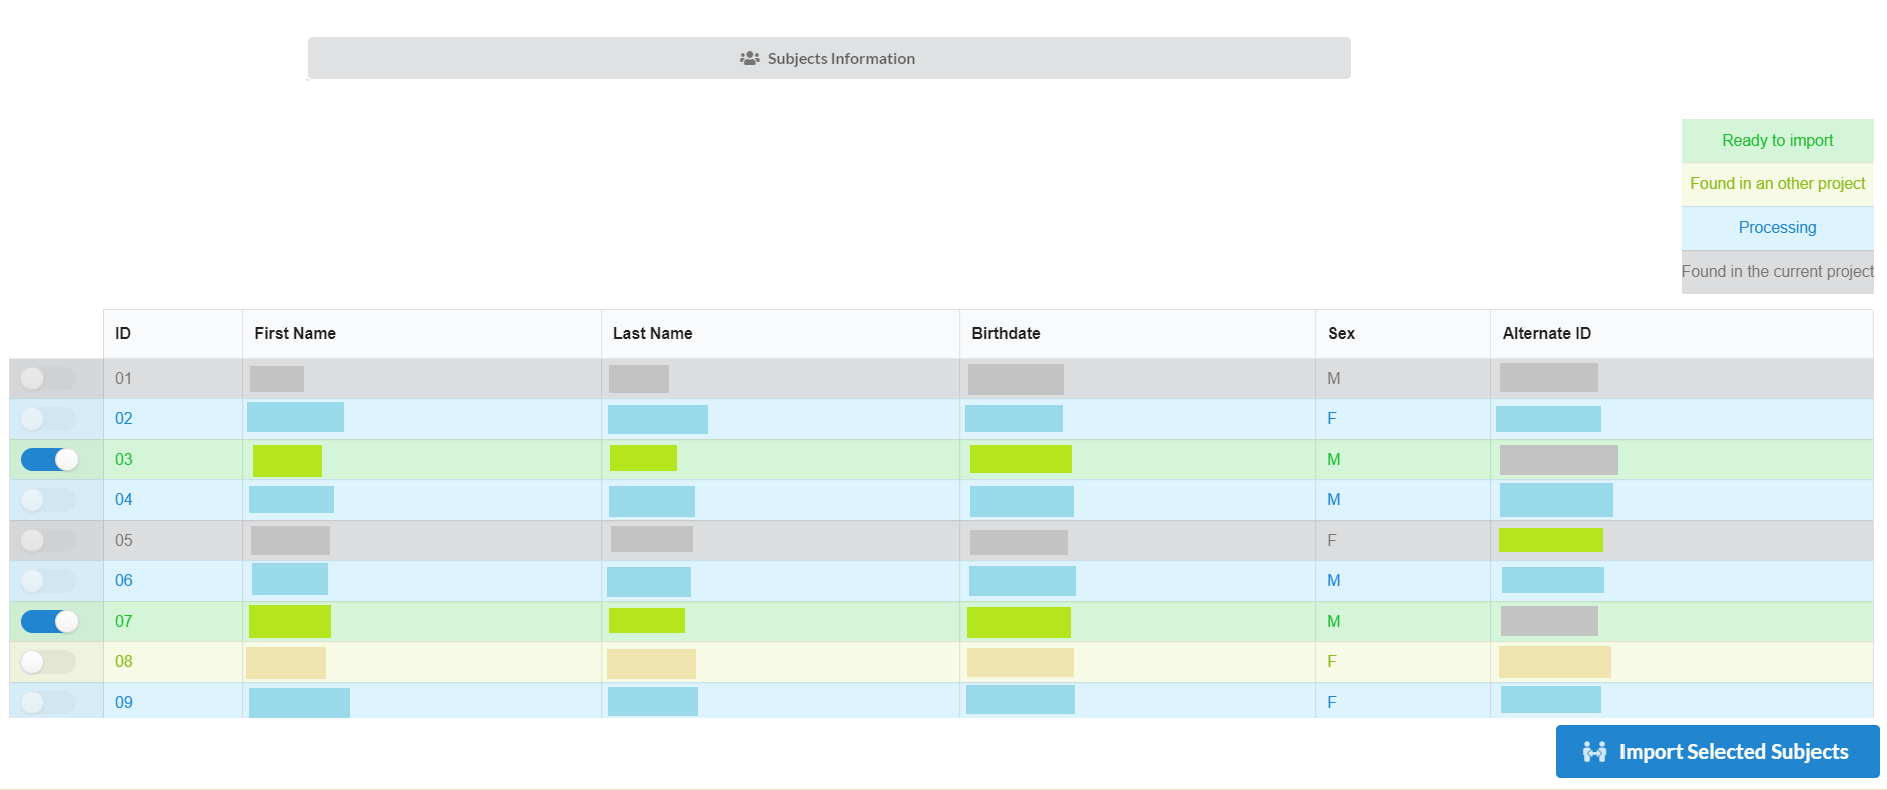 There can be four types of subjects in the list. Those are:
1. Ready to Import: are the one those are in redcap and can be imported.
2. Found in an other project: these are present in another project under inthe NiDB database. They can also be imported, but need to be selected to get import.
3. Processing: these are already in the process of being imported and cannot be selected to import.
4. Already exist in the project: these already exist in the current project and cannot be duplicated.
After selecting the required subjects click "Import Selected Subjects" to start the import process.
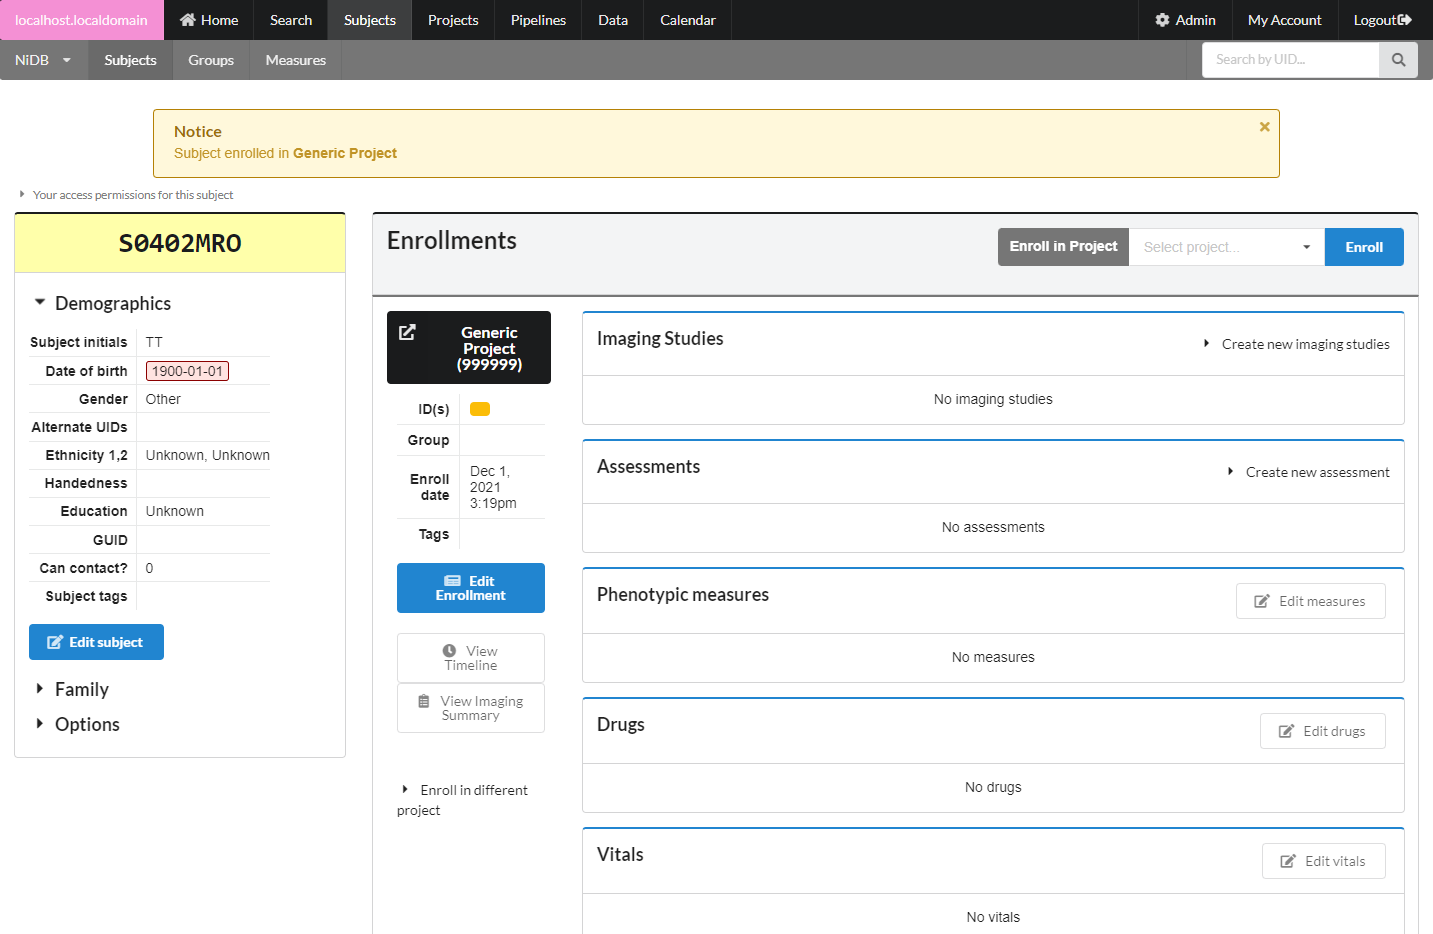
### Enroll Subject in a Project
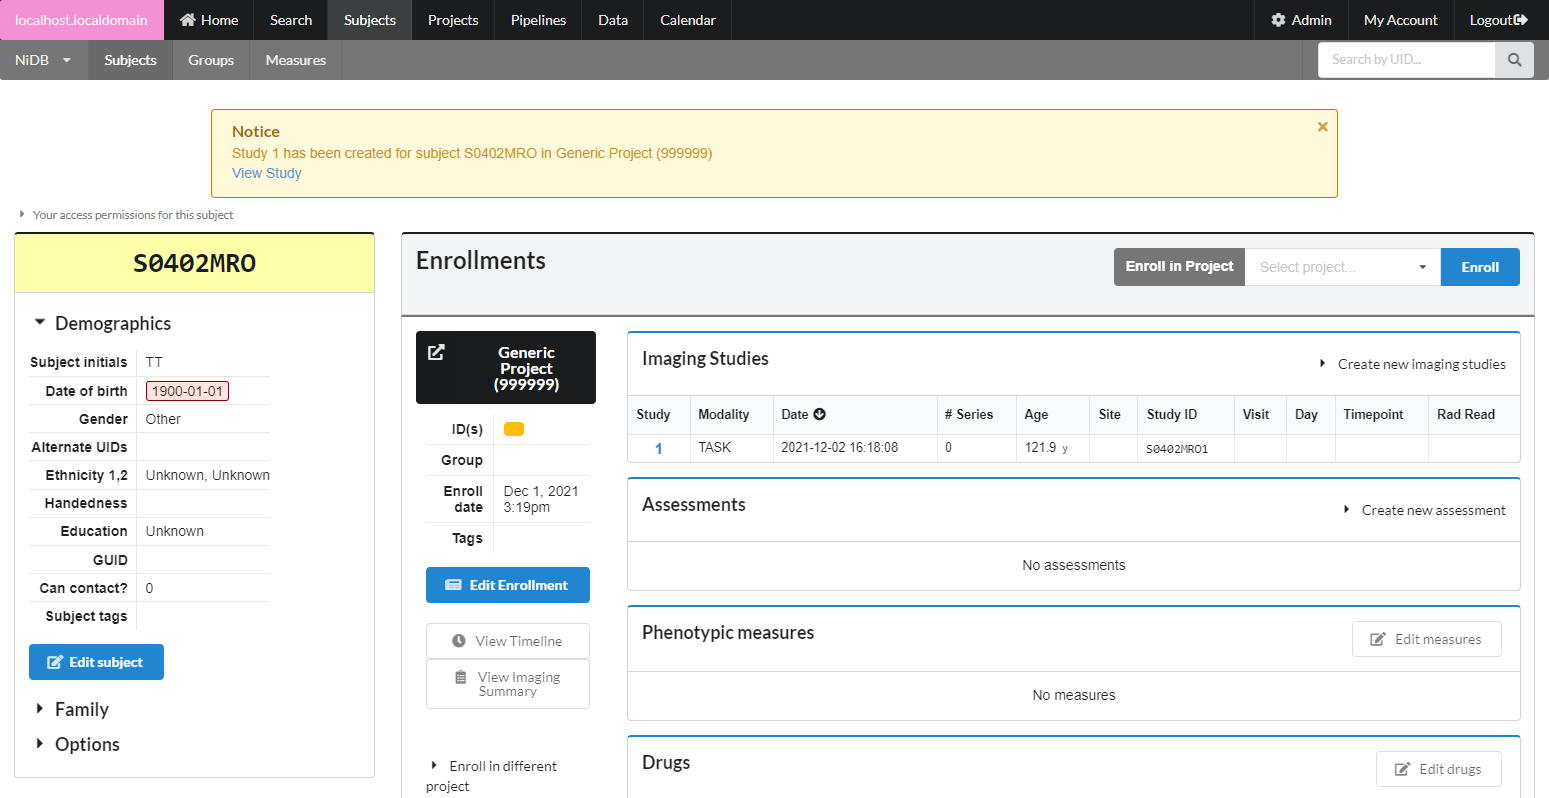
In the enrollments section, select the project you want to enroll in, and click Enroll. The subject will now be enrolled in the project. Permissions within NiDB are determined by the project, which is in theory associated with an IRB approved protocol. If a subject is not enrolled in a project, the default is to have no permissions to view or edit the subject. Now that the subject is part of a project, you will have permissions to edit the subject's details. Once enrolled, you can edit the enrollment details and create studies.
There can be four types of subjects in the list. Those are:
1. Ready to Import: are the one those are in redcap and can be imported.
2. Found in an other project: these are present in another project under inthe NiDB database. They can also be imported, but need to be selected to get import.
3. Processing: these are already in the process of being imported and cannot be selected to import.
4. Already exist in the project: these already exist in the current project and cannot be duplicated.
After selecting the required subjects click "Import Selected Subjects" to start the import process.
### Enroll Subject in a Project
In the enrollments section, select the project you want to enroll in, and click Enroll. The subject will now be enrolled in the project. Permissions within NiDB are determined by the project, which is in theory associated with an IRB approved protocol. If a subject is not enrolled in a project, the default is to have no permissions to view or edit the subject. Now that the subject is part of a project, you will have permissions to edit the subject's details. Once enrolled, you can edit the enrollment details and create studies.
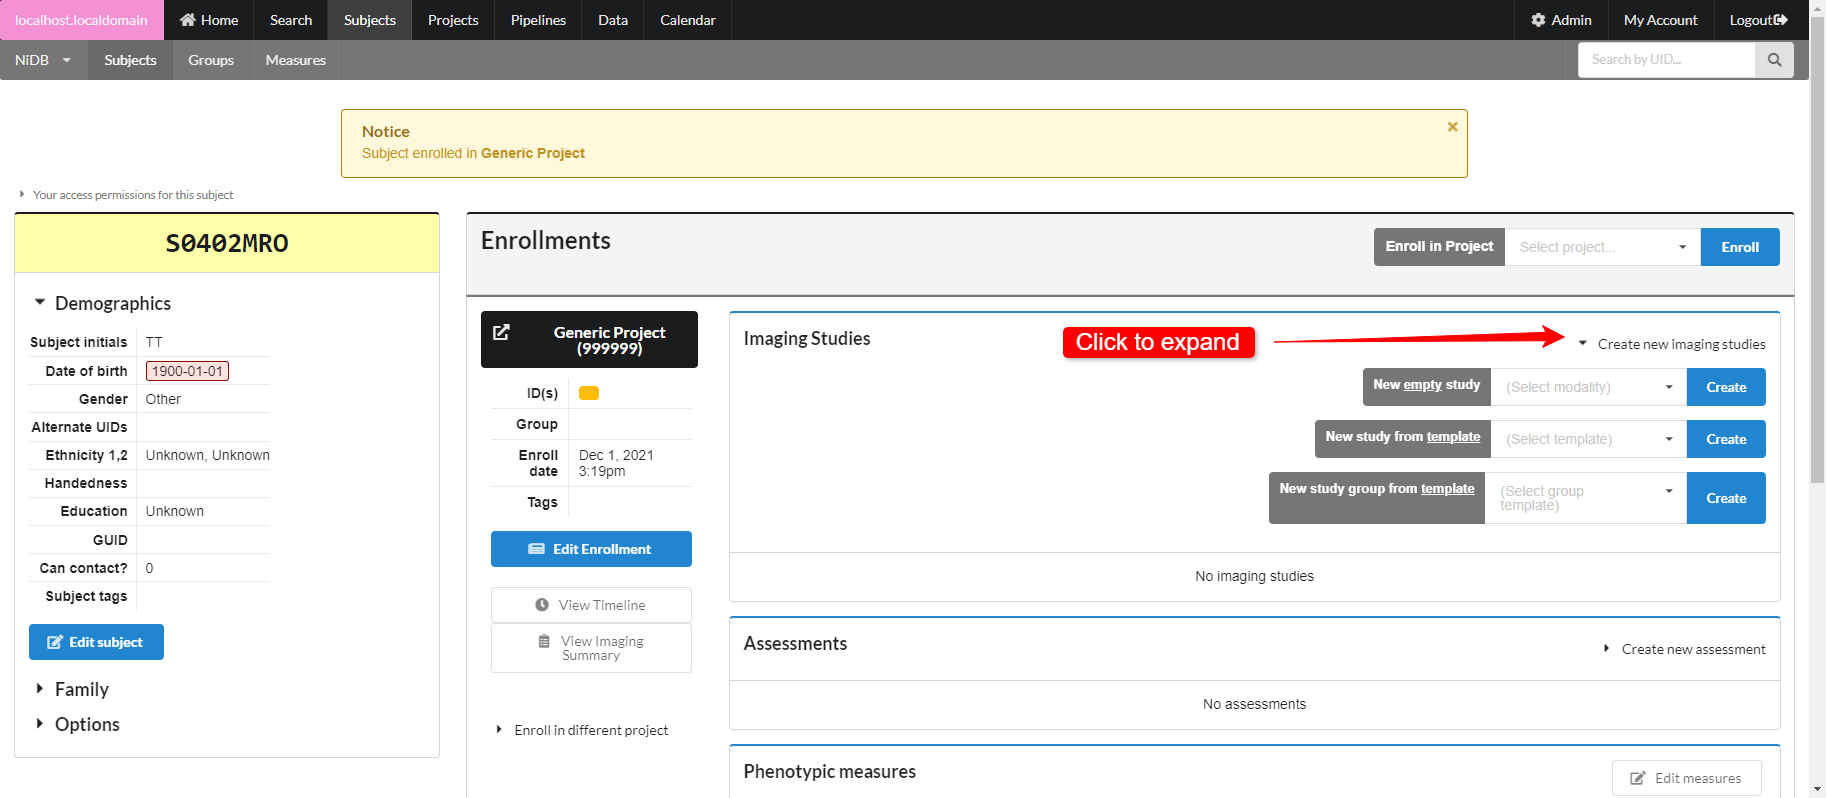
 ### Create Imaging Study
There are three options for creating studies
1. Create a single empty study for a specific modality
2. Create a single study prefilled with empty series, from a template
3. Create a group of studies with empty series, from a template
Click **Create new imaging studies** to see these options. To create study templates or project templates, see Study Templates.
### Create Imaging Study
There are three options for creating studies
1. Create a single empty study for a specific modality
2. Create a single study prefilled with empty series, from a template
3. Create a group of studies with empty series, from a template
Click **Create new imaging studies** to see these options. To create study templates or project templates, see Study Templates.
 Once the study is created, it will appear in the list of imaging studies. Studies are given a unique number starting at 1 in order in which they are created. The studies are sorted by date in this list. While studies will often appear sequential by date and study number, this is because study numbers are incremented by each new study date added, and each new study often occurs at a later date. However, studies may be numbered in any order, regardless of date. If you create several studies for previous dates, if importing older data, if deleting or merging studies, this will cause study numbers to appear random. This is the normal behavior.
 ### Create Single Series/Upload data
MRI and non-MRI data are handled differently, because of the substantial amount of information contained in MRI headers. MRI series are created automatically during import, while all other imaging data can be imported automatically or manually.
#### MRI
MRI series cannot be created manually, they must be imported as part of a dataset. See Bulk Import of Large Datasets or Automatic Import via DICOM receiver. MRI series can be managed individually after automatic importing has occured.
#### Non-MRI
Non-MRI data be imported automatically or manually. To manually import non-MRI data, first go into the imaging study. Then fill out the series number, protocol, date, notes. Series number and date are automatically filled, so change these if you need to. When done filling out the fields, click **Create Series**.
### Create Single Series/Upload data
MRI and non-MRI data are handled differently, because of the substantial amount of information contained in MRI headers. MRI series are created automatically during import, while all other imaging data can be imported automatically or manually.
#### MRI
MRI series cannot be created manually, they must be imported as part of a dataset. See Bulk Import of Large Datasets or Automatic Import via DICOM receiver. MRI series can be managed individually after automatic importing has occured.
#### Non-MRI
Non-MRI data be imported automatically or manually. To manually import non-MRI data, first go into the imaging study. Then fill out the series number, protocol, date, notes. Series number and date are automatically filled, so change these if you need to. When done filling out the fields, click **Create Series**.
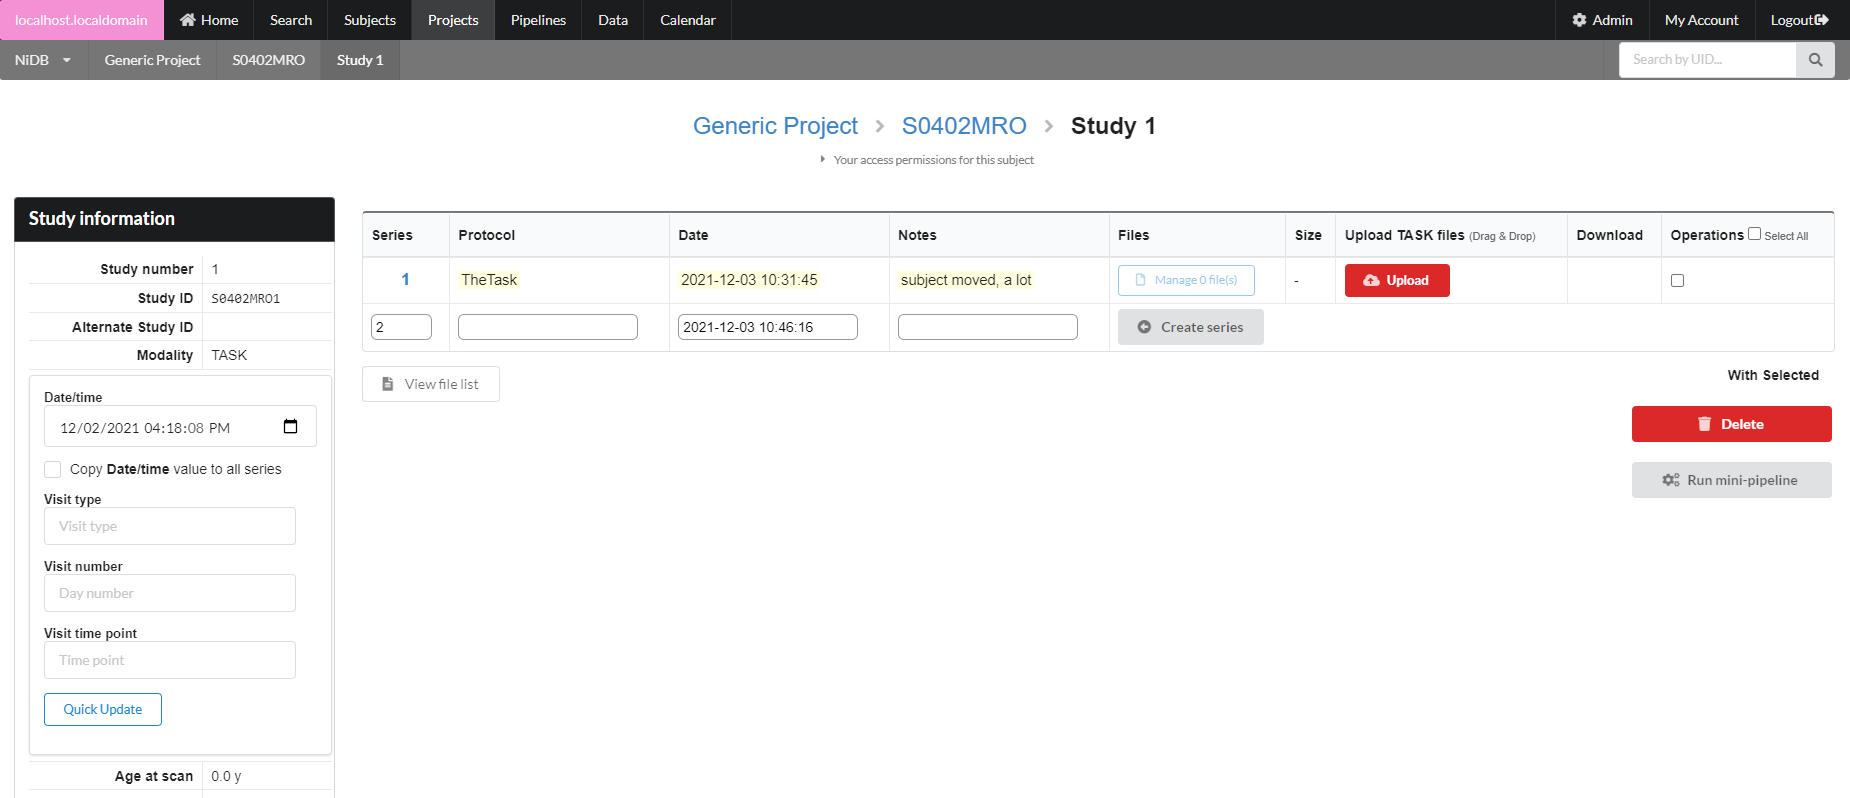
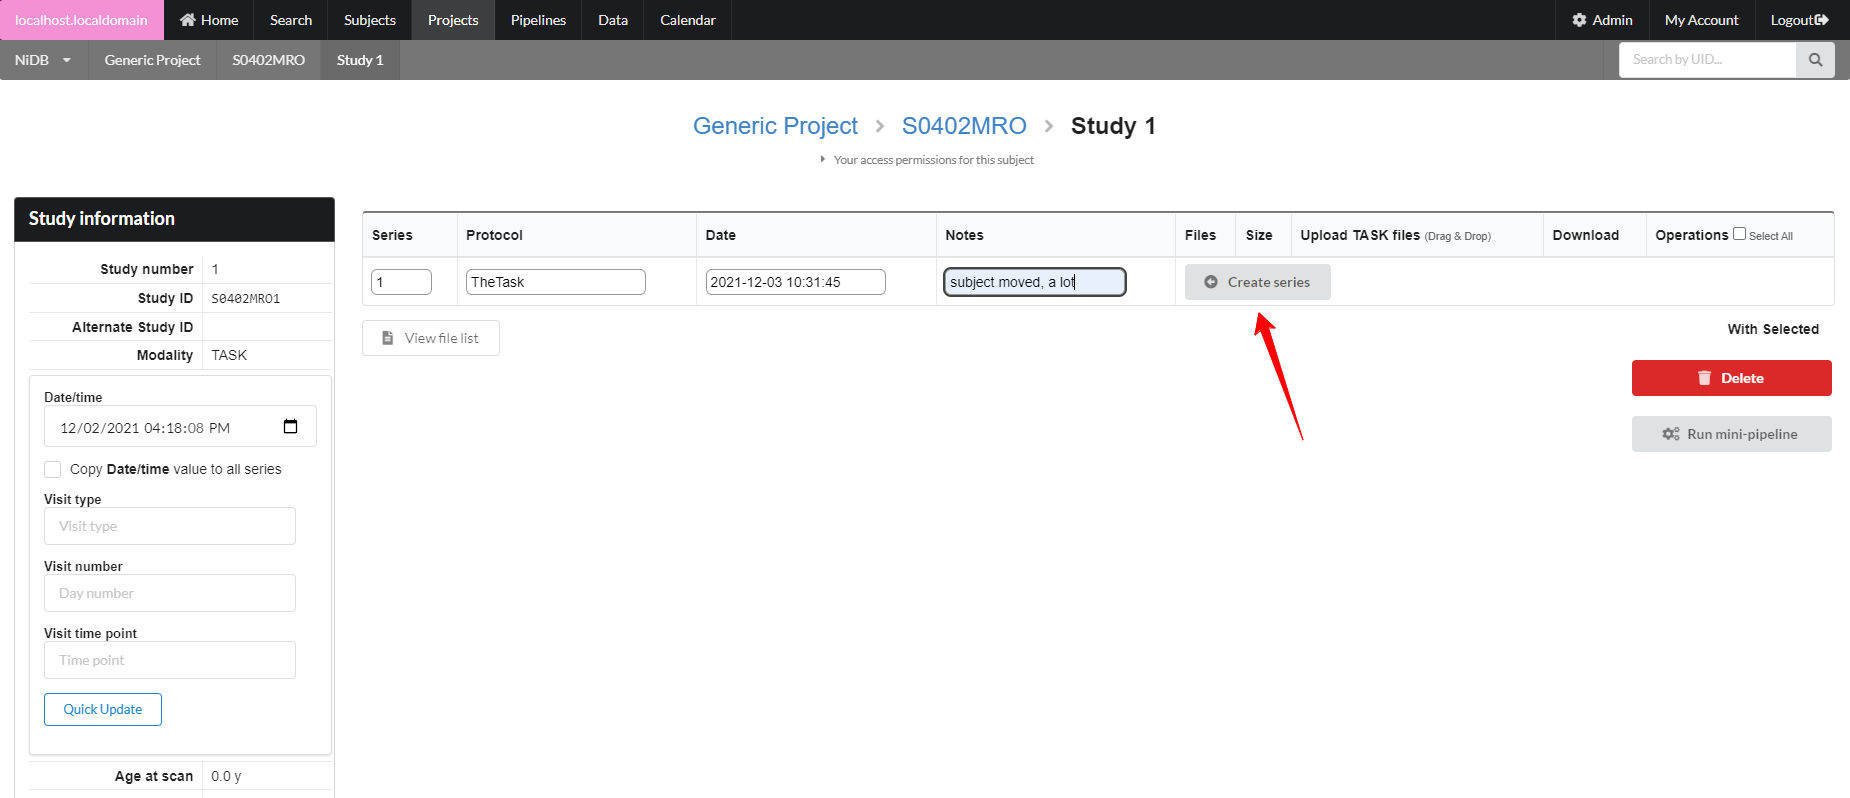 The series will be created, with an option to create another series below it. Upload files by clicking the **Upload** button, or by dragging and dropping onto the **Upload** button. If you need to delete or rename files, click the **Manage files** button. This will display a list of files in that series, and you can rename the file by typing in the filename box.
 ### Bulk Import of Large Datasets
The imaging import page can be accessed by the Data → Import Imaging menu. Because datasets can be large and take hours to days to completely import and archive, they are queued in import jobs. To import a dataset, click the **New Import** button.
### Bulk Import of Large Datasets
The imaging import page can be accessed by the Data → Import Imaging menu. Because datasets can be large and take hours to days to completely import and archive, they are queued in import jobs. To import a dataset, click the **New Import** button.
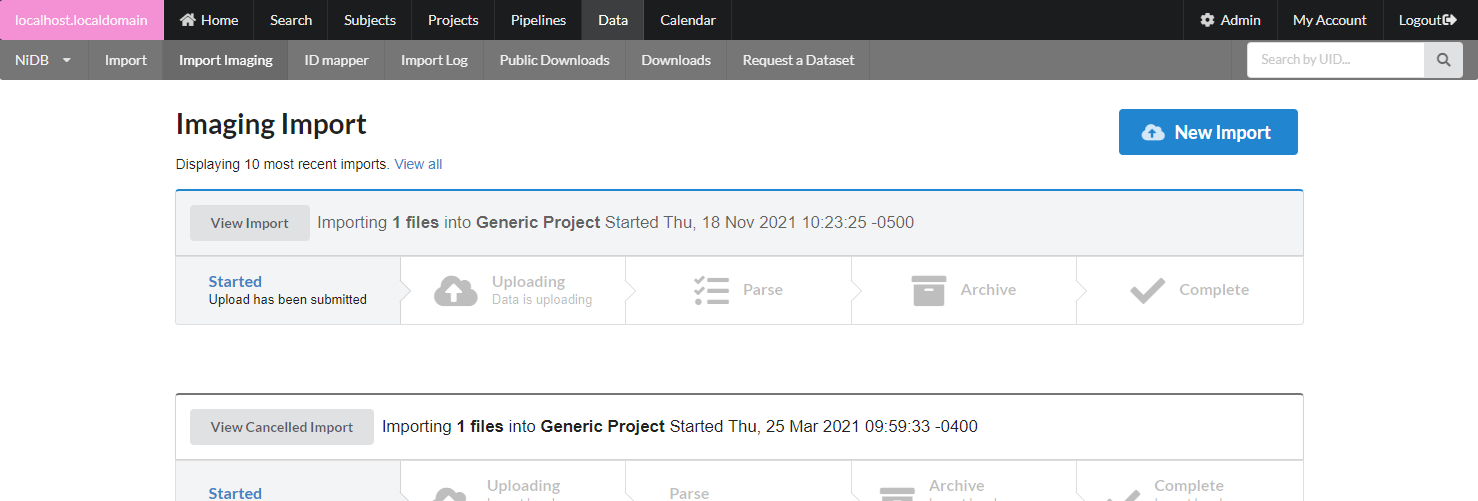 This will bring up the new import page.
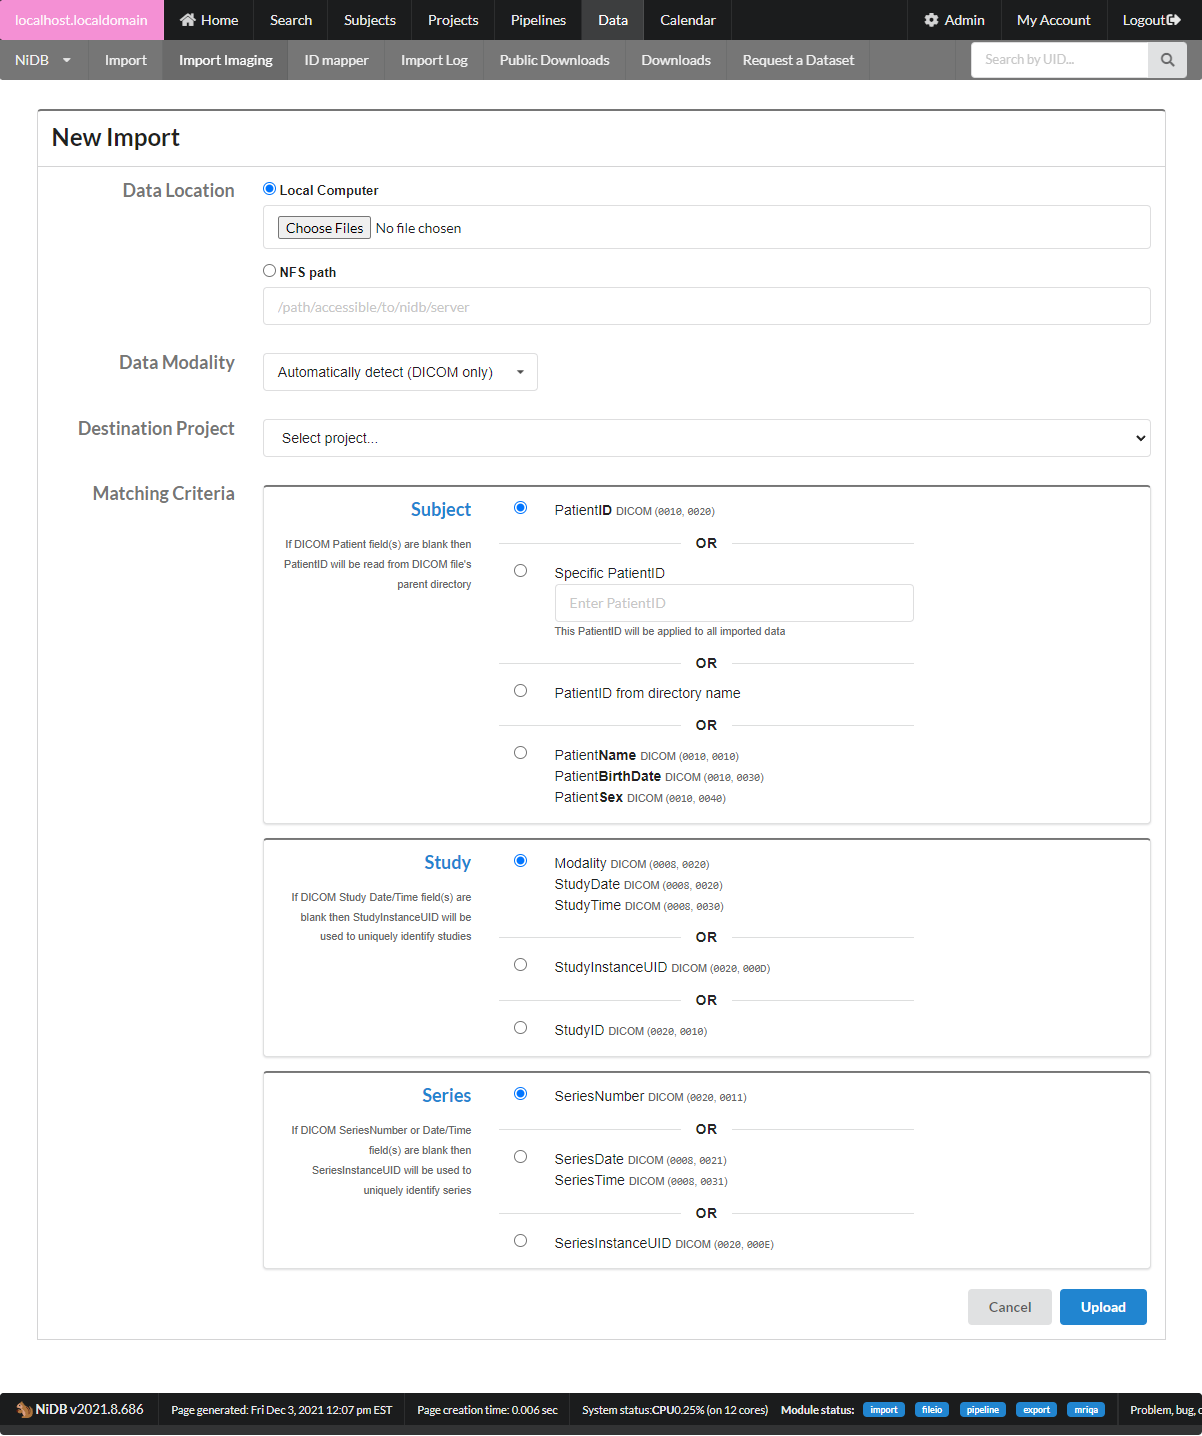 **Data Location**
| Data Location Criteria | Notes |
|---|---|
| Local computer | Upload files via the web browser. 'Local computer' is basically the computer from which the browser is being run, so this may be a Windows PC, Mac, or other browser based computer |
| NFS path | This is a path accessible from NiDB. The NiDB admin will need to configure access to NFS shares |
| Data Modality Criteria | Notes |
|---|---|
| Automatically detect | This option will detect data modality based on the DICOM header. If you are importing DICOM data, use this option |
| Specific modality | If you definitely know the data being imported is all of one modality, chose this. Non-DICOM files are not guaranteed to have any identifying information, so the imported files must be named to encode the information in the name. |
| Unknown | This is a last ditch option to attempt to figure out the modality of the data by filename extension. It probably won't work |
| Matching Field | Notes |
|---|---|
| Subject | PatientID - match the DICOM PatientID field to an existing UID or alternate UID Specific PatientID - this ID will be applied to all imported data, ex S0001 will be the ID used for all data in the entire importPatientID from directory name - get the subject ID from the parent directory of the DICOM file. This will be the highest level directory name, ex for 12345/1/data/MRI the subject ID will be 12345 |
| Study | Default is to match studies by the DICOM fields Modality/StudyDate/StudyTime. Sometimes anonymized DICOM files have these fields blank, so StudyInstanceUID or StudyID must be used instead. If data is not importing as expected, check your DICOM tags and see if these study tags are valid |
| Series | The default is to match series by the DICOM field SeriesNumber. But sometimes this field is blank, and SeriesDate/SeriesTime or SeriesUID must be used instead. If data is not importing as expected, check your DICOM tags to see if these series tags are valid |
| Import Stage | Possible Status & Description |
|---|---|
| Started | The upload has been submitted. You will likely see this status if you are importing data via NFS, rather than through local web upload |
| Upload | Uploading - The data is being uploaded Uploaded - Data has finished uploading |
| Parsing | Parsing - The data is being parsed. Depending on the size of the dataset, this could be minutes, hours, or days Parsed - The data has been parsed, meaning the IDs, series, and other information have been read and the data organized into a Subject→Study→Series heirarchy. Once parsing is complete, you must select the data to be archived |
| Archive | Archiving - The data is being archived. Depending on the size of the dataset, this could be minutes, hours, or days Archived - The data is finished archiving |
| Complete | The entire import process has finished |
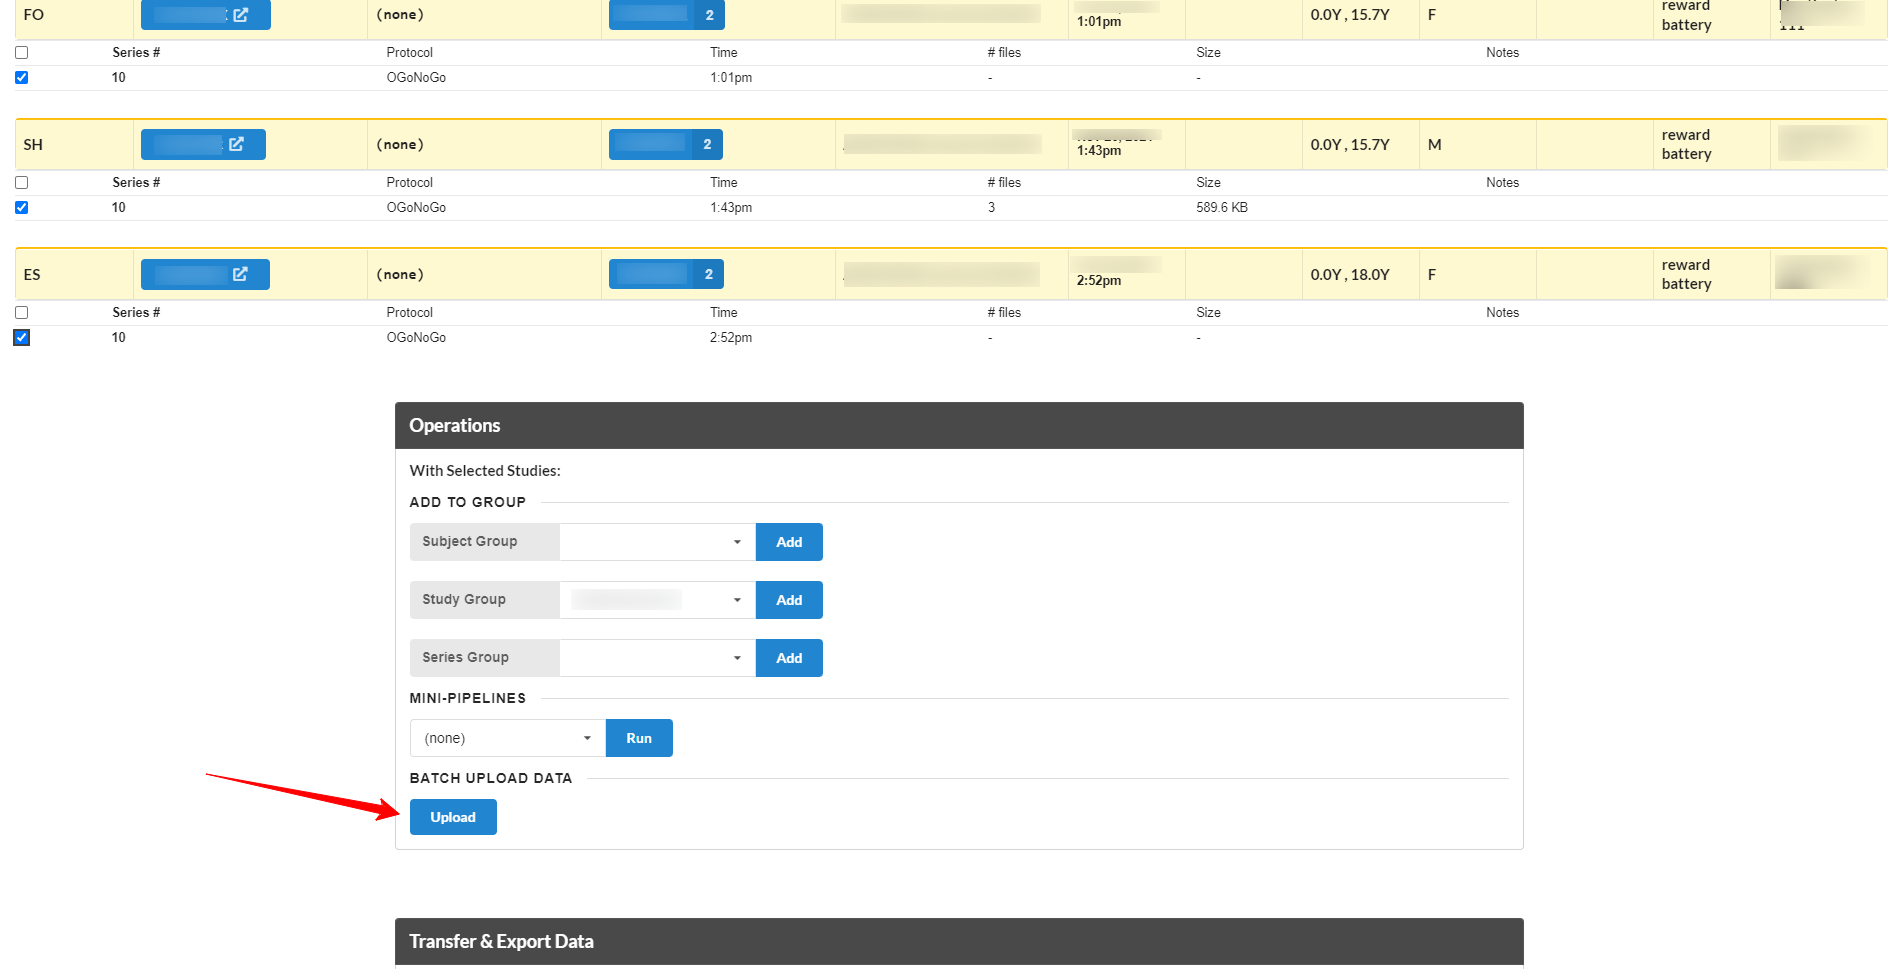 This will display a list of just those series, with an area to drag\&drop files onto. Existing files for each series are displayed on the right side of the page.
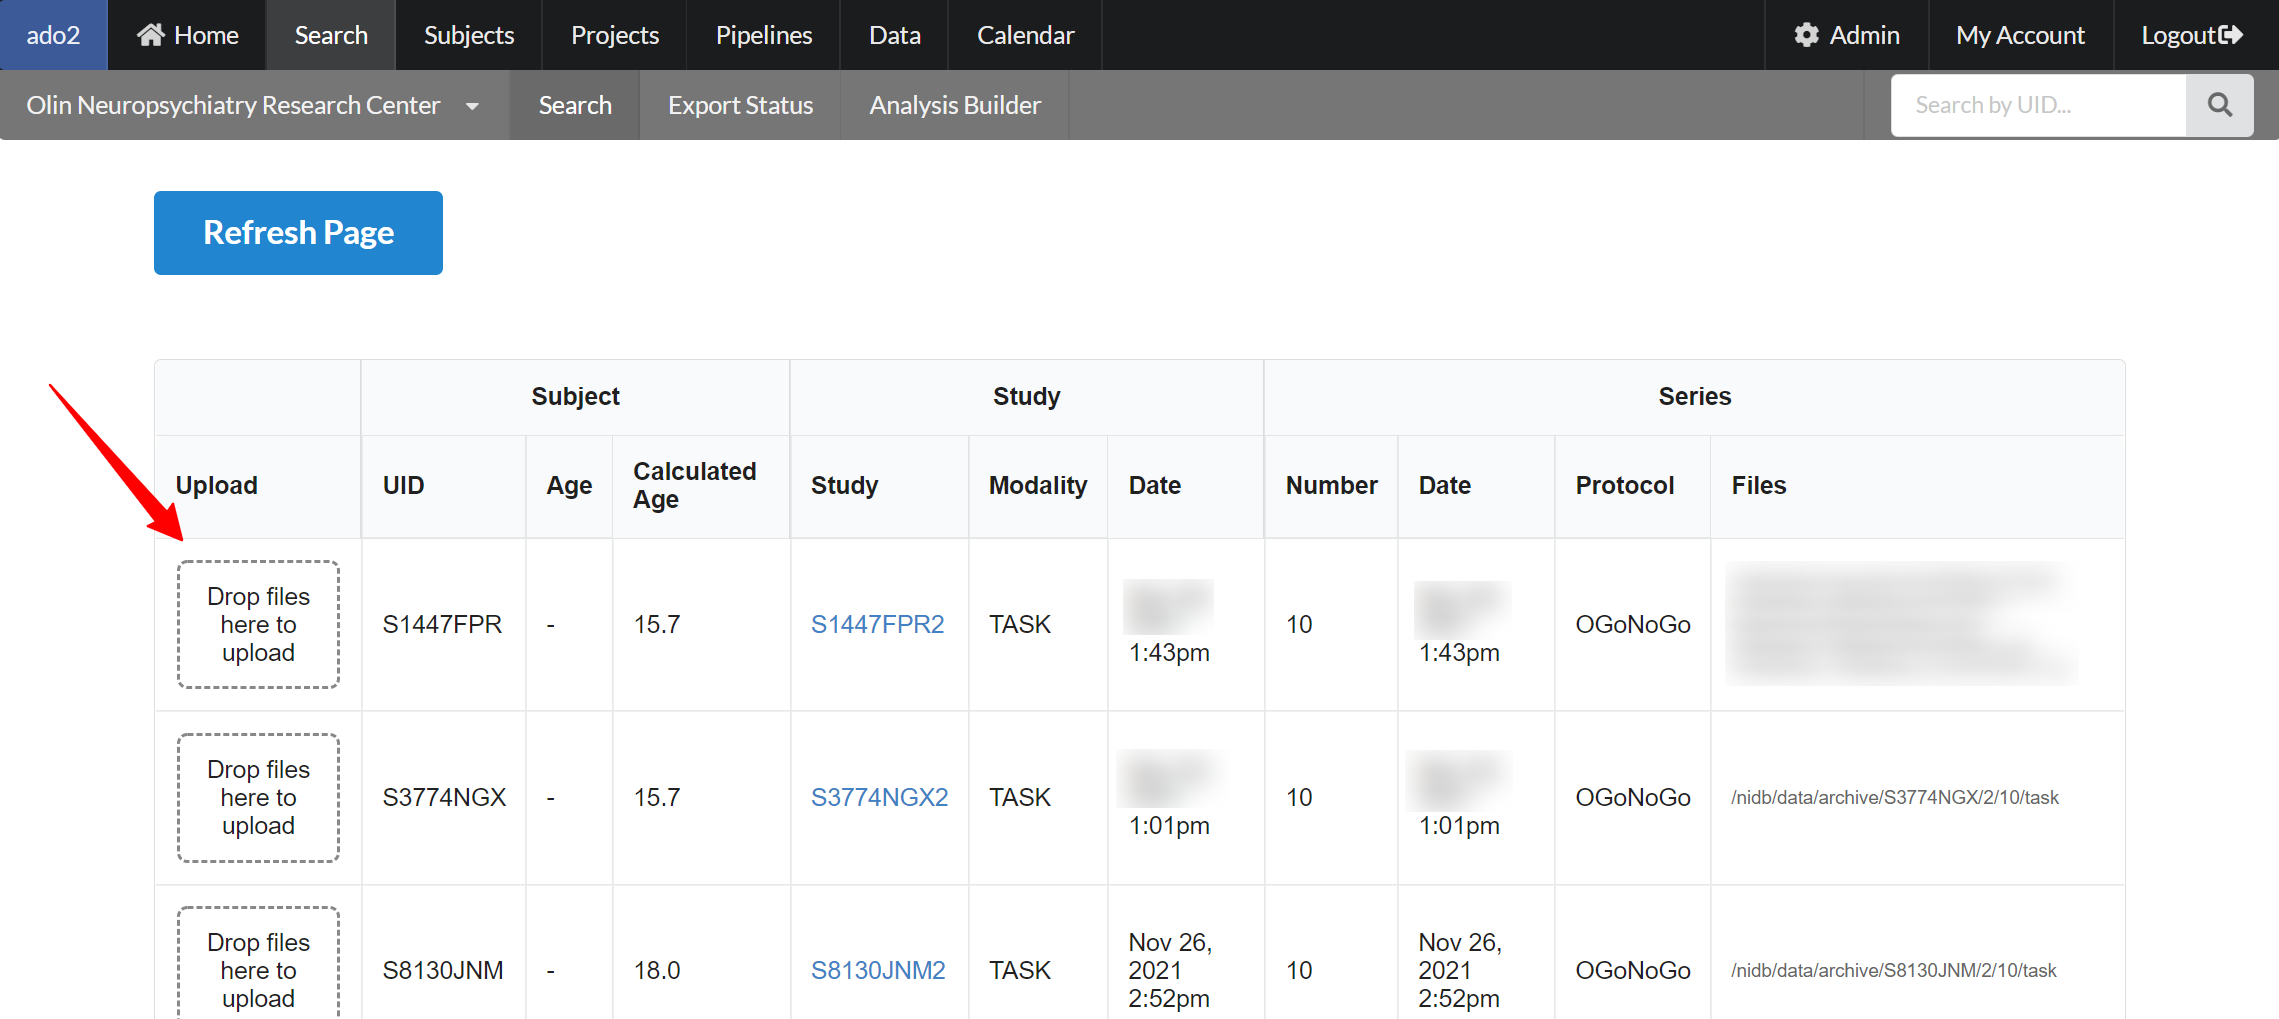 Drag and drop files onto those series, and click **Refresh Page** to view the newly uploaded files.