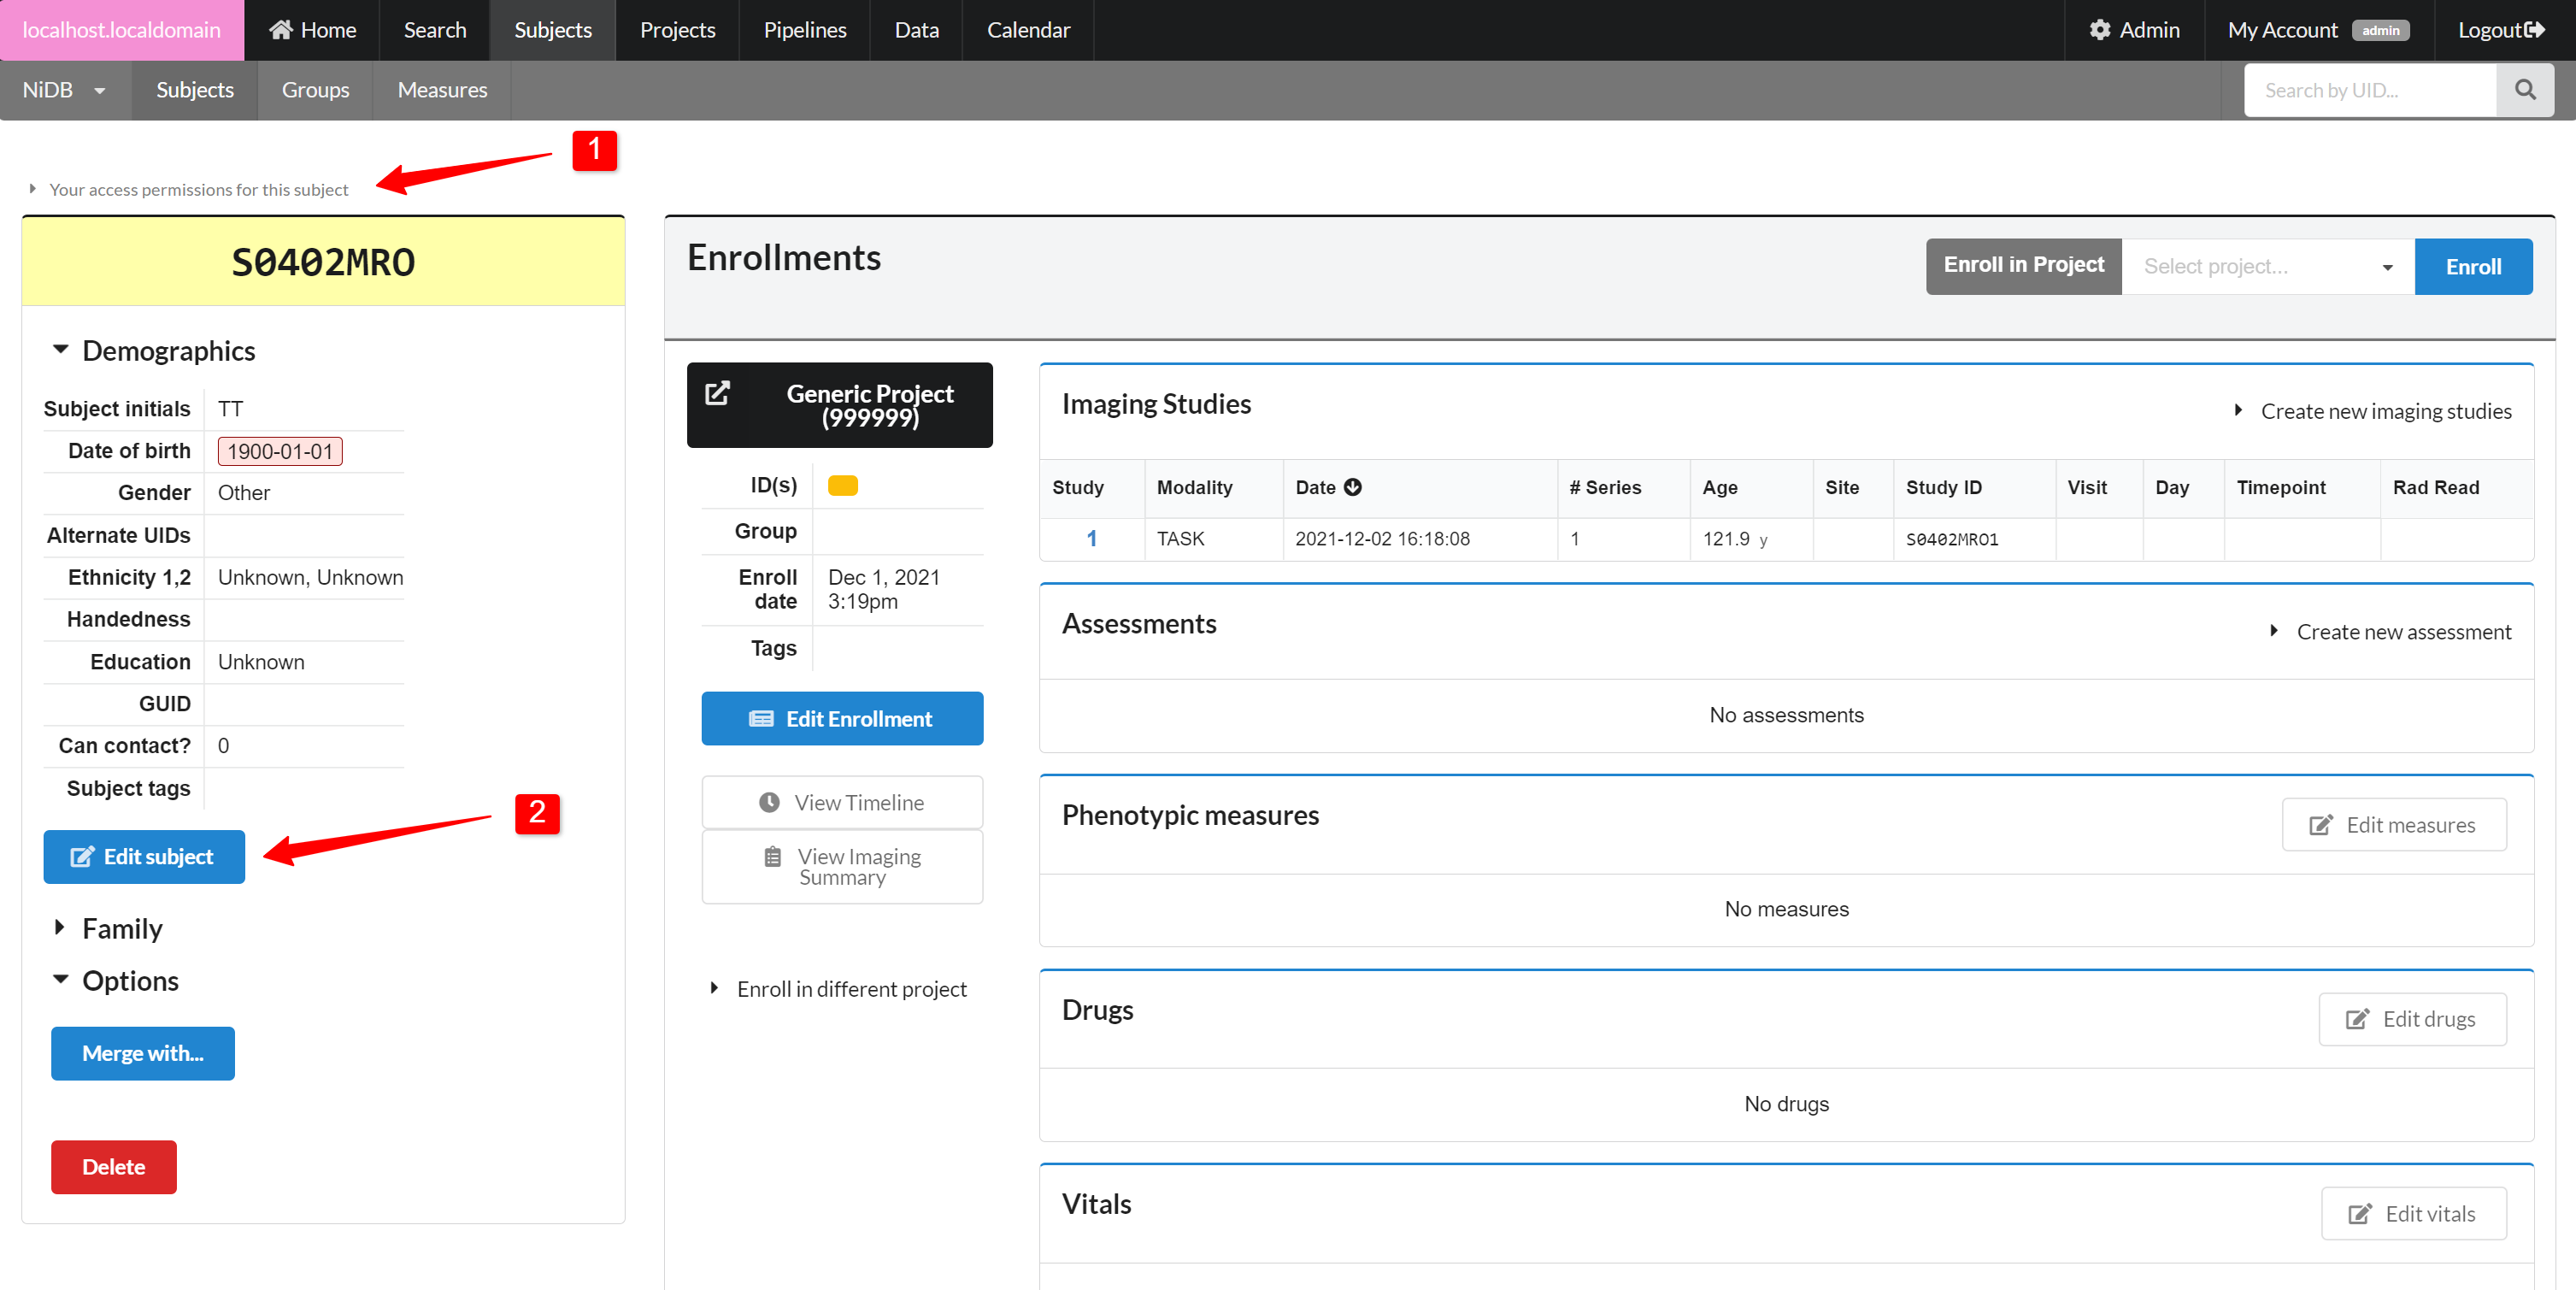
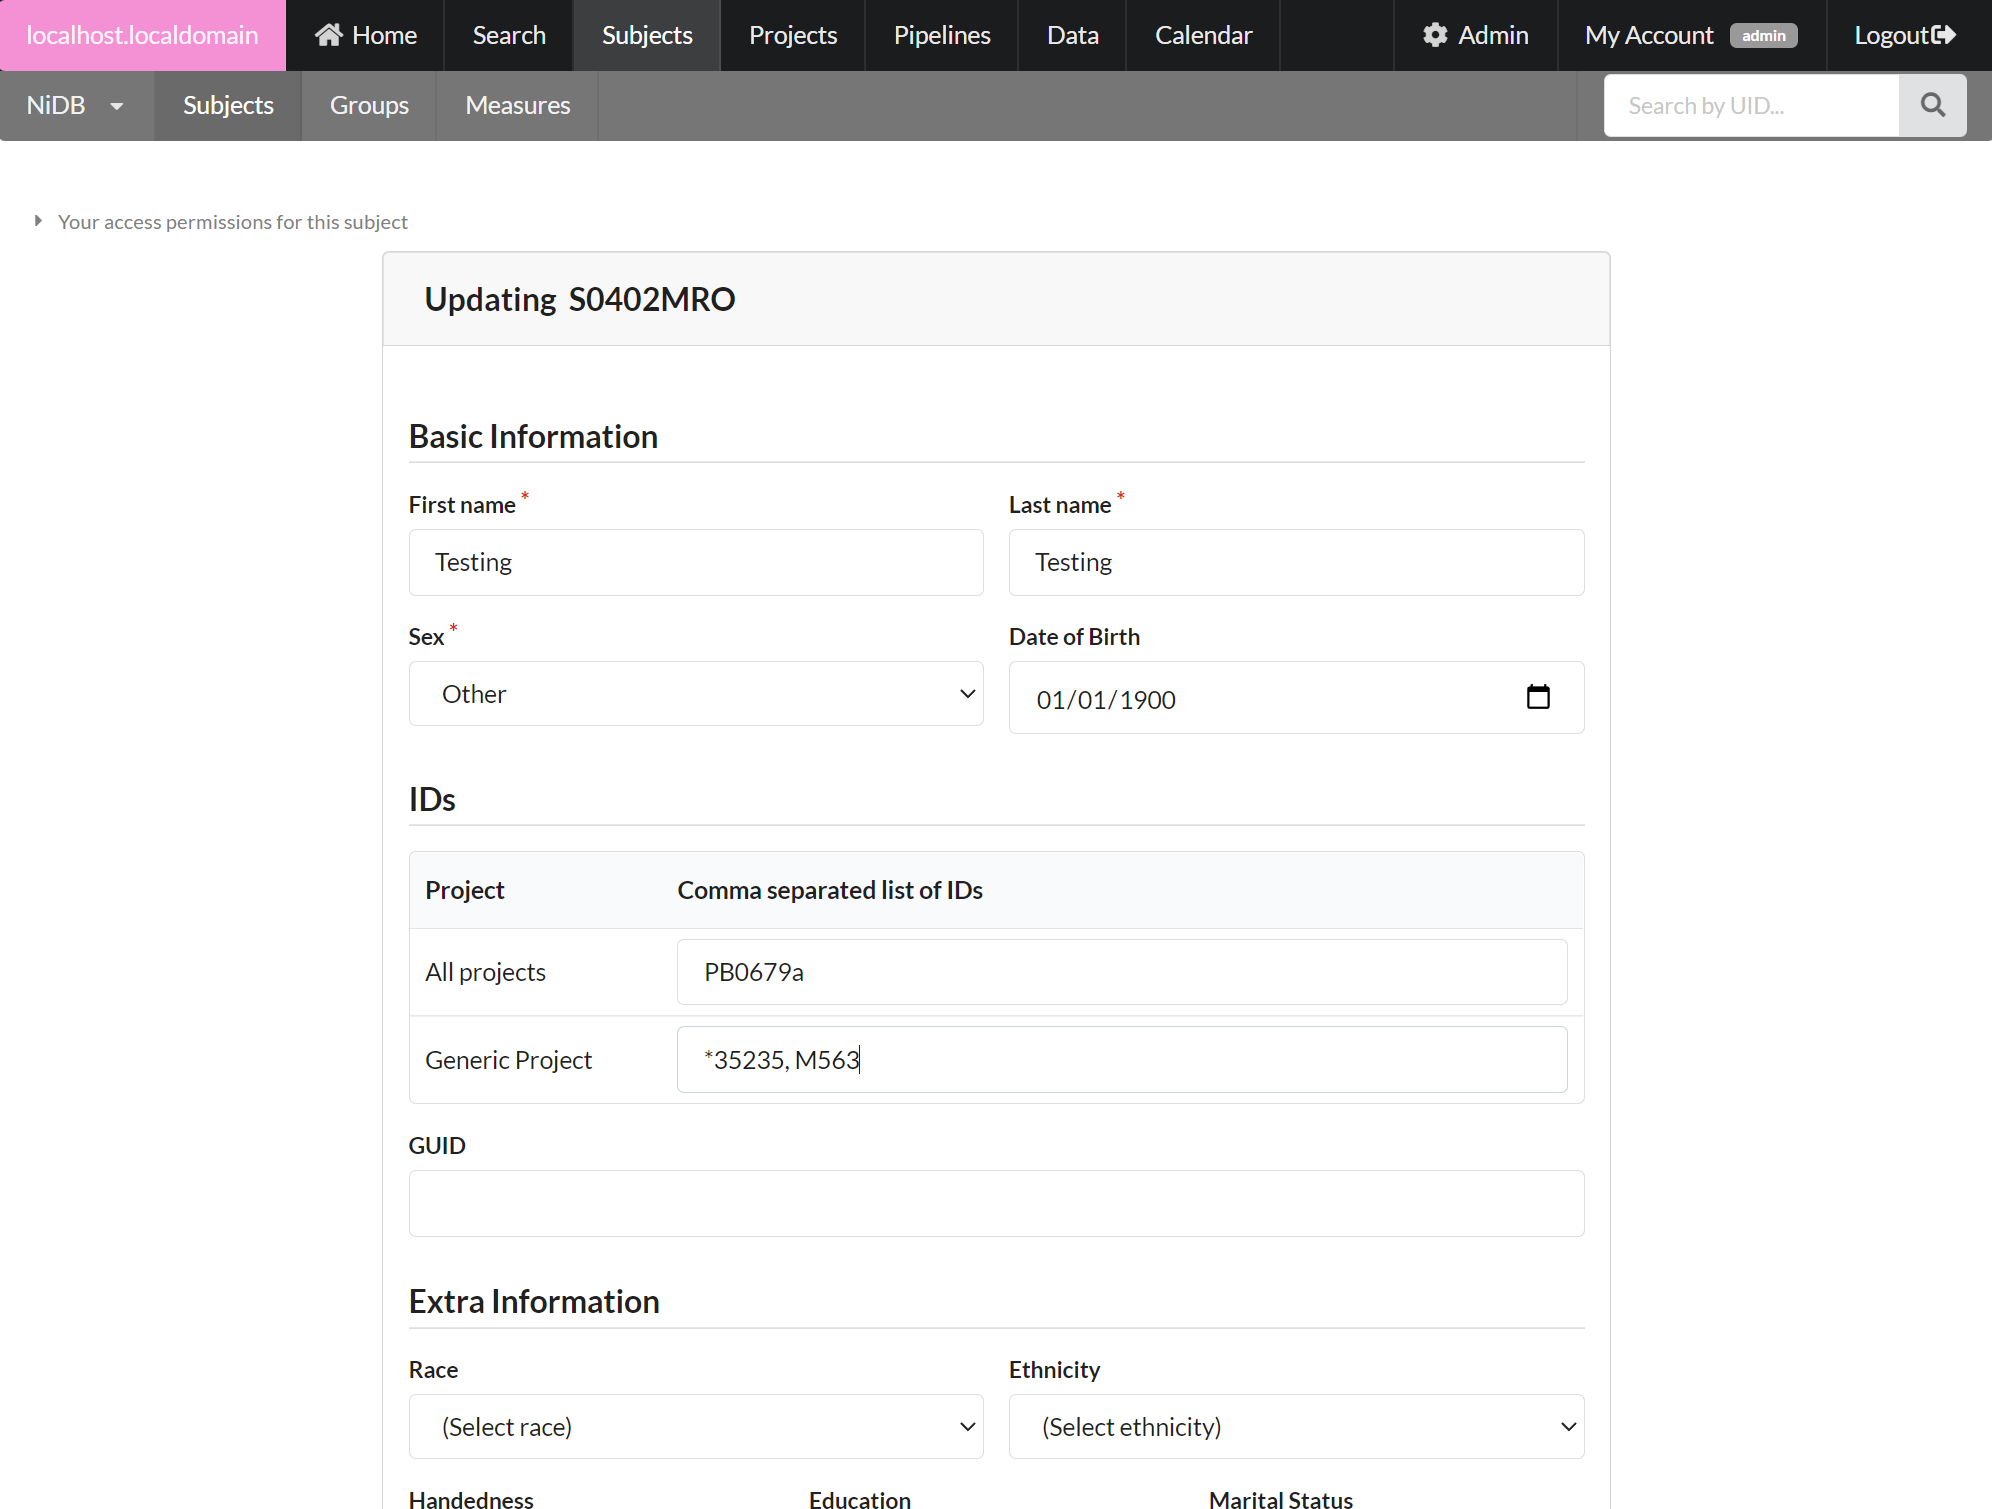
 When editing subject demographic information, required fields are highlighted. Most fields are optional. You can edit IDs on this page, which are reflected for the subject in all projects. The primary alternate ID should have an asterisk in front of it. The primary alternate ID will now be with the main ID for this subject in the specified project. See the ID note below. Click **Update** to save the demographic information. Confirm on the following page.
 {% hint style="info" %}
**A Note About IDs** - Identifiers help identify a subject. They're supposed to be unique, but a subject may be assigned IDs after being enrolled in multiple projects. Each project may uniquely identify the subject by the UID which is automatically generated by the system. Or the subject may be identified by an ID generated somewhere else. Maybe the ID is generated by RedCap, or you are given a list of IDs that you need to use for your subjects. If this subject is enrolled in multiple projects, they might have multiple IDs. NiDB is designed to handle this, but it can be a little complicated. Here are some definitions that may help make it simpler
{% endhint %}
**Below are some terms used to describe IDs within NiDB**
{% hint style="info" %}
**A Note About IDs** - Identifiers help identify a subject. They're supposed to be unique, but a subject may be assigned IDs after being enrolled in multiple projects. Each project may uniquely identify the subject by the UID which is automatically generated by the system. Or the subject may be identified by an ID generated somewhere else. Maybe the ID is generated by RedCap, or you are given a list of IDs that you need to use for your subjects. If this subject is enrolled in multiple projects, they might have multiple IDs. NiDB is designed to handle this, but it can be a little complicated. Here are some definitions that may help make it simpler
{% endhint %}
**Below are some terms used to describe IDs within NiDB**
| Term | Definition |
|---|---|
| UID | Unique ID, assigned by the system. This ID is unique to this installation of NiDB. If this subject is transferred to another NiDB installation, this ID will change |
| Alternate IDs | Comma separated list of IDs that are associated with this subject |
| Primary alternate ID | This is an alternate ID, which should be unique within the project. For example, if the project uses IDs in the format |
| Study Num | The unique number assigned by the system for each of a subject's studies. This number is unique within a subject, regardless of enrollment. For example, if a subject is enrolled in multiple projects, they may have studies 1,2,3 in project A and studies 5,6 in project B |
| StudyID | This ID basically concatenates the UID and the study num: for example S1234ABC8 |
| Alternate StudyID | Sometimes an individual imaging session (study) has it's own unique ID. For example, some imaging centers will give a subject a new ID every time they go into the scanner. This is a place to store that ID |
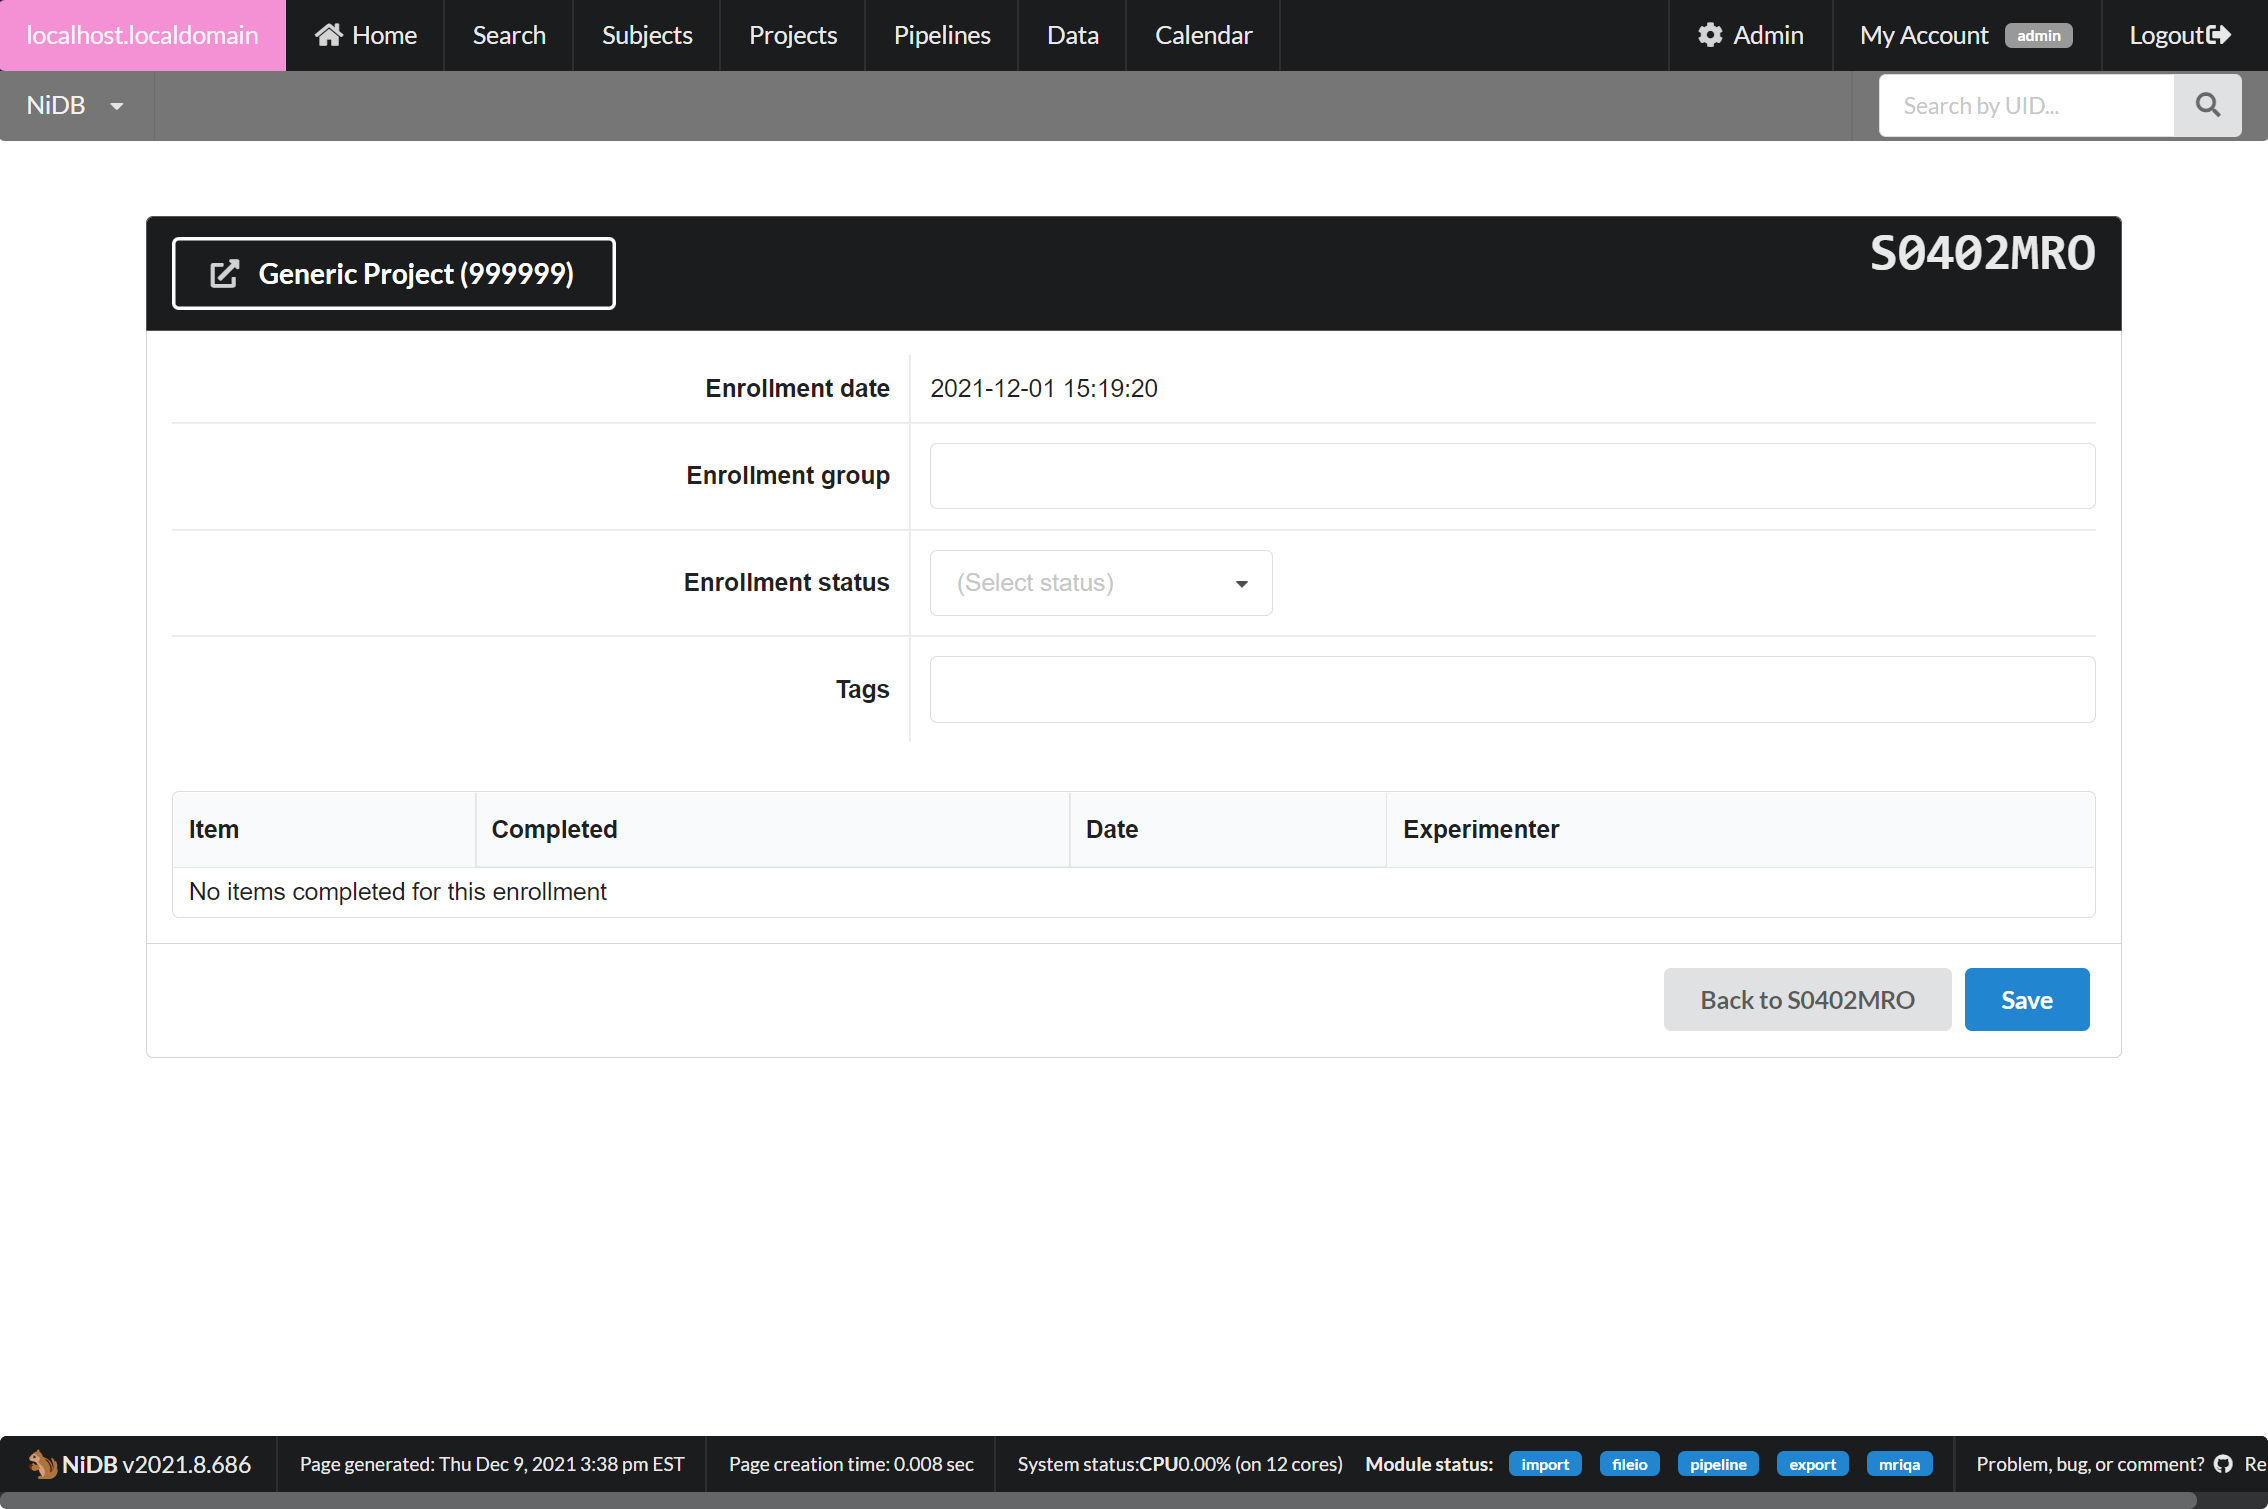
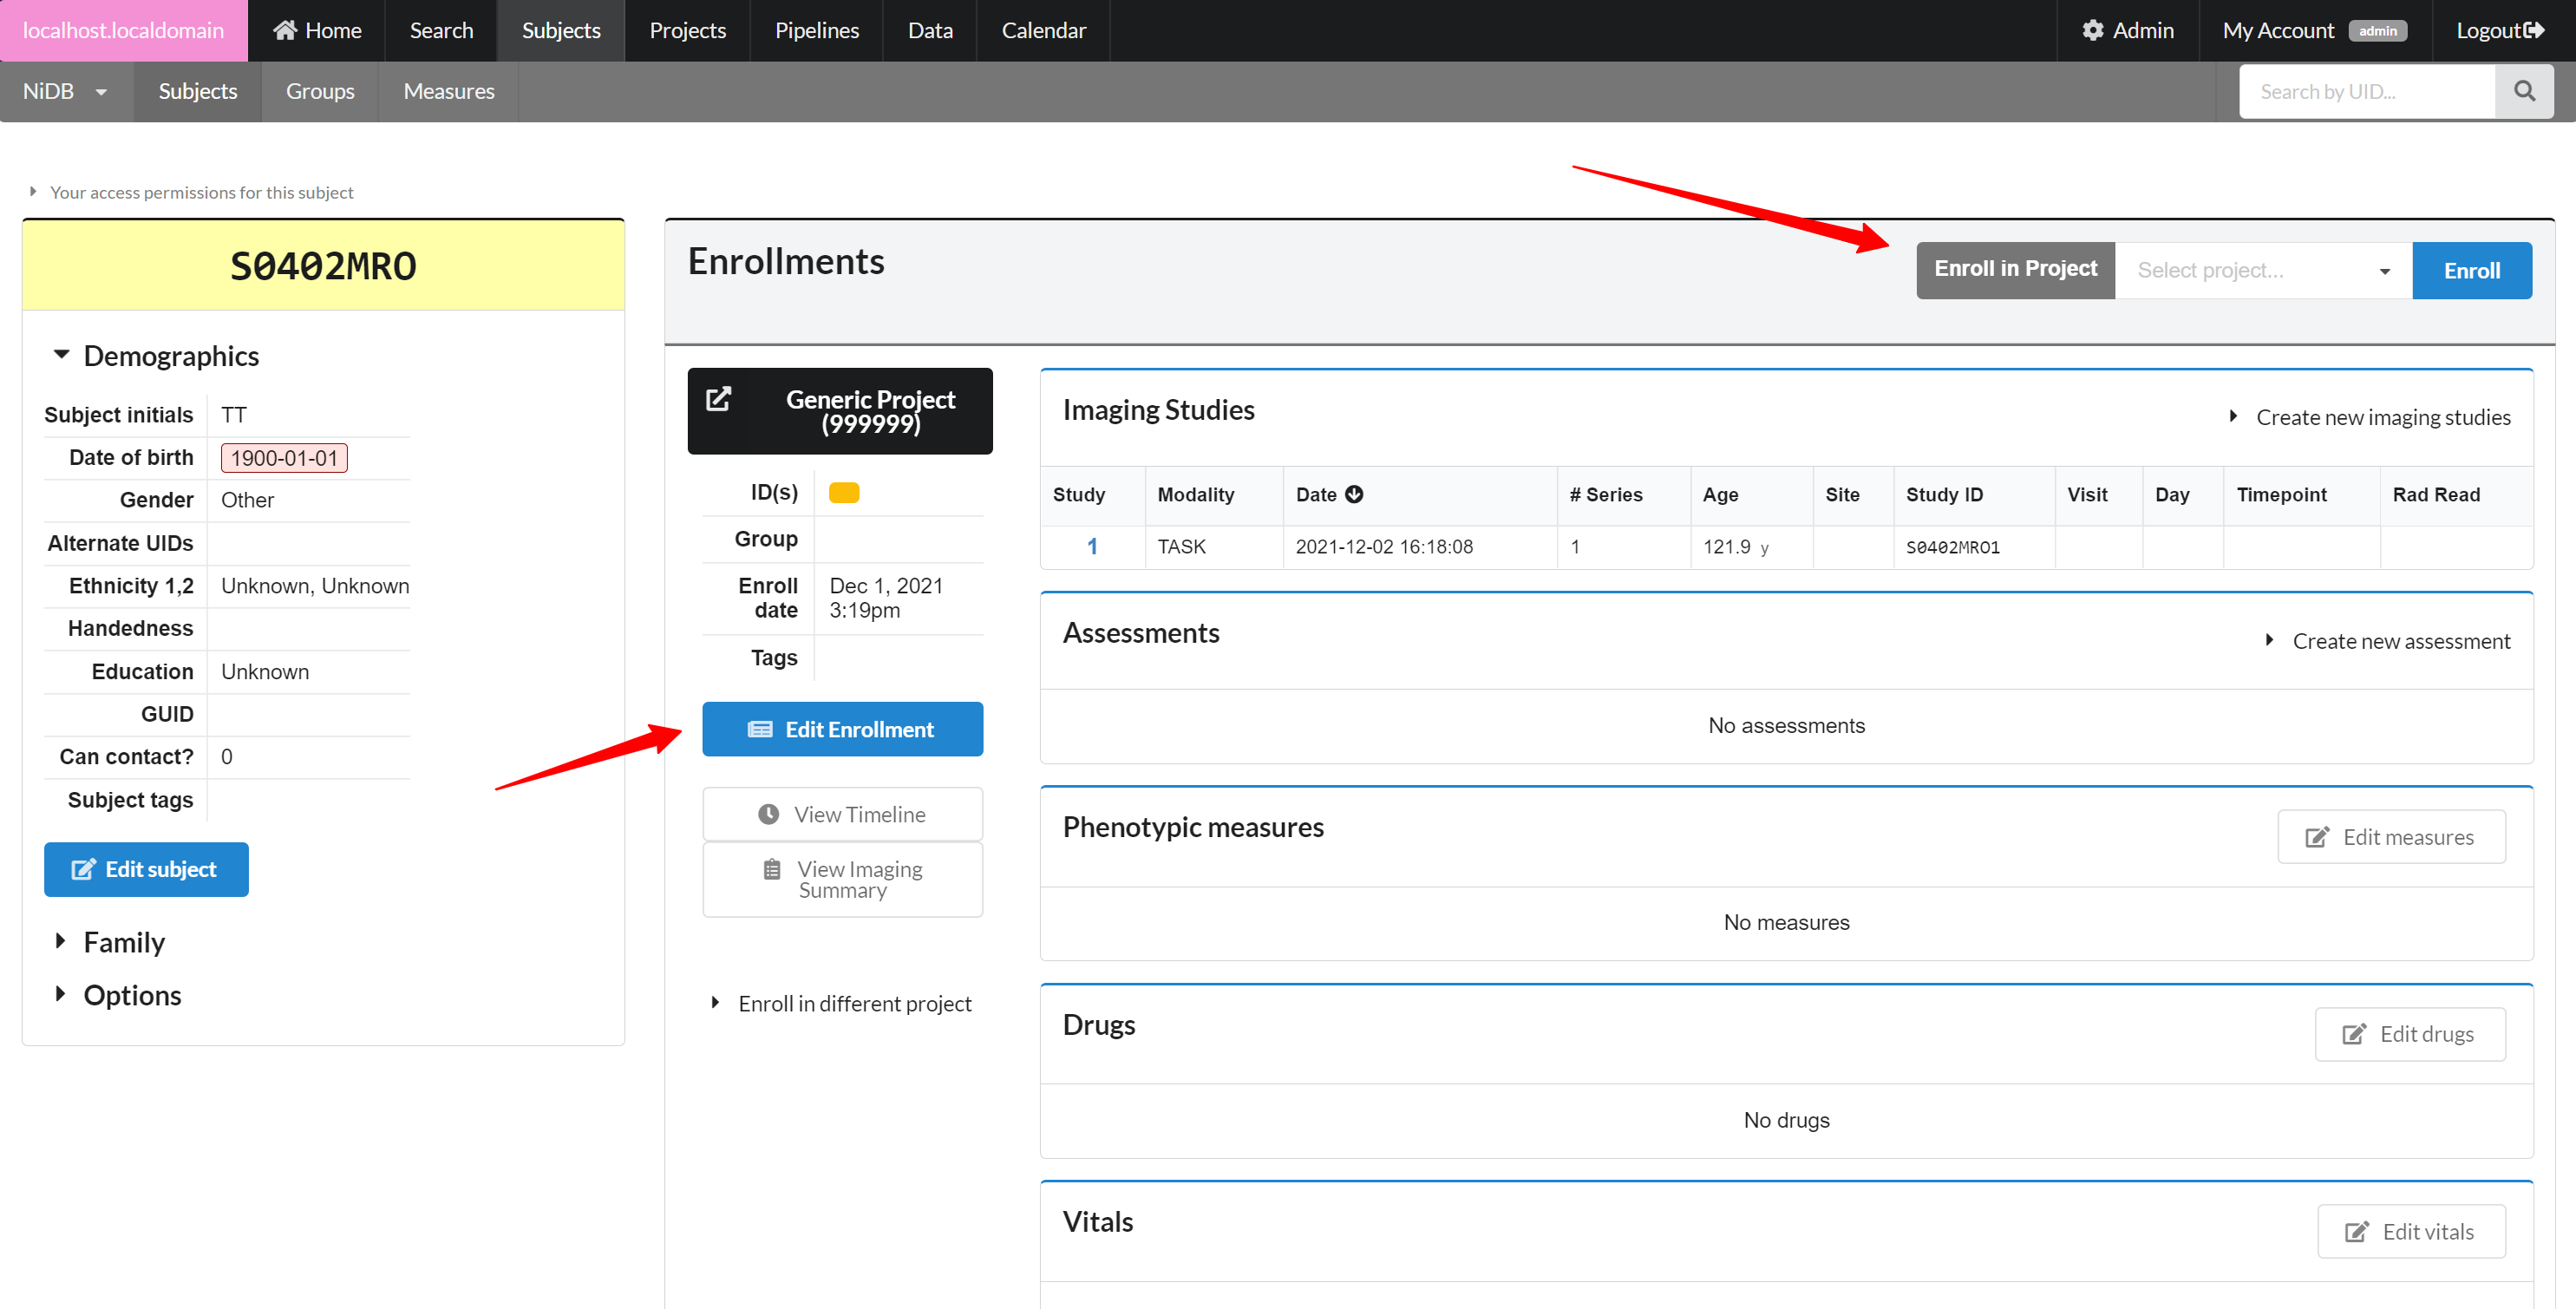 You can edit an existing enrollment by clicking the Edit Enrollment button. There isn't a whole of information available on this page, but enrollment checklists can be useful to check if a subject has completed all of the items for the project. Subjects can be marked as excluded, complete. Enrollment group can also be specified, such as CONTROL or PATIENT.
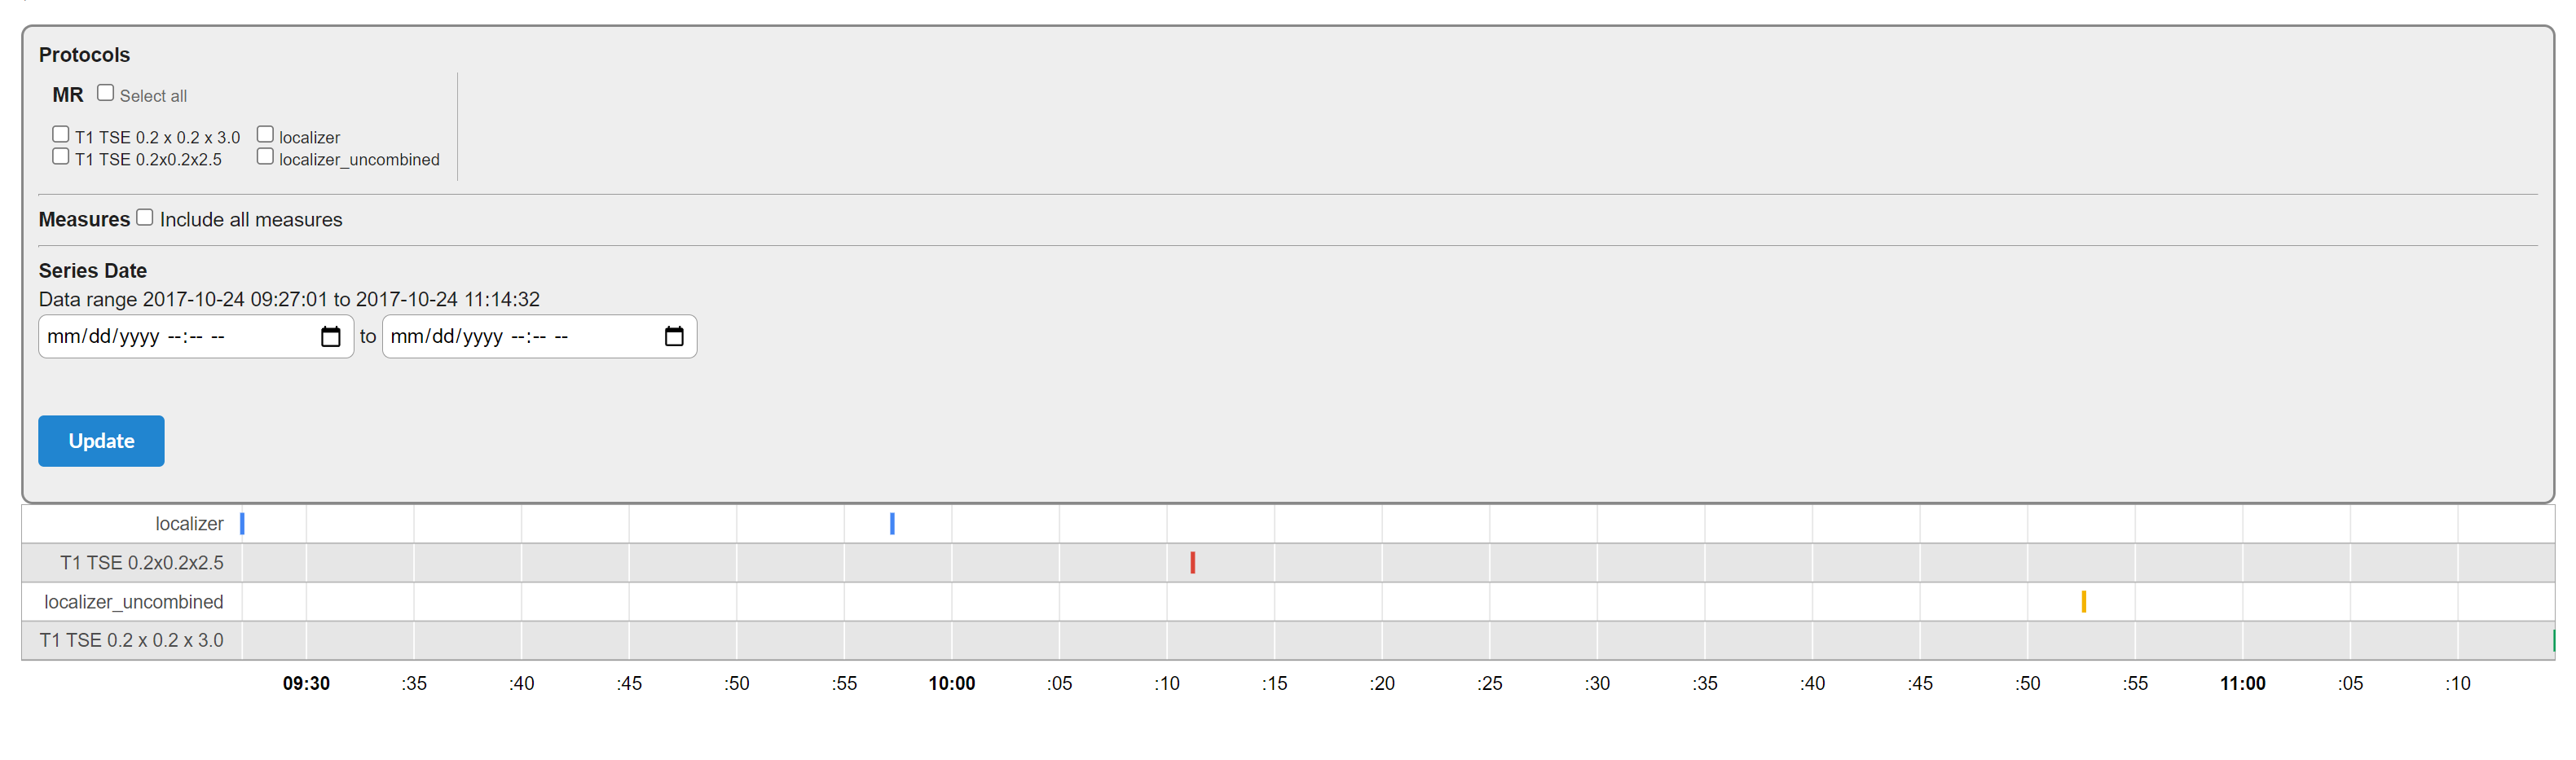
 **Timelines**
For projects with a chronological component, you can view a timeline of series for this enrollment. Click the **View Timeline** button on the subject's page, for the enrollment. It will display a timeline of series. Bottom axis displays the date/time. You can change the parameters of the timeline by selecting date range or series.
**Timelines**
For projects with a chronological component, you can view a timeline of series for this enrollment. Click the **View Timeline** button on the subject's page, for the enrollment. It will display a timeline of series. Bottom axis displays the date/time. You can change the parameters of the timeline by selecting date range or series.
 **Enroll in Different Project**
If your subject is enrolled in a project, but you need to move the enrollment (and all of the imaging studies, enrollment info, assessments, measures, drugs, and vitals) into a different project, you can do that by expanding the **Enroll in different project** section. Select the new project, and click **Move**. You must be an admin to do this.
#### Merging
You must have admin permissions to merge subjects. To merge subjects, first go into one of the subject's main pages. On the lefthand side of the page, expand the **Operations** section. Click **Merge with...** and it will bring up the merge page. On the top of the page, you can add other UIDs you want to merge. Once all subjects are added (up to 4), they will be displayed side-by-side.
**Enroll in Different Project**
If your subject is enrolled in a project, but you need to move the enrollment (and all of the imaging studies, enrollment info, assessments, measures, drugs, and vitals) into a different project, you can do that by expanding the **Enroll in different project** section. Select the new project, and click **Move**. You must be an admin to do this.
#### Merging
You must have admin permissions to merge subjects. To merge subjects, first go into one of the subject's main pages. On the lefthand side of the page, expand the **Operations** section. Click **Merge with...** and it will bring up the merge page. On the top of the page, you can add other UIDs you want to merge. Once all subjects are added (up to 4), they will be displayed side-by-side.
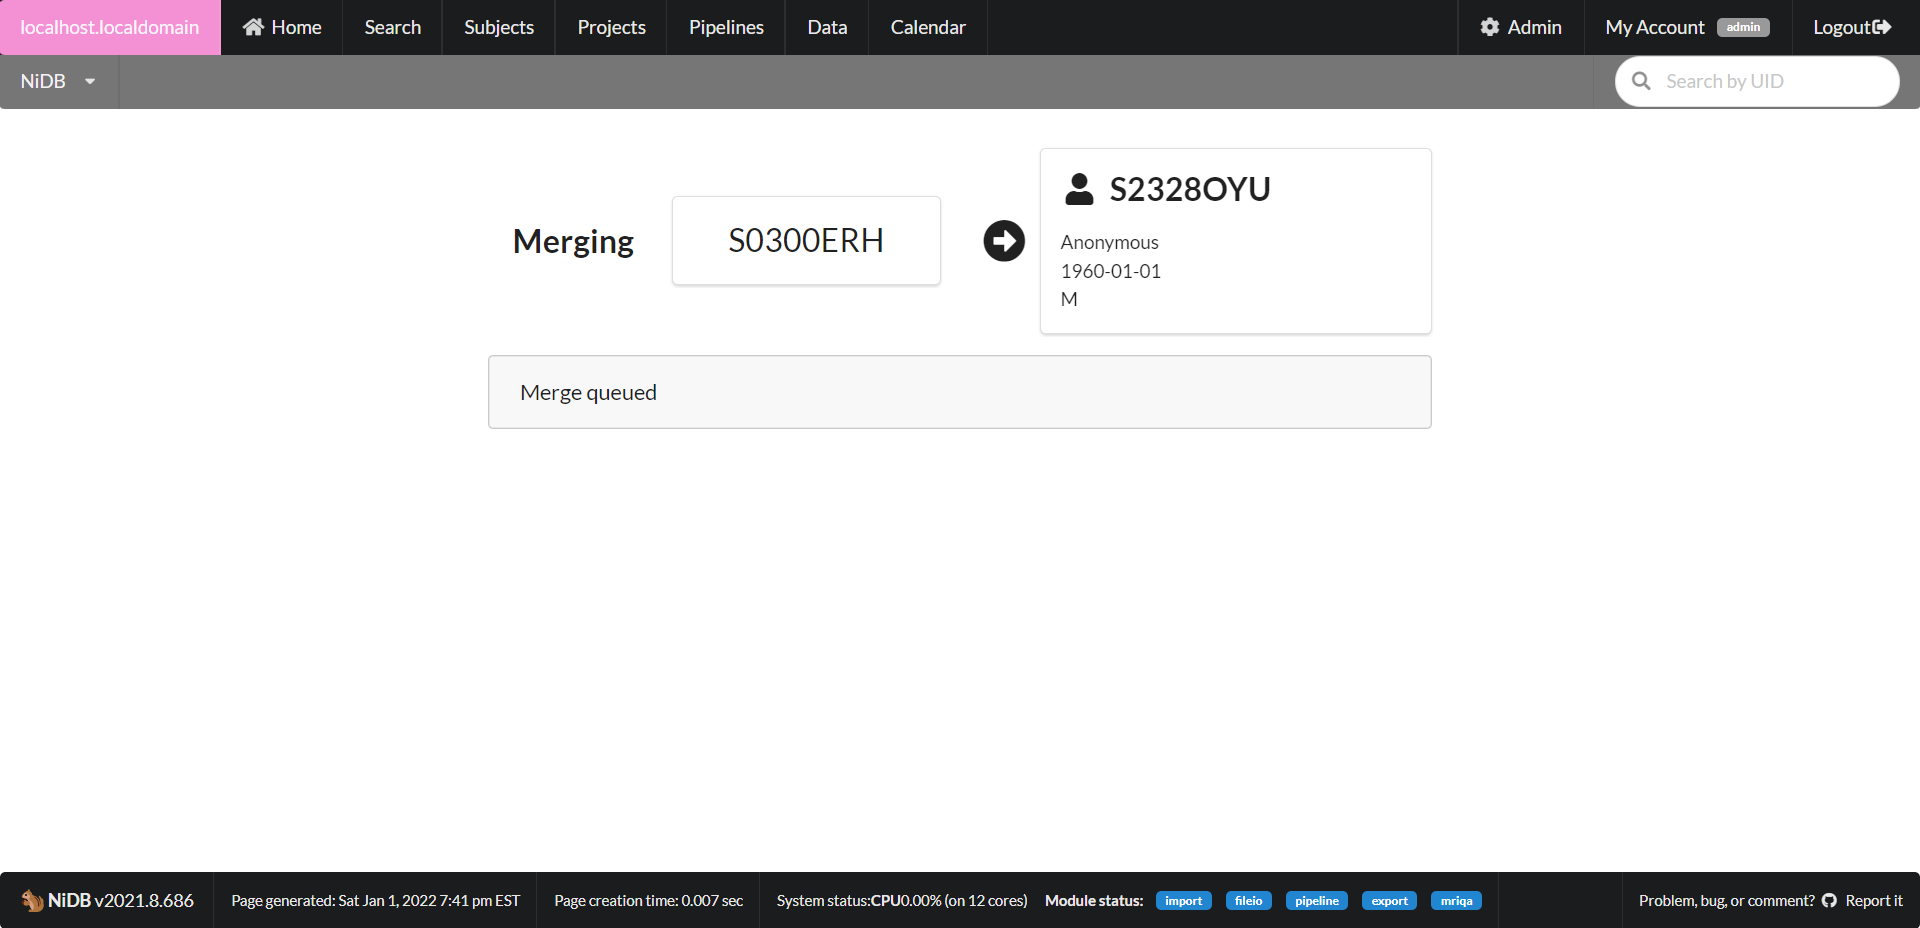
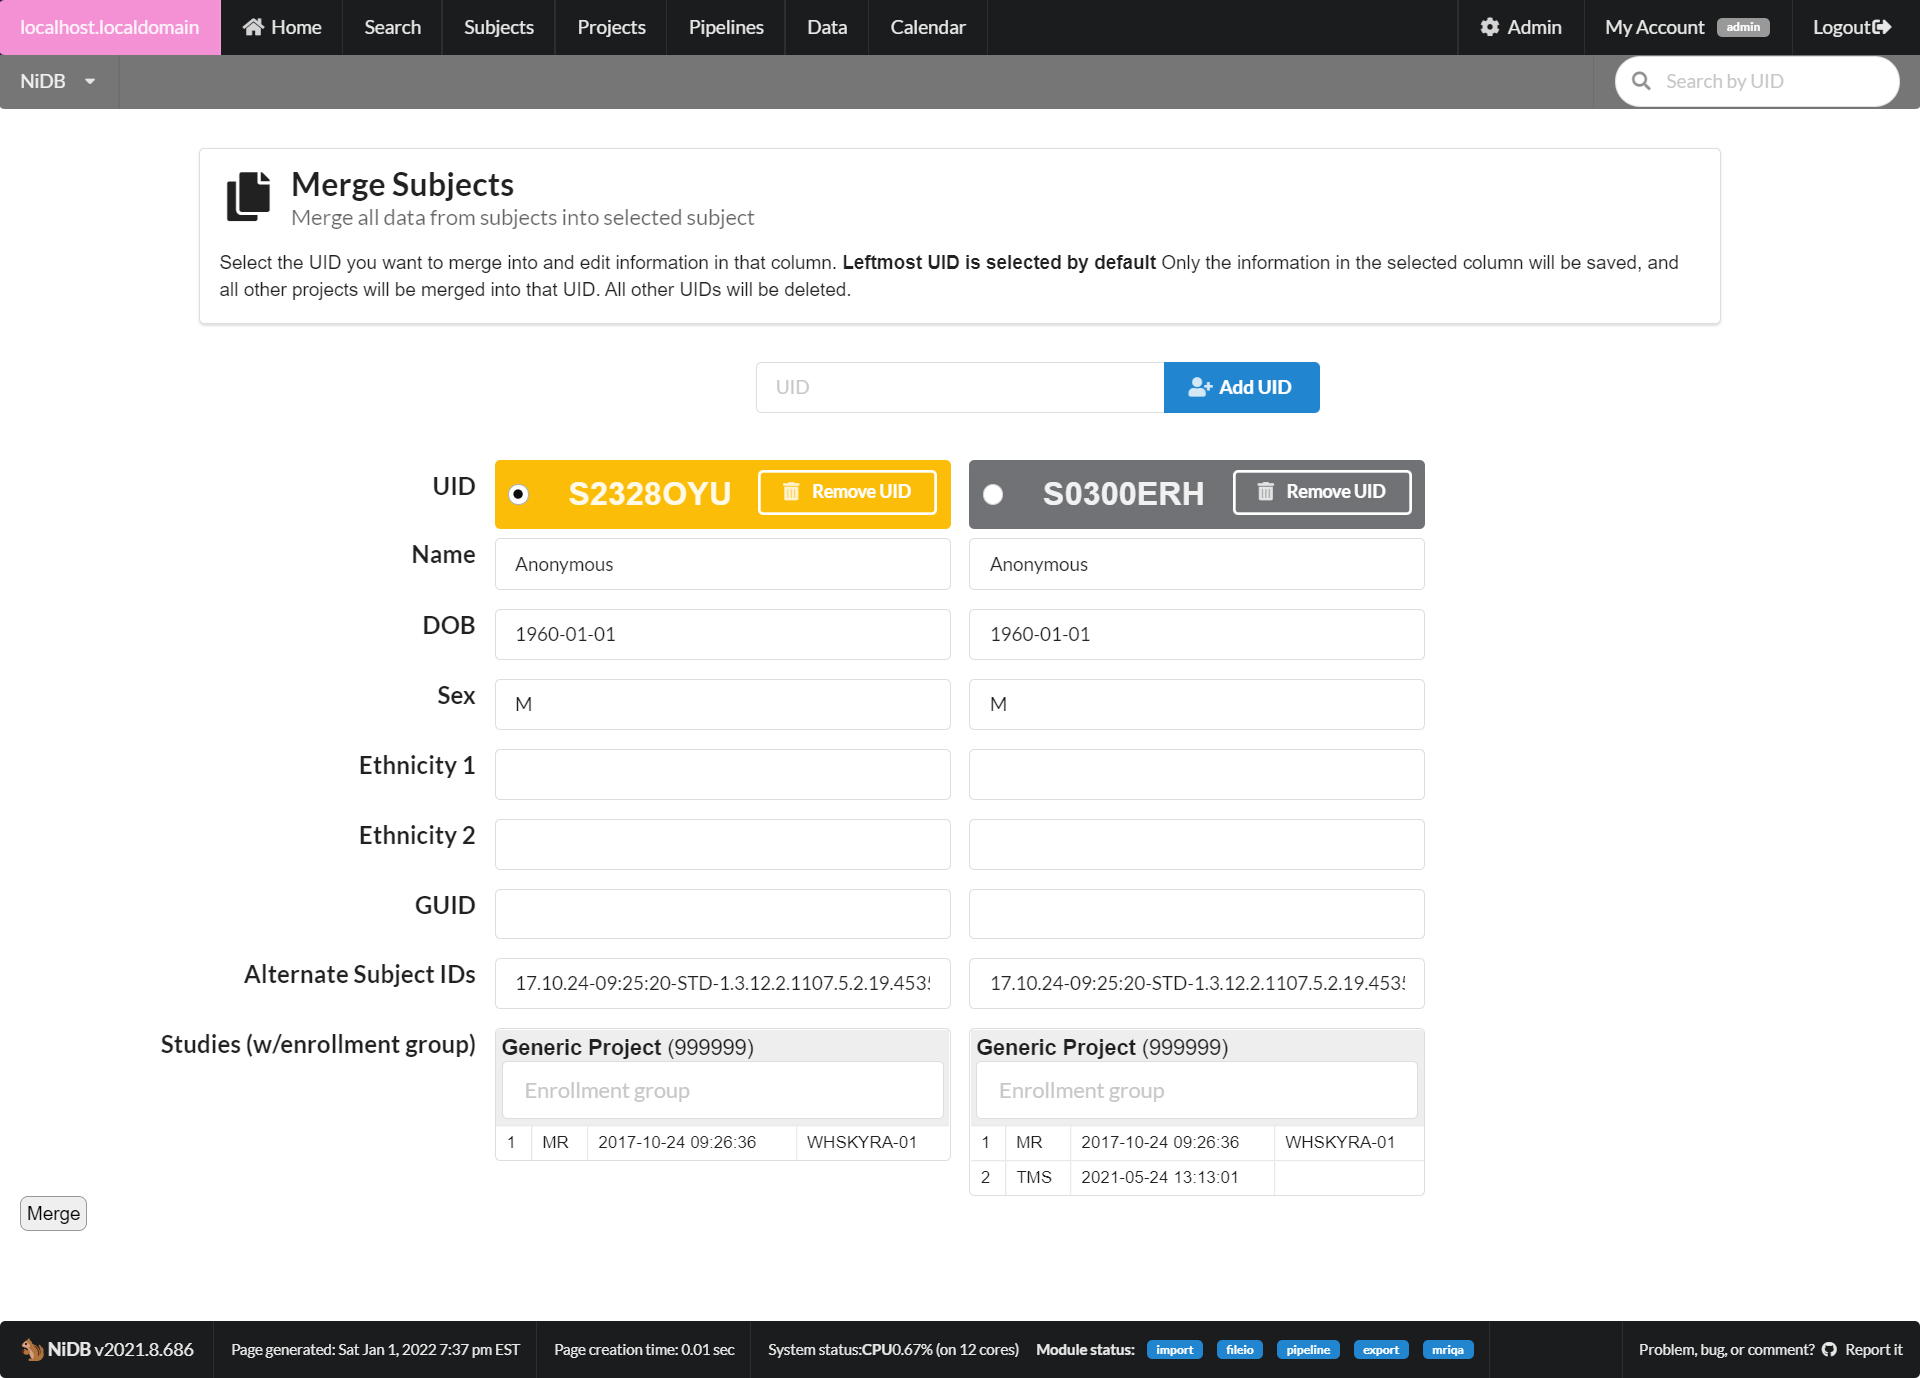 Select the UID to be the final merged UID. Enter all demographic information that will be in the final UID into that column. Once merged, only the information in that column will be saved for the final subject. All other subjects will be marked inactive. All of the imaging studies will be moved from the other subjects to the final subject. When all information is complete, click Merge. The merge will be queued and will be run in the background. Check the status of the merge under **My Account** → **File IO**.
 #### Deleting
Only admins can delete subjects. To delete a subject, go to the subject's page. On the lefthand side, expand the **Operations** section and click the **Delete** button. It will confirm that you want to delete this subject. Confirm on the next page. Subjects are not actually removed from the NiDB system, but are instead marked as *inactive*. *Inactive* subjects do not appear in search results or summaries, but will show up in certain sections of the project page and if searching by UID directly. A subject can be undeleted if necessary.
#### Undeleting
Subjects can be undeleted by following the same process as deleting a subject, except the Undelete button will appear under the Operations section of the subject's page.
### Managing Studies
#### MRI/DICOM vs non-MRI/DICOM Studies
**DICOM Derived** - Studies derived from DICOM data are displayed differently than other modalities because they contain detailed header files which are imported automatically. Because of the complex ways in which subject/study/series heirarchy are stored in DICOM files, archiving is done completely automatically.
**MRI** - MRI studies allow for storage of behavioral data associated with fMRI tasks. Other data such as eye tracking, simultaneous EEG, or other series specific data can be stored in the behavioral data section of MRI series.
**All Other Modalities** - Series information is less detailed, series can be created manually, and there is no option to store behavioral data for each series.
#### Editing Study Information
For any modality, edit a study by viewing the study page and clicking the **Edit Study** button on the lower left of the page. Depending on the modality, different study information may be available.
For non-MRI modalities, the Study date/time (and all series date/times), visit type, visit number, and visit timepoint can be edited directly on the study page without clicking the **Edit Study** button.
#### Merging Studies
Occasionally, weird things can happen when importing data such as each series of an MRI study being inserted into it's own study. If the single study had 15 series, it might create 15 seperate studies, each with one series. This can be fixed by merging all of the series into one study. To merge studies (of the same subject/enrollment/modality) together, go into the study page and click the **Operations** button. A sub-menu will pop up with a **Merge Study with...** button. A list of available studies will be displayed.
#### Deleting
Only admins can delete subjects. To delete a subject, go to the subject's page. On the lefthand side, expand the **Operations** section and click the **Delete** button. It will confirm that you want to delete this subject. Confirm on the next page. Subjects are not actually removed from the NiDB system, but are instead marked as *inactive*. *Inactive* subjects do not appear in search results or summaries, but will show up in certain sections of the project page and if searching by UID directly. A subject can be undeleted if necessary.
#### Undeleting
Subjects can be undeleted by following the same process as deleting a subject, except the Undelete button will appear under the Operations section of the subject's page.
### Managing Studies
#### MRI/DICOM vs non-MRI/DICOM Studies
**DICOM Derived** - Studies derived from DICOM data are displayed differently than other modalities because they contain detailed header files which are imported automatically. Because of the complex ways in which subject/study/series heirarchy are stored in DICOM files, archiving is done completely automatically.
**MRI** - MRI studies allow for storage of behavioral data associated with fMRI tasks. Other data such as eye tracking, simultaneous EEG, or other series specific data can be stored in the behavioral data section of MRI series.
**All Other Modalities** - Series information is less detailed, series can be created manually, and there is no option to store behavioral data for each series.
#### Editing Study Information
For any modality, edit a study by viewing the study page and clicking the **Edit Study** button on the lower left of the page. Depending on the modality, different study information may be available.
For non-MRI modalities, the Study date/time (and all series date/times), visit type, visit number, and visit timepoint can be edited directly on the study page without clicking the **Edit Study** button.
#### Merging Studies
Occasionally, weird things can happen when importing data such as each series of an MRI study being inserted into it's own study. If the single study had 15 series, it might create 15 seperate studies, each with one series. This can be fixed by merging all of the series into one study. To merge studies (of the same subject/enrollment/modality) together, go into the study page and click the **Operations** button. A sub-menu will pop up with a **Merge Study with...** button. A list of available studies will be displayed.
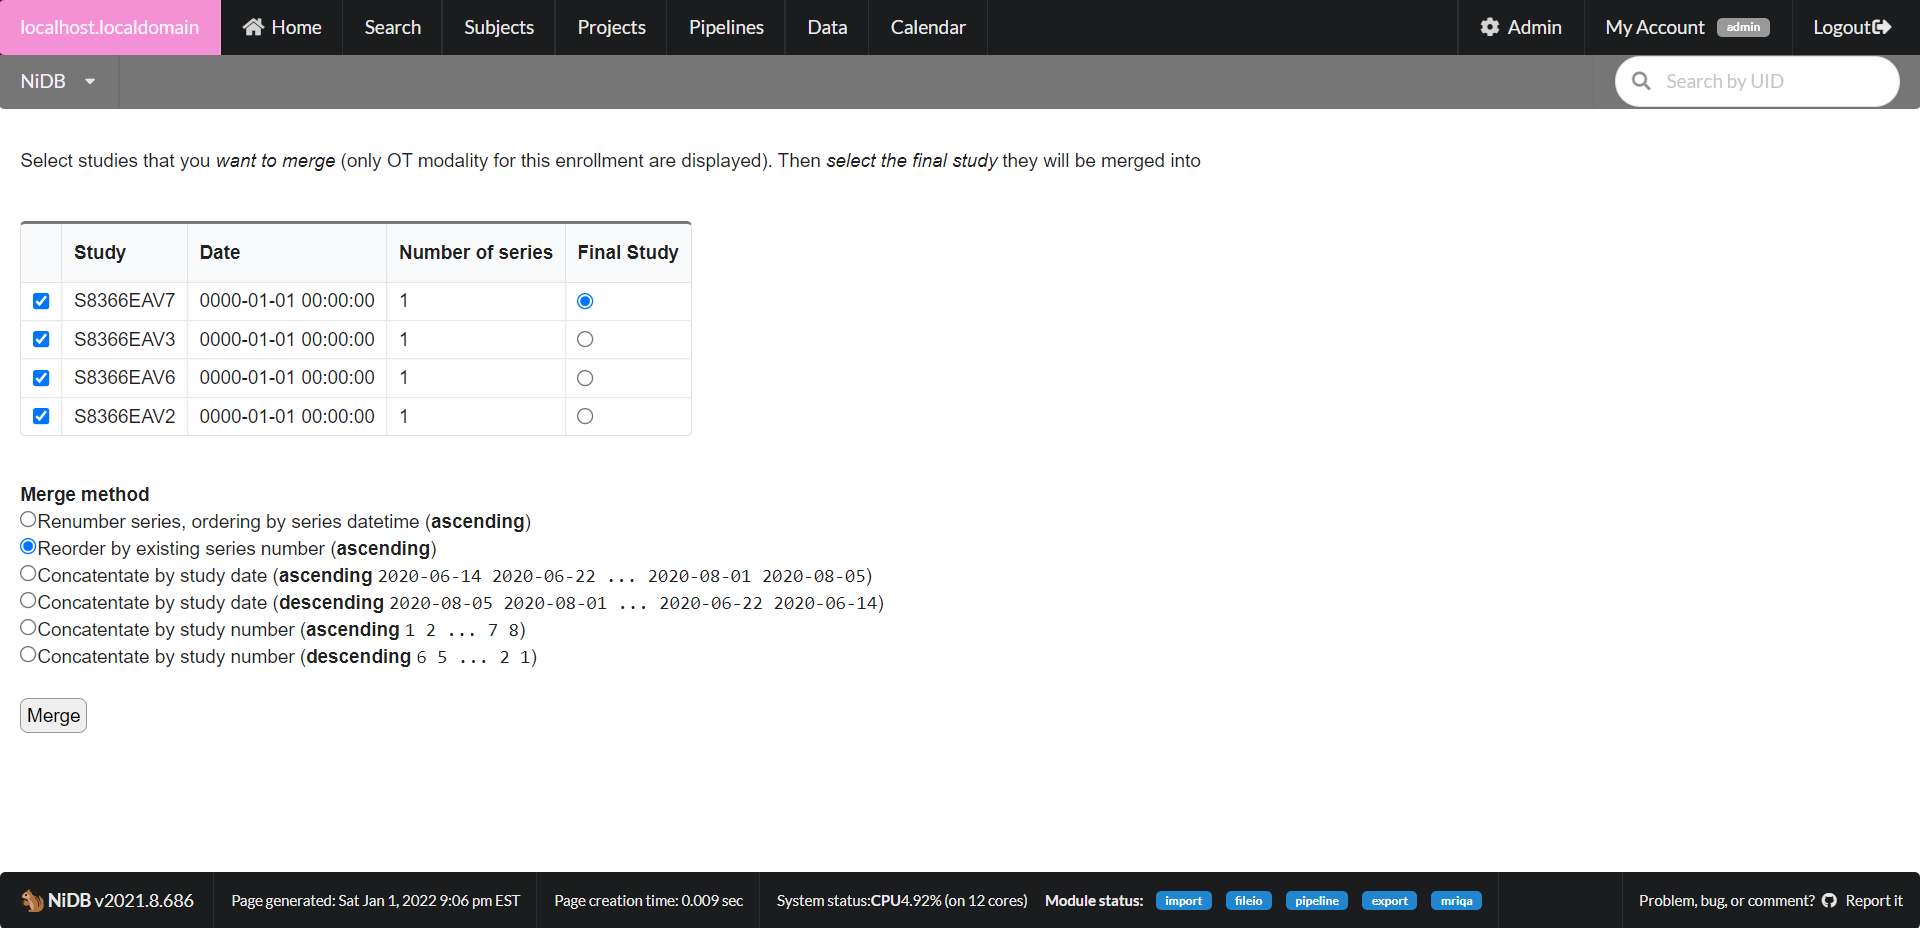 It will display a list of studies of the same modality that can be merged. Choose the study **number** you want as the final study, and the merge method. CLick Merge, and your merge will be queued. Check the status of the merge by going to **My Account** → **File IO**.
#### Moving Studies
Studies can be moved into different projects (different enrollment) or to different subjects. To move studies, click the Operations button on the bottom left of the study page which will display options for moving the study.
It will display a list of studies of the same modality that can be merged. Choose the study **number** you want as the final study, and the merge method. CLick Merge, and your merge will be queued. Check the status of the merge by going to **My Account** → **File IO**.
#### Moving Studies
Studies can be moved into different projects (different enrollment) or to different subjects. To move studies, click the Operations button on the bottom left of the study page which will display options for moving the study.
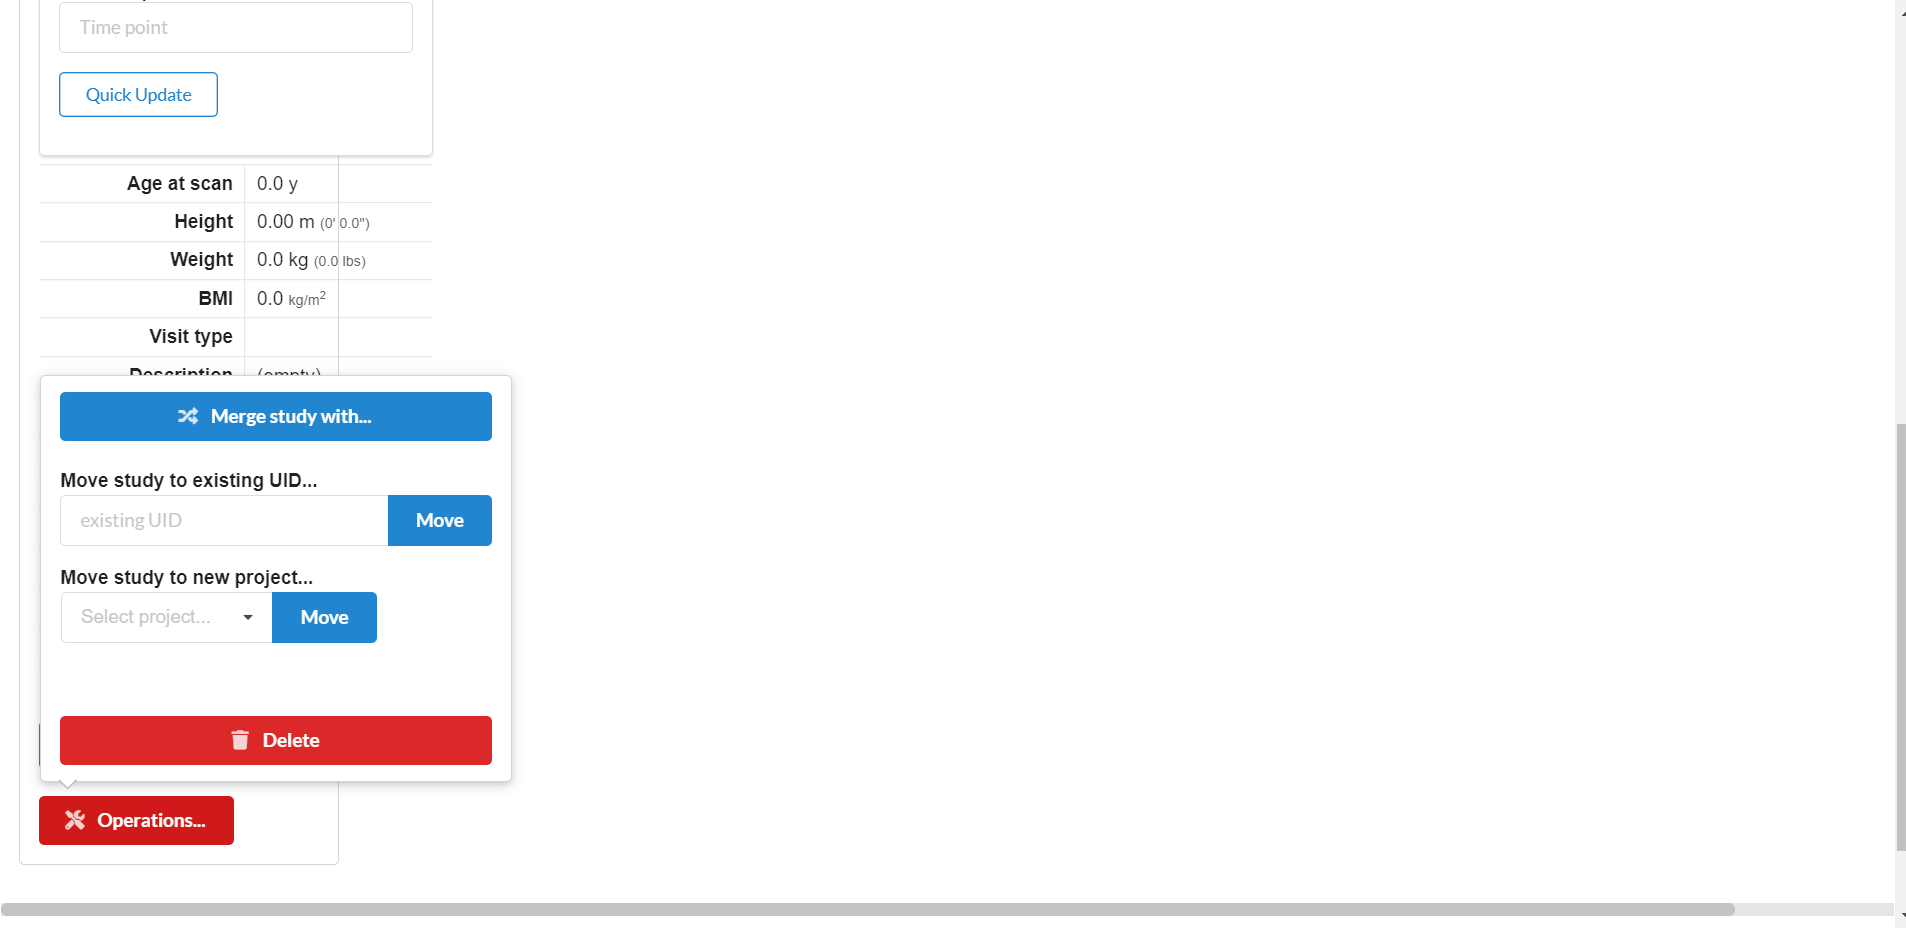 To move to an existing subject, enter the the UID and click **Move**. To move the study to an existing enrollment (a project the subject is already enrolled in) select the project and click **Move**.
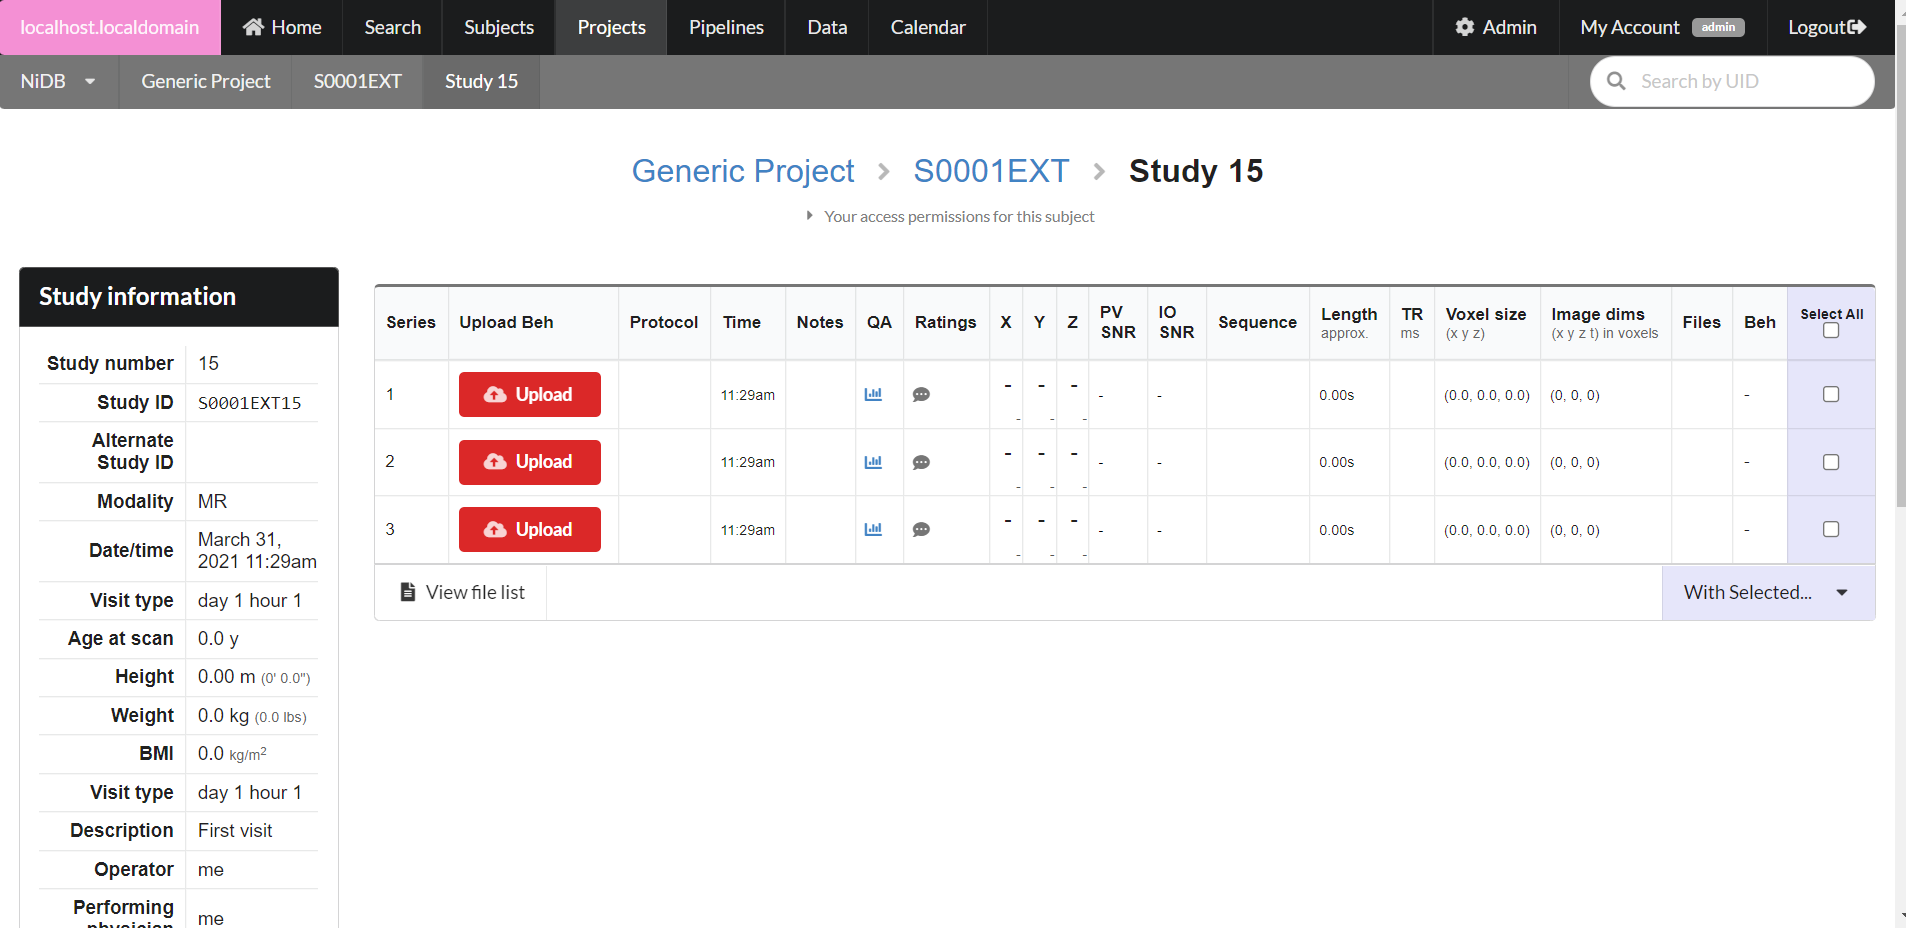
### Managing Series
#### Viewing series information
For DICOM derived series, most information will be displayed on the main study page. To view a thumbnail of the series, click the icon below the protocol name. To view DICOM header information, click the protocol name. To view detailed QA information, click the chart icon. To view or edit ratings, click the speech bubble icon. To download this series as a zip file, click the download icon under the **Files** column. To download the behavior data (if MR series) click the download icon under the **Beh** column. To view a list of files associated with the series, click **View file list** button.
To move to an existing subject, enter the the UID and click **Move**. To move the study to an existing enrollment (a project the subject is already enrolled in) select the project and click **Move**.
### Managing Series
#### Viewing series information
For DICOM derived series, most information will be displayed on the main study page. To view a thumbnail of the series, click the icon below the protocol name. To view DICOM header information, click the protocol name. To view detailed QA information, click the chart icon. To view or edit ratings, click the speech bubble icon. To download this series as a zip file, click the download icon under the **Files** column. To download the behavior data (if MR series) click the download icon under the **Beh** column. To view a list of files associated with the series, click **View file list** button.
 #### Editing series information
Series information can only be edited for non-DICOM derived series. To edit the series information (protocol, datetime, notes) click the series number, edit the information, and click **Update**. To upload new files to the series, drag and drop them onto the **Upload** button. To manage the existing files, click the **Manage *****n***** files** button. This will display a list of the files associated with this series. Clicking the file name will download the file. Editing the filename in the Rename column will allow you to rename the file (press enter to finalize the rename). Delete the file by clicking the trash icon. Download the entire series as a .zip file by clicking the **Download** button.
#### Editing series information
Series information can only be edited for non-DICOM derived series. To edit the series information (protocol, datetime, notes) click the series number, edit the information, and click **Update**. To upload new files to the series, drag and drop them onto the **Upload** button. To manage the existing files, click the **Manage *****n***** files** button. This will display a list of the files associated with this series. Clicking the file name will download the file. Editing the filename in the Rename column will allow you to rename the file (press enter to finalize the rename). Delete the file by clicking the trash icon. Download the entire series as a .zip file by clicking the **Download** button.
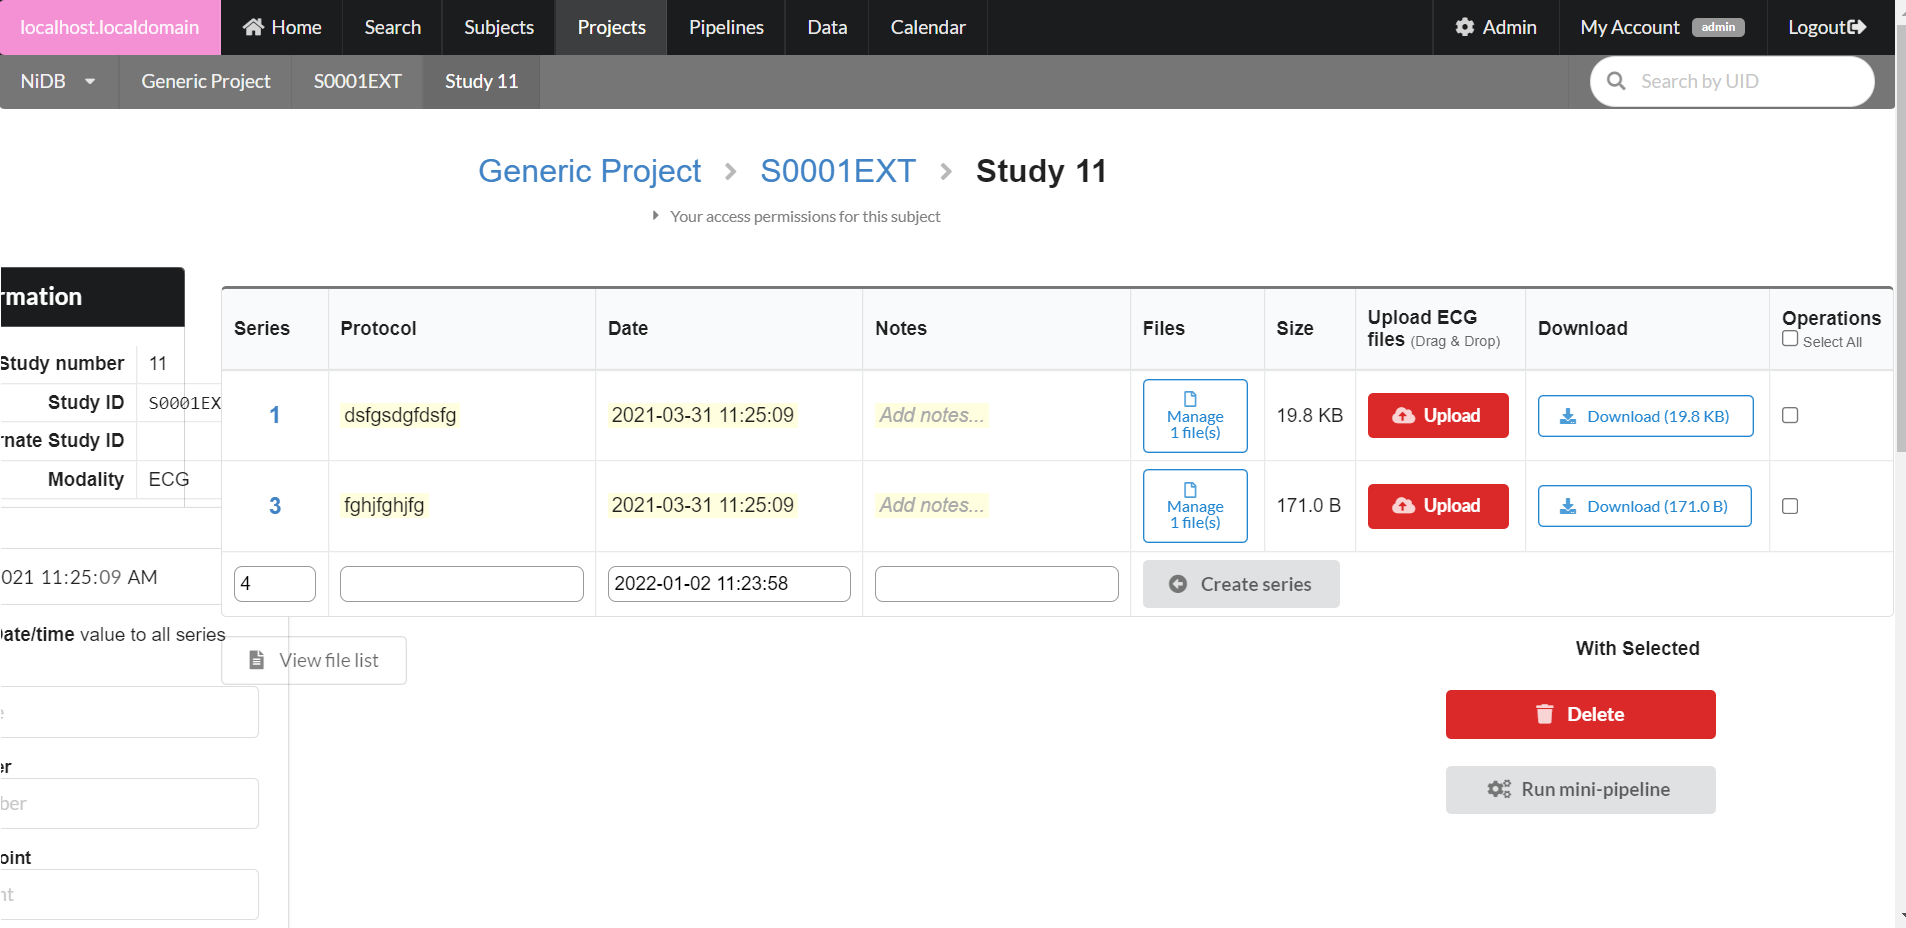 If the study is an MR modality, you can upload behavioral data by dragging and dropping files onto the **Upload** button. Behavioral files can be edited by clicking on the number under the Beh column.
#### Series Operations
For non-DICOM series, you can delete series by selecting the series using the checkbox in the rightmost column and clicking the **Delete** button.
For DICOM-derived series, more operations are available. Select the series you want to perform an operation on and click **With Selected...**. A menu will pop up with options
If the study is an MR modality, you can upload behavioral data by dragging and dropping files onto the **Upload** button. Behavioral files can be edited by clicking on the number under the Beh column.
#### Series Operations
For non-DICOM series, you can delete series by selecting the series using the checkbox in the rightmost column and clicking the **Delete** button.
For DICOM-derived series, more operations are available. Select the series you want to perform an operation on and click **With Selected...**. A menu will pop up with options
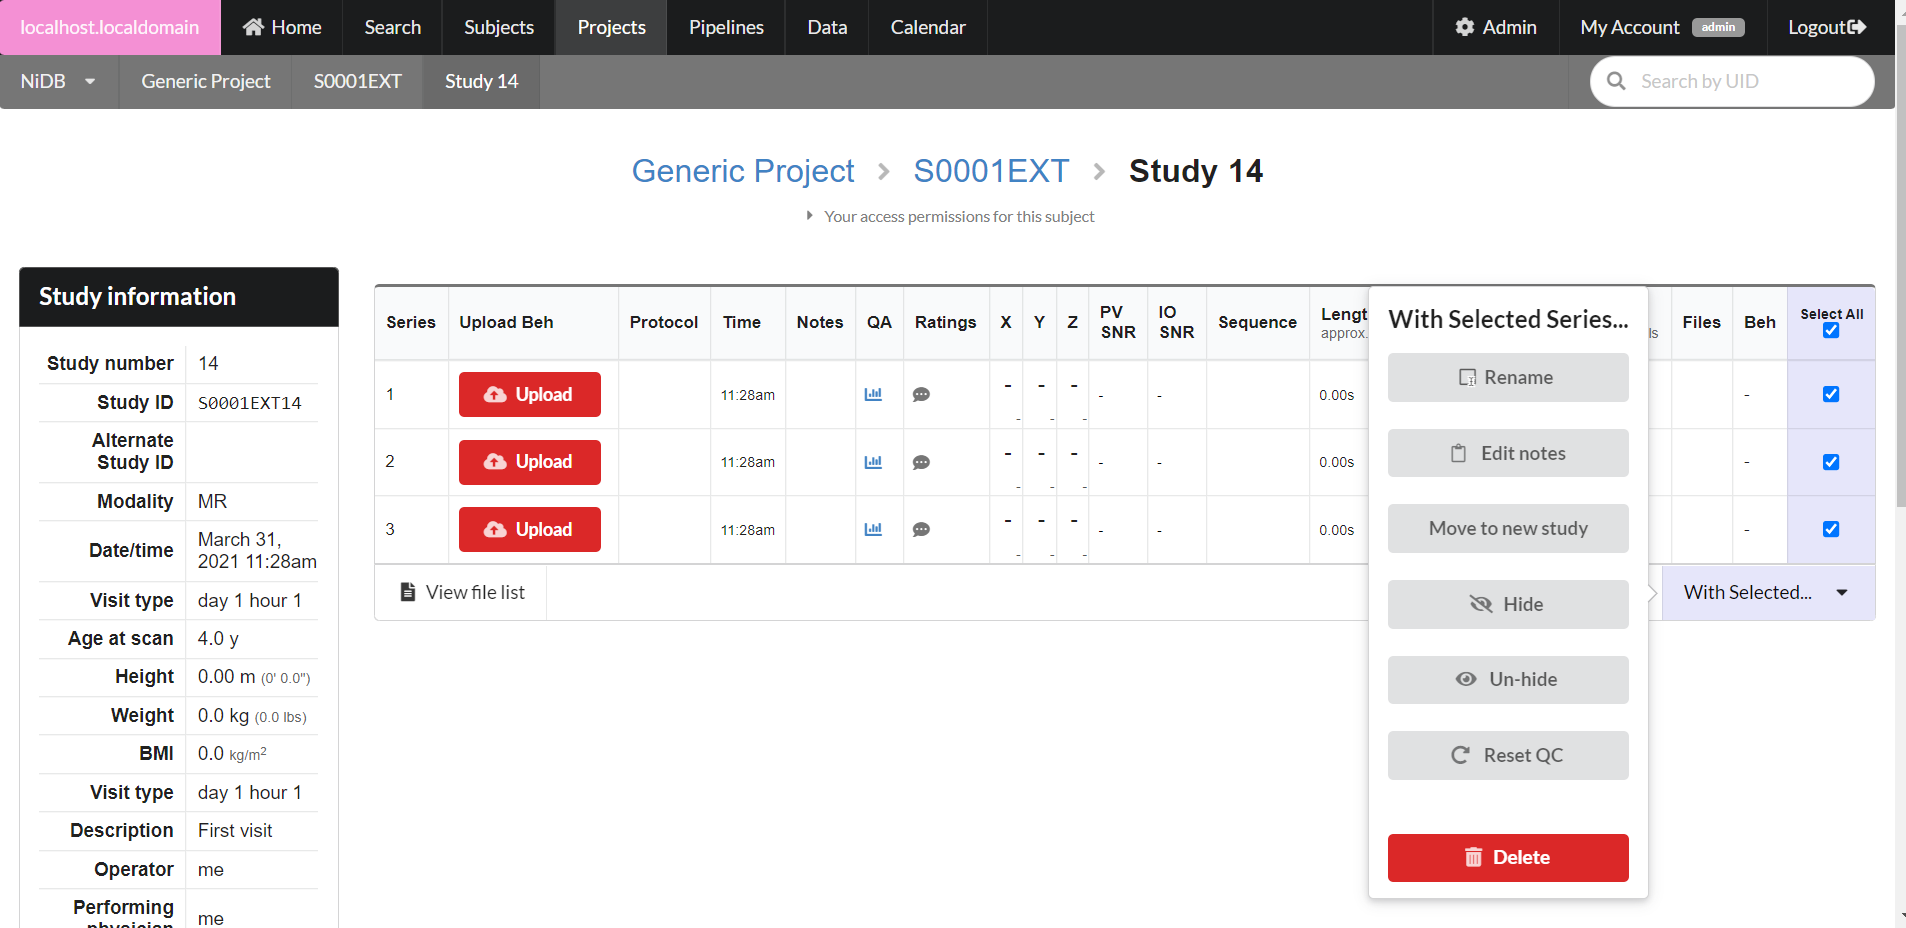 | Operation | Description |
| ----------------- | --------------------------------------------------------------------------------------------------------------------------------------------------------------------------------------------------------------------------------------------------------------------------------------------------- |
| Rename | Renames the protocol name of the series |
| Edit Notes | Edits the notes displayed on the study page for that series |
| Move to new study | This is useful if you need to move series out of this study into a new study. For example if multiple series were grouped as a single study, but some of those series should actually be separate, this is a good option to use to separate them. This is basically the opposite of merging studies |
| Hide | Hides the series from searches and summary displays. The series will still be visible in the study page |
| Un-hide | Does the opposite of hiding the series |
| Reset QC | This will delete all of the QC information and will requeue the series to have QC information calculated |
| Delete | Deletes the series. Completely remove the series from the database. The series files will not be deleted from disk, instead the series directory will be renamed on disk |
### Groups
Groups can be created of existing items, such as subjects, studies, or series. This is useful if you need to group subjects together that are in different projects, or if you want to group a subset of studies from one or more projects. Groups can only contain one type of data, ie they can only contain subjects, studies, or series. It is a similar concept to a SQL database View. Groups can be used in the Search page, and pipelines.
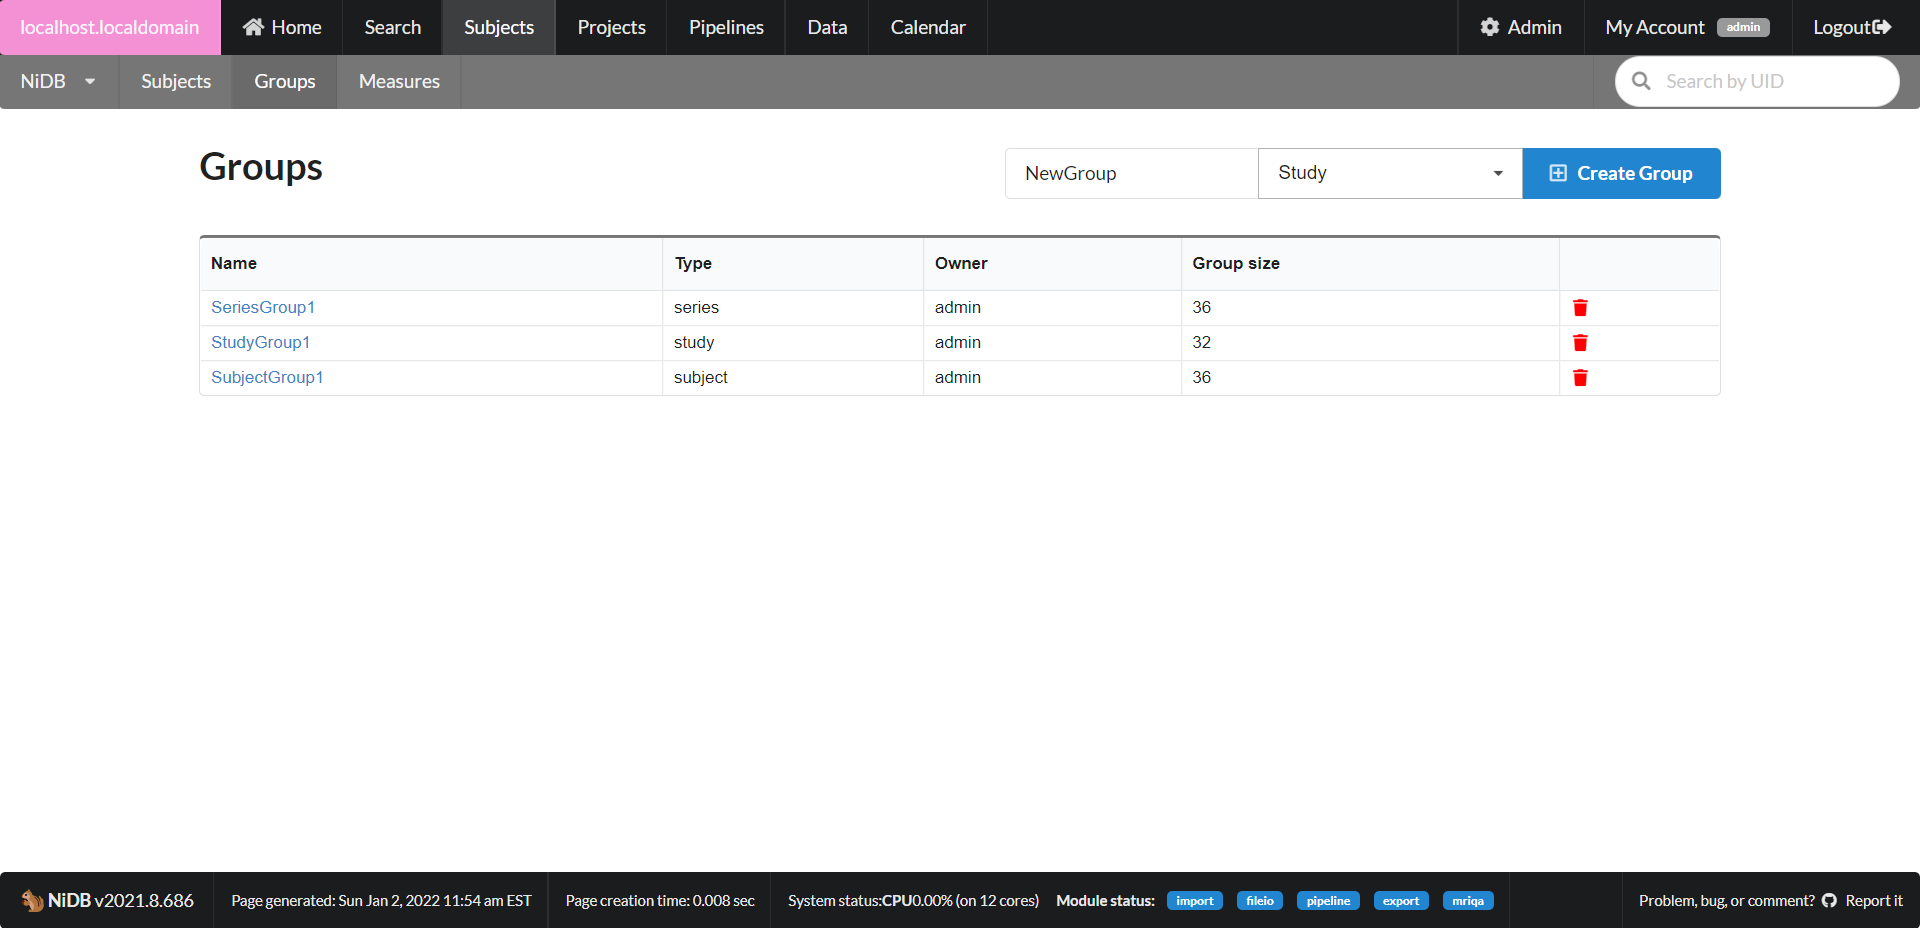
#### Create new group
Under the **Subjects** menu item, click the **Groups** menu item. A list of existing groups will be displayed, and a small form to create a new group. To create a new group, enter a group name, select the group type (subject, study, series) and click **Create Group**.
| Operation | Description |
| ----------------- | --------------------------------------------------------------------------------------------------------------------------------------------------------------------------------------------------------------------------------------------------------------------------------------------------- |
| Rename | Renames the protocol name of the series |
| Edit Notes | Edits the notes displayed on the study page for that series |
| Move to new study | This is useful if you need to move series out of this study into a new study. For example if multiple series were grouped as a single study, but some of those series should actually be separate, this is a good option to use to separate them. This is basically the opposite of merging studies |
| Hide | Hides the series from searches and summary displays. The series will still be visible in the study page |
| Un-hide | Does the opposite of hiding the series |
| Reset QC | This will delete all of the QC information and will requeue the series to have QC information calculated |
| Delete | Deletes the series. Completely remove the series from the database. The series files will not be deleted from disk, instead the series directory will be renamed on disk |
### Groups
Groups can be created of existing items, such as subjects, studies, or series. This is useful if you need to group subjects together that are in different projects, or if you want to group a subset of studies from one or more projects. Groups can only contain one type of data, ie they can only contain subjects, studies, or series. It is a similar concept to a SQL database View. Groups can be used in the Search page, and pipelines.
#### Create new group
Under the **Subjects** menu item, click the **Groups** menu item. A list of existing groups will be displayed, and a small form to create a new group. To create a new group, enter a group name, select the group type (subject, study, series) and click **Create Group**.
 Click on a group name to edit the group members, or add or delete group members.