> For the complete documentation index, see [llms.txt](https://docs.neuroinfodb.org/nidb/llms.txt). Markdown versions of documentation pages are available by appending `.md` to page URLs; this page is available as [Markdown](https://docs.neuroinfodb.org/nidb/using-nidb/users-guide/managing-projects.md).
# Managing projects
## Projects
NiDB is a multi-project database. Data from multiple projects can be managed in one database instance. Each project can have different attributes according to the needs of the project.
### Creating a Project
A user with admin rights can create, and manage a project in NiDB. A user with Admin rights will have an extra menu option "Admin". To create a new project in NiDB, click "Admin" from the main menu and then click "Projects" as shown in the figure below.
 The following page with the option "Create Project" will appear. This page also contains a list of all the current projects. To create a new project, click on the "Create Project" button on the left corner of the screen as shown in the figure below.
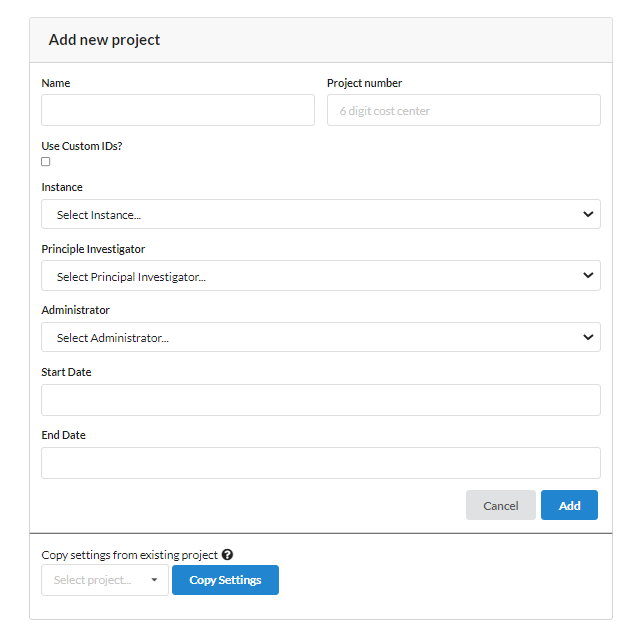
 On the next page, fill the following form related to the new project. Name the new project, fill the project number. Select the option "Use Custom IDs" if project need to use its own ID system. Select the Principal Investigator (PI) and project administrator (PA) from the existing NiDB users. The PI and PA can be the same subject. Mention the start and end date if they are known. Also there is an option if you want to copy an existing setting from one of your projects.
 After clicking "Add" button, a new project will be added to the project list and it will be shown in the list of existing projects as shown in the figure below.
### Project Setup
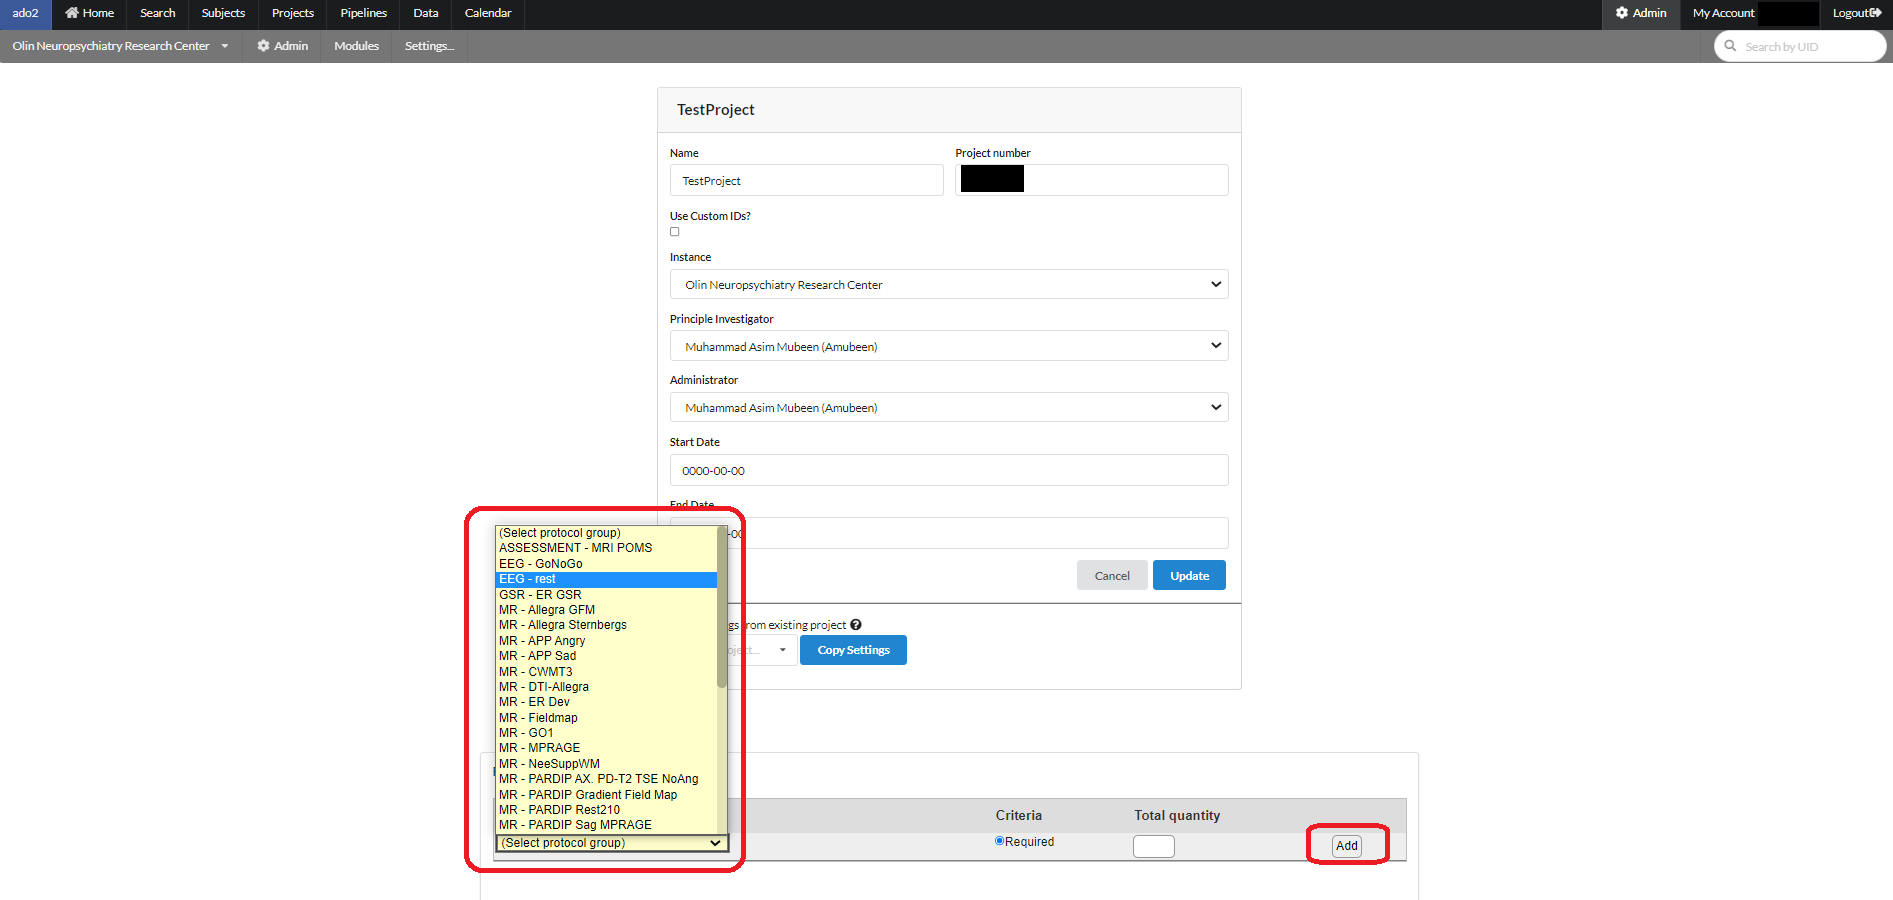
To setup the project for collecting data click the name of the project on the above page and the following page can be used to add the right set of protocols.
After clicking "Add" button, a new project will be added to the project list and it will be shown in the list of existing projects as shown in the figure below.
### Project Setup
To setup the project for collecting data click the name of the project on the above page and the following page can be used to add the right set of protocols.
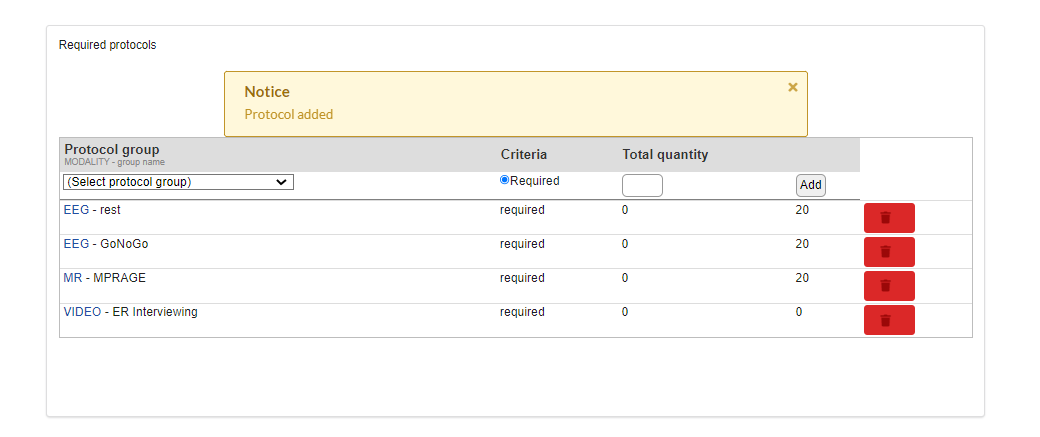
 After adding the required set of protocols, a list of protocols will be shown as follow. A protocol can be deleted by clicking the "delete" button in front of an added protocol as shown in the figure below.
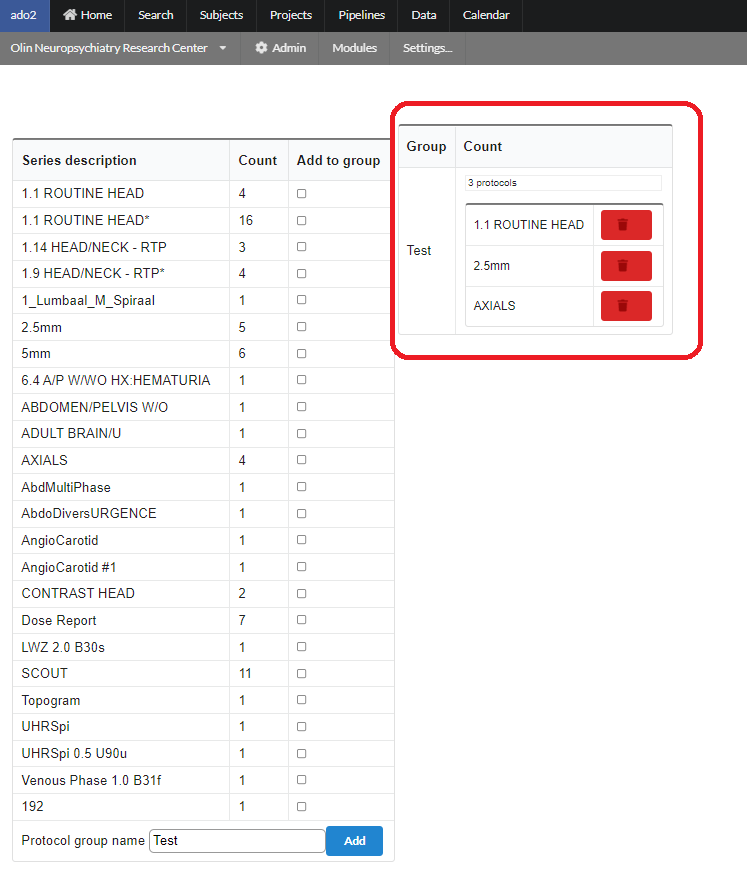
 To define a protocol, click on the name of a protocol in the above list. For example if we click on EEG-Rest, the following page will appear with the existing list of EEG-series being already used in various projects. You can pick any of those to add to your own protocol group. A group name can be assigned by using the "Protocol group name" box at the end of the page as shown. After clicking the "Add" button the selected series in the group will be added to the group and will be shown on the right.
 ### Working With a Project
After setting up project accordingly, the project can be accessed by users having its rights. A user can access a project via "Projects" menu from the main menu. A list of existing projects will be displayed. TO search a specific project, type the name of a project and the list will reduced to the projects containing the search phrase.
### Working With a Project
After setting up project accordingly, the project can be accessed by users having its rights. A user can access a project via "Projects" menu from the main menu. A list of existing projects will be displayed. TO search a specific project, type the name of a project and the list will reduced to the projects containing the search phrase.
 Click the name of the project from the list as shown above. A project specific page will appear as seen below.
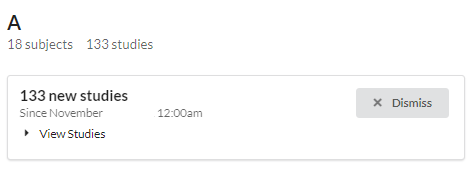
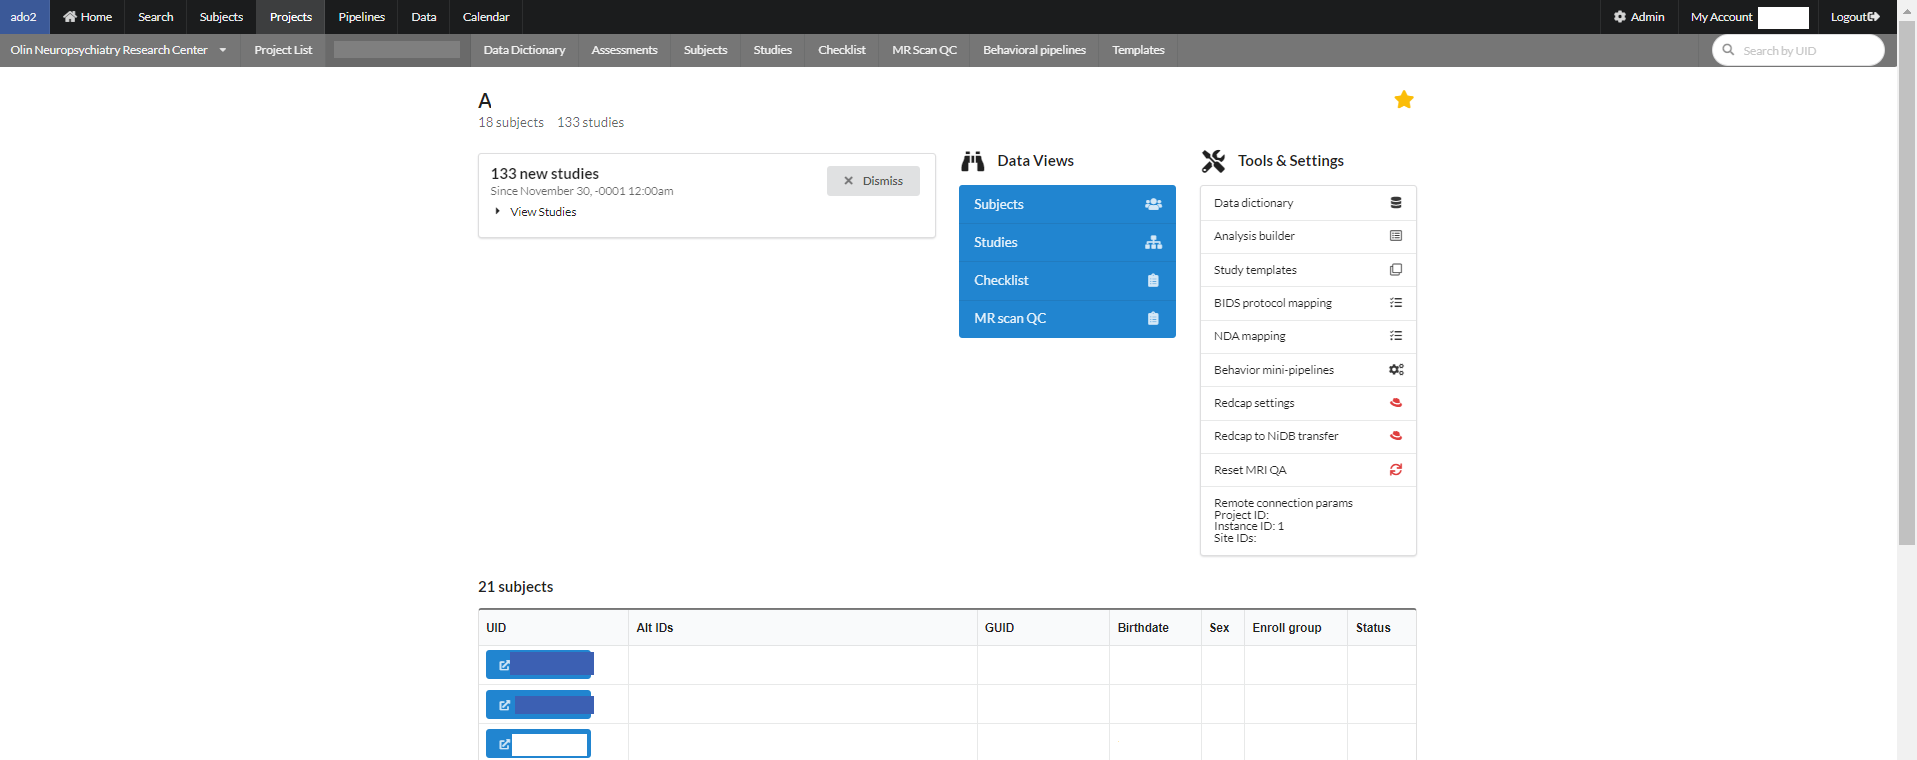 A project page consists of some information regarding the current project. Under the project name there is total number of subjects and studies. Undeneath that is a message box consists of number of studies. One can dismiss this message box by clicking "dismiss" button or view all the studies inside the message box.
 In the middle of a project page is "Data Views" for subjects, studies, checklist for subjects and an option to QC the MR scans.

To update information regarding the subjects in the current project, click on the "Subjects" button in the data view, a page will appear where the information can be updated for all the subjects and can be saved at once by clicking "Save" button at the end.
In the middle of a project page is "Data Views" for subjects, studies, checklist for subjects and an option to QC the MR scans.

To update information regarding the subjects in the current project, click on the "Subjects" button in the data view, a page will appear where the information can be updated for all the subjects and can be saved at once by clicking "Save" button at the end.
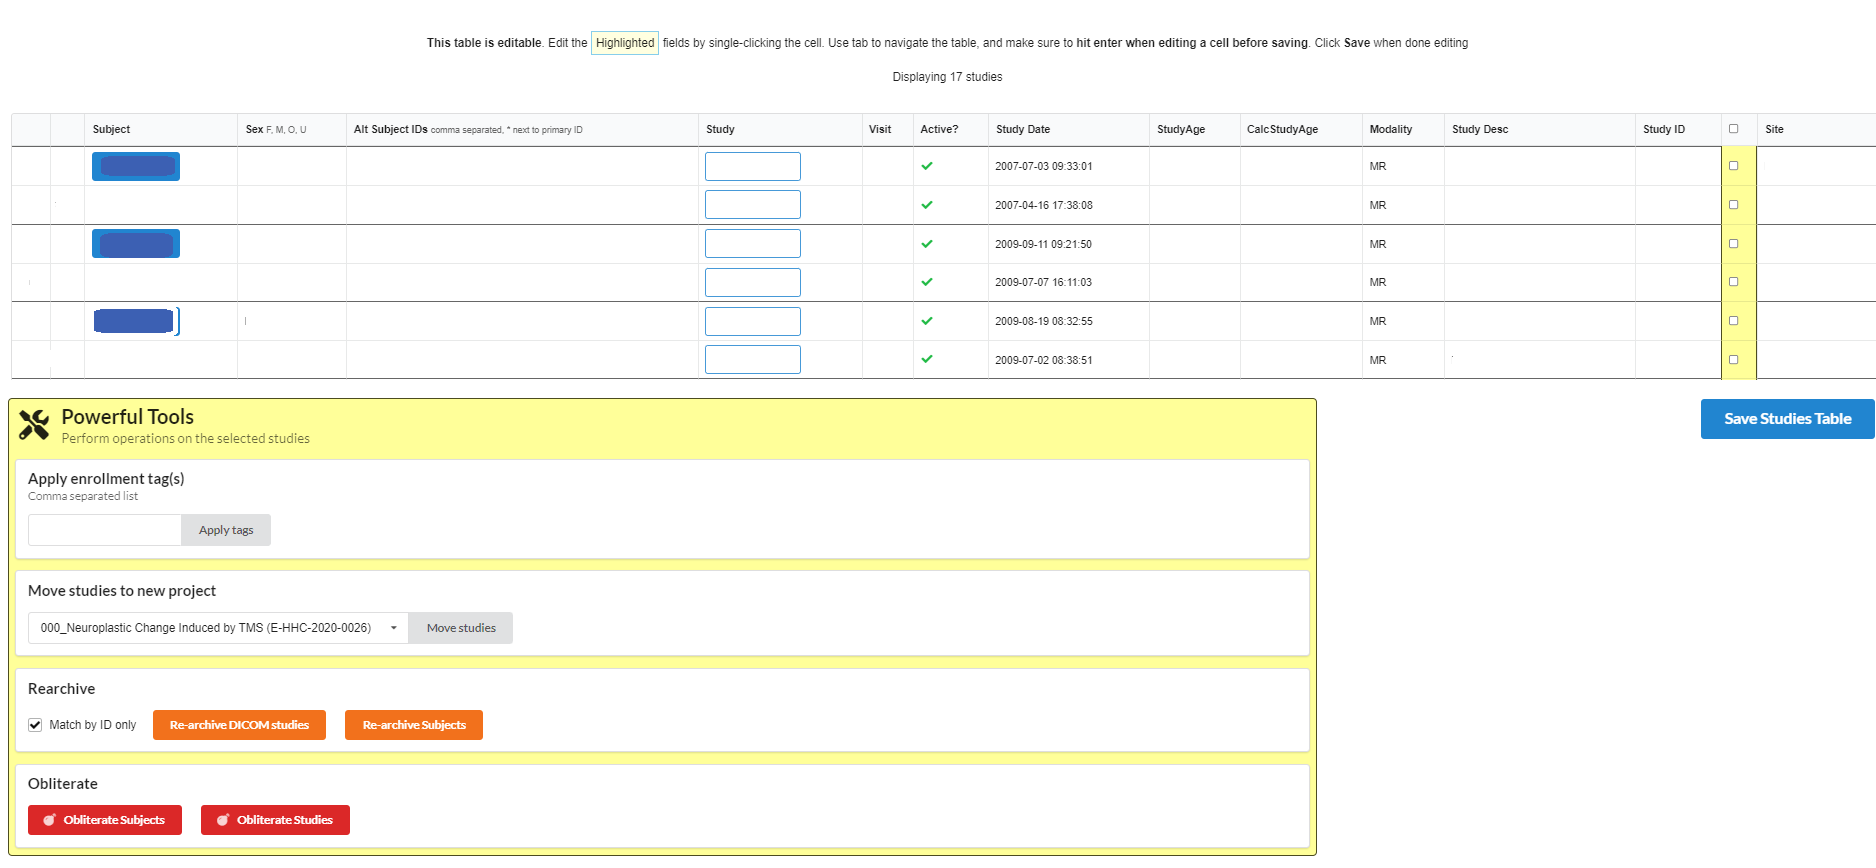
 By clicking the **Studies** button from **Data Views** section, following page will appear. The studies can be selected to perform various operations like adding enrollment tags, moving studies to another project.
{% hint style="info" %}
If you are an NiDB system admin, you may see the Powerful Tools box at the bottom of the page. This allows you to perform maintenance on the data in batches. Select the studies, and then click one of the options. **This is a powerful tool, so use with caution!**
{% endhint %}
By clicking the **Studies** button from **Data Views** section, following page will appear. The studies can be selected to perform various operations like adding enrollment tags, moving studies to another project.
{% hint style="info" %}
If you are an NiDB system admin, you may see the Powerful Tools box at the bottom of the page. This allows you to perform maintenance on the data in batches. Select the studies, and then click one of the options. **This is a powerful tool, so use with caution!**
{% endhint %}
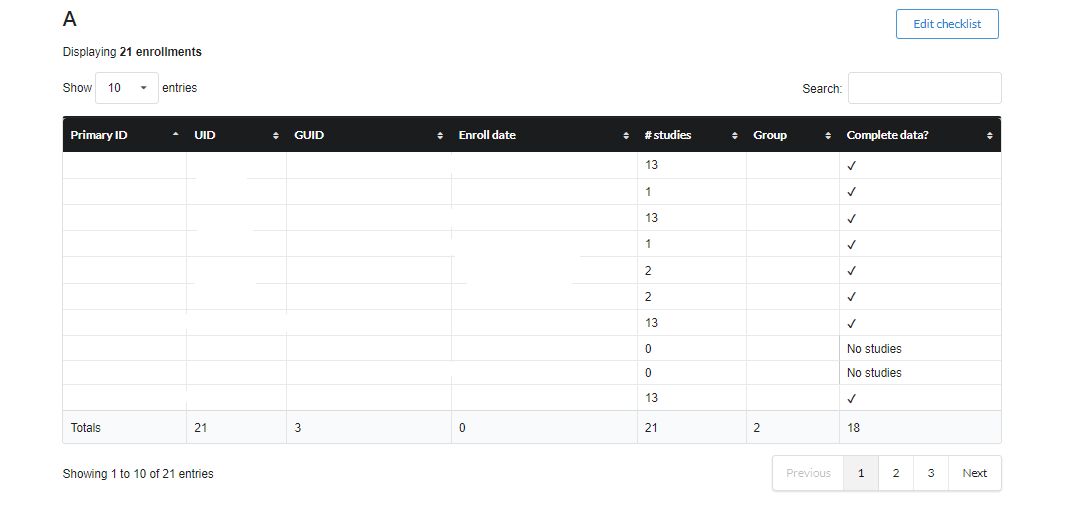
 Checklist provides a brief summary on the subjects, studies and their status as shown below.
 On the right side of the project page is a star that can be selected to make this project "favorite" that will show this project on the main page of NiDB to access it easily from there. Also there are links to the project related tools and their settings. This section is named as "Project tools & settings". This section includes:
* Data Dictionary
* Analysis Builder
* Study Templates
* BIDS Protocol Mapping
* NDA Mapping
* Behavioral Minipipelines
* Recap-> NiDB Transfer
* Reset MRI QA
It also possess the parameters required to connect this project remotely.

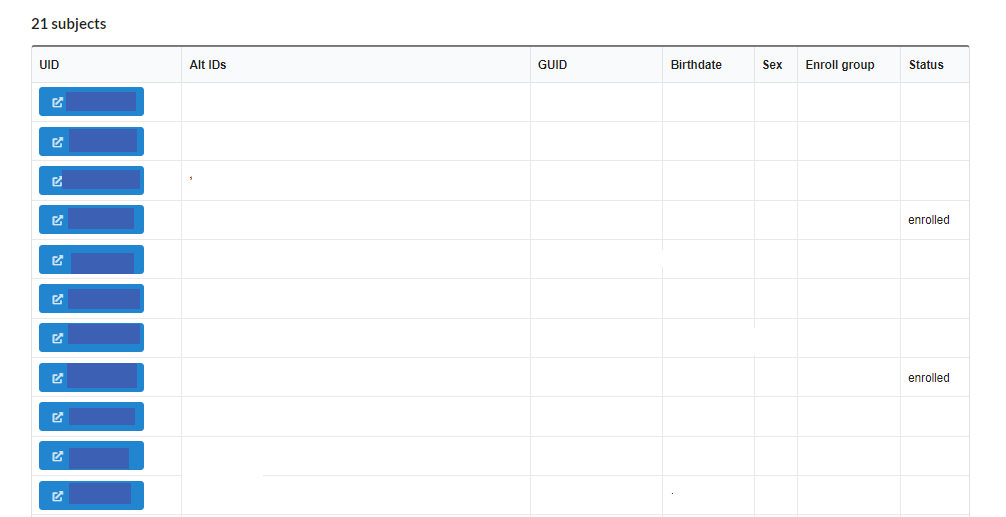
The last section of a project page consists of a list of subjects registtered, with its alternate Ids, GUID, DOB, Sex, and status as shown below:
On the right side of the project page is a star that can be selected to make this project "favorite" that will show this project on the main page of NiDB to access it easily from there. Also there are links to the project related tools and their settings. This section is named as "Project tools & settings". This section includes:
* Data Dictionary
* Analysis Builder
* Study Templates
* BIDS Protocol Mapping
* NDA Mapping
* Behavioral Minipipelines
* Recap-> NiDB Transfer
* Reset MRI QA
It also possess the parameters required to connect this project remotely.

The last section of a project page consists of a list of subjects registtered, with its alternate Ids, GUID, DOB, Sex, and status as shown below:
 The projects main-menu also has a sub-menu to navigate through various project related tools. The sub-menu includes links to Data Dictionary, Assessments, Subjects, Studies, Checklist, MR Scan QC, Behavioral pipeline and Templates. Also "Project List" can navigate back to the list of all the projects in the current database instance.
